
If you want to incorporate some older printed photos into your next digital project, you need to scan them. If you have a scanner at home, you are lucky, but you should be aware of the scanning resolution.
What is the default?
Different scanners will have different settings. Make sure to check with your own machine to see what it is. I have worked with a few scanners, and the default is set to 200 ppi. This might be fine for a written document, a receipt, or a map, but it is different for a photo. The default settings are likely not going to be enough.
Why is resolution important?
In a previous article, we explained that when working on a digital project, the resolution was NOT important. In fact, where the resolution was meaningful was when you had to change medium, like printing a project you worked on digitally. When you scan, that is what happens. You are going from a physical medium to a digital one and that is where it becomes important.
What is the difference?
The resolution for the scanning will determine how many pixels will be "created" for each square inch of the physical photo. So, if you scan a standard photo (let's say 4x6 inches) at a resolution of 200 ppi, your resulting digital image will be 800x1200 pixels. On the other hand, if you scan at 300 ppi, your resulting image will be 1200x1800 pixels. Finally, if you scan at a resolution of 600 ppi, your digital image will be 2400x3600 pixels.
Why does it matter?
When working on a digital project, the resolution itself might not matter but going from the paper medium to the digital format will mean that you have a different number of pixels to work with.. The larger the digital image is, the more options you have to display your photos or to manipulate them. The larger they are, the better it is because you can always size down, but you can't always size up.
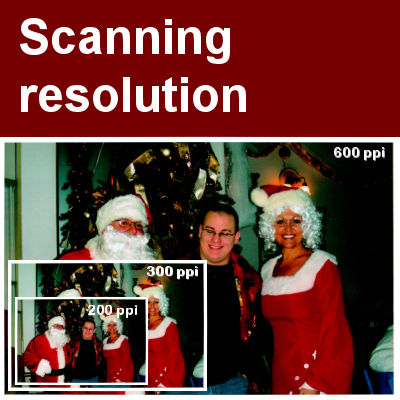
How does it look?
As an example, I took a standard 4x6 photo and scanned it with 3 different resolutions: 200 ppi, 300 ppi and 600 ppi. Placing all three photos on a standard 12x12 inches layout (3600x3600 pixels), this is what it looks like.
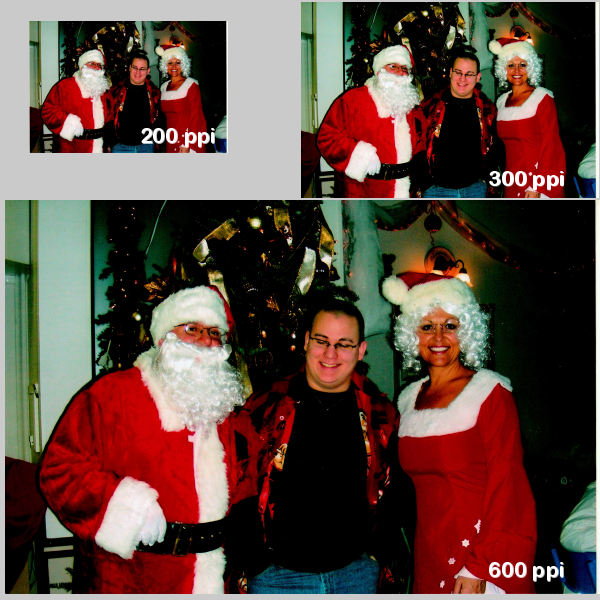
As you can see, the same photo, scanned at different resolutions, would yield a different size photo that can then be used in a project. If you only need a small picture, it is ok to scan with a low resolution but why would you? Scan them to be as large as you can and it will also allow you more options like for extracting elements or editing specific details in the photo. With more pixels to work with, you will likely get better results.


5 thoughts on “Scanning resolution”
thanks Cassel: i always work in 300 dpi , scand or new projects 300 dpi is better
another + when you import a png file in a 300 dpi file, the png file also become 300 dpi, the png file become scharper and the printing results are better.
greetings Bram
Thank you Cassel, always you have such good tips and tutorials that I can use everyday.
I will sure remember this next time… great info
Thank you for the great tip, Can I rescan the ones i’ve done at 300 dpi and fixed?
If you have the original printed version and are able to re-scan them, go ahead. If you are trying to scan a printed photo of a previously scanned and fixed, then, you won’t be able to get more details than the initial 300 dpi scan had.