

PaintShop Pro has a unique feature which is the ability it gives the user to customize the way the interface looks and works. Since every user's need will differ, and each user's workflow is also different, assuming they can be happy with a single static interface is asking them to adapt to the program instead of the other way around. But that is where PaintShop Pro gives control to the user.
Adjust the look and feel
Although PaintShop Pro comes with a default workspace, as a user, you can change many of those settings. For example, you can choose from three levels of grey (dark, medium, and light). For those using the Tabbed Windows mode, there are also five different colors to choose from (black, white, and three levels of grey). This is great for any user who prefers a lighter or darker interface to work with their photos and projects.
There are also three size options for the icons (small, medium, and large). This can be chosen by a user who might have a visual impairment, or if they are using a large monitor with high resolution, in which case, all the icons are displayed smaller.
With PSP 2018, also came the option to choose the size of the nodes and the scrollbar. Again, this allows a user with a different visual ability or a different monitor resolution, to work more comfortably with the program.
There is also an additional option that is well hidden in the Customize window, where a user can choose between color and black and white icons.
To learn more about Customizing your PSP 2018, check out this class.
Toolbars, menus, and palettes
Depending on the type of work a user does, some tools and functions will be more commonly used, or not used at all. PaintShop Pro allows the user to hide some toolbars or open others. The same goes for the palettes; the user might need them constantly, or only a few times, or never. Various settings are available for that.
Saving the workspace
Once you have customized the workspace to suit your workflow, your needs, and preferences, you don't want to have to redo that again. However, there are times when you could need to reinstall PSP, or reset it, or add a service pack. These events will typically wipe out your customized workspace and will replace it with the default interface you started with, in the very beginning. That might mean a long time wasted resetting all your favorite settings, toolbars, palettes, and menus. To avoid this wasted time, you can save your workspace.
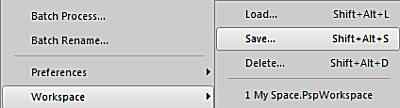
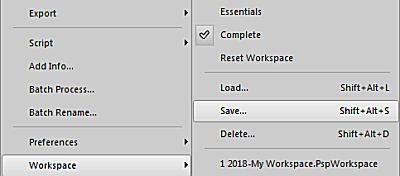
Go to File > Workspace > Save ...
Then, you will be presented with a dialogue window where you can see a list of any Workspace previously saved (if any) and the option to enter the name of this particular workspace.
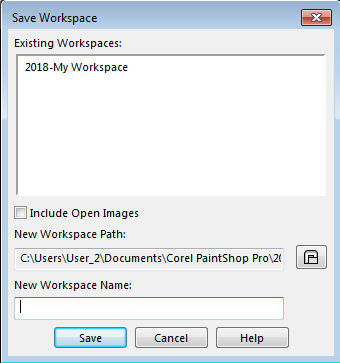
The name you choose is completely up to you. You can name it with a date, or a particular type of project you work on that requires that specific workspace (like "Photo editing", "Classes", "Design work"). One thing that I would highly suggest you do is to include the PSP version this workspace is saved for. This will prevent you from loading a workspace saved for a different version of PSP. Although PaintShop Pro won't give you an error message, it is likely to cause issues in some functionalities of your PSP later. At that time, it might be hard to pinpoint the reason those tools or commands are misbehaving.
Saving your workspaces outside of PSP
Typically, when PaintShop Pro is installed, it creates a series of folders to hold all the supplies you will be creating (brushes, preset shapes, scripts, and workspaces among others). Unfortunately, it is possible that those folders would be removed if you need to reinstall PSP. If that is the case, having a saved workspace would not be very useful, would it? That is why I would suggest you create a separate folder (on your C: drive if you want) that you can use to gather and save your workspace(s) and then, you just have to tell your PSP where to find it (through File > Preferences > File Location). You can read more about saving your supplies outside of PSP in this article.
Loading a saved workspace
If something happens and either your workspace gets wonky, or you lose it because of a reinstall or an update, you can simply go to File > Workspace > Load ... At this point, you might get a warning window like this one:
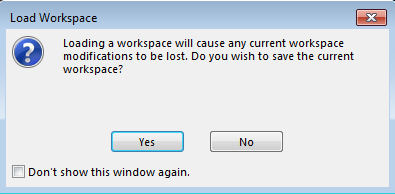
If you are trying to load a saved workspace, it is obviously because you don't want to keep the one you have so you can just click Yes. Then, the next window you will see is the Save Workspace window. It might seem like you are getting the wrong dialog window but in fact, it is just that PaintShop Pro wants to give you the opportunity to save your current workspace before removing it. If you don't need to save it, just click Cancel, and you will see the following window to actually load a workspace:
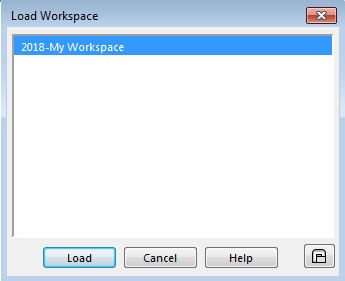
That is where you will highlight the workspace you want to load (you might have only one, or more than one, depending on what you have saved previously), and click Load. And voilà, you will have your favorite workspace back in PSP, ready for you to keep working.
It is important to save at least one workspace, in case something happens and you want to reset things without having to go through the trouble of doing all the adjustments manually again. Go. Do it now!
It is unfortunate that when you choose to upgrade to a newer version of PaintShop Pro, you still have to redo all that customization. You SHOULD NEVER load a workspace from a previous version. It will cause issues down the line, mostly when you least expect it. Trust me, it can be a nightmare to troubleshoot at that time since you might have loaded older workspace weeks or months before so you likely don't remember!


