
Whether you want to capture what is on your screen for future reference or to help in troubleshooting, taking screenshots is often a must. There are different ways to grab a screenshot. There are some tools you can download for that, but you can do that with your PaintShop Pro, since you already have that on hand.
Using the PrintScreen
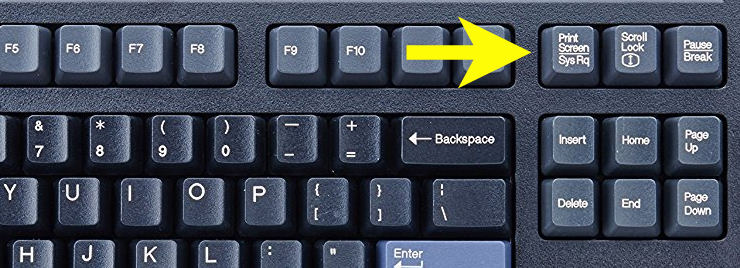
On your keyboard, you should have a key that means "Print Screen". It is often abbreviated to PrtScrn or something similar. Whenever you press that key, it will take a snapshot of what is currently visible on your screen, and keep it on the clipboard. Everything that is visible on your screen will be captured, including the active program, the taskbar, etc. However, it will NOT capture the cursor. This might be a good thing if you don't want it in the way of the image, but it might be an inconvenience if the cursor position is necessary for the task at hand.
Once the image is captured, you just have to go to your PaintShop Pro, and paste it as a new image (CTrl-Shift-V). This allows you to crop the image to either show only the necessary information, blur sensitive data, or emphasize a particular area with an arrow or circle. Then, you just have to save your image where you can retrieve it later, either as a comparison, or to attach to a support email.
Capturing a Screenshot in PaintShop Pro
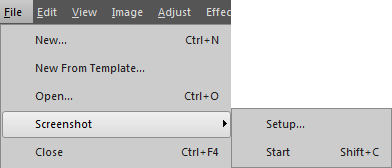
PaintShop Pro has had the ability to take screenshots since many many versions (my version 9 has it). In recent versions, this feature has been enhanced and the format has changed to be more user friendly. In older PSP, you will find that feature under File > Import > Screen Capture. Now, it is under File > Screenshot.
Setting up the Screenshot tool
To set up your Screenshot tool, you have various options to choose from, depending on the use you have for that particular tool at that particular time.
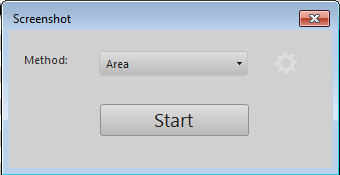
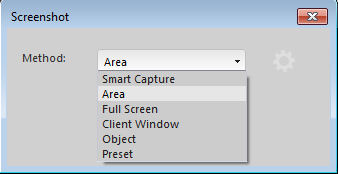
From this first window, you already have various options at your disposal through that pull-down list. I'll illustrate the various methods a bit further so you can determine which one might be the best for you.
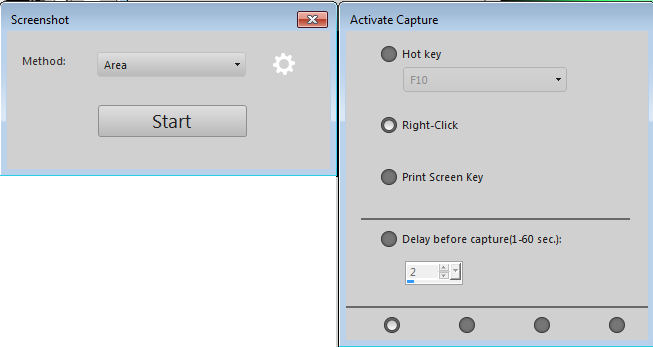
If you click on the little gear icon, you will be presented an additional window with even more options. The first one is how you want to activate the capture. Notice that you can also choose to use the Print Screen Key as part of the PSP screen capture function, just like we mentioned above.
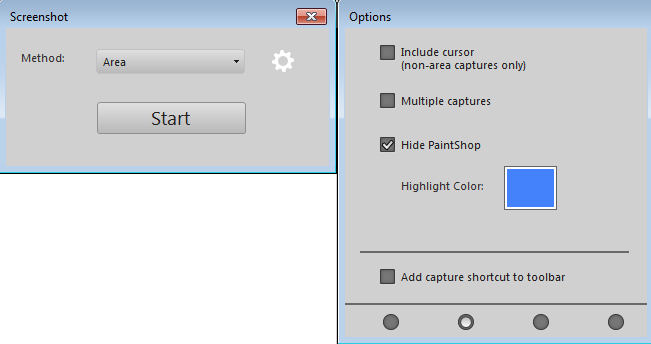
Notice the four dots at the bottom of that settings window. Each dot corresponds to a different set of settings you can choose from, giving you even more flexibility in using that tool. The second set of options is the Options. Notice that you CAN include the cursor in the capture if it makes sense to you.
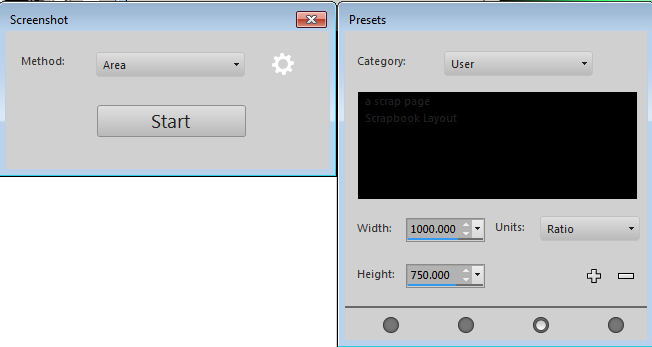
The third set of options refers to a preset area you might want to capture.
And finally, the fourth window will design the destination of the image once the capture is done. Using the Print Screen command would only put it on the clipboard but you can automatically open it in PSP if you expect to have some editing to do (cropping, highlighting, blurring, etc.) but you can also get this image to save automatically on your computer, saving you steps if you don't need any editing.

Different Methods of capturing images
In the initial setup of the Screenshot tool, you have various Methods to pick from. What do they all mean, and which one should you use? It all depends on what you want to capture and illustrate. Let's have a look at each one:
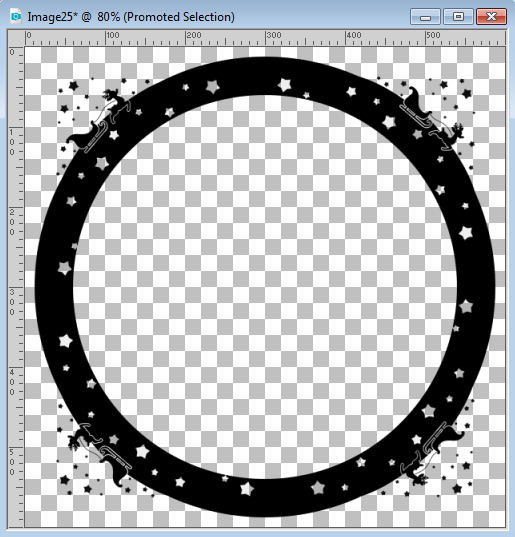
Smart Capture: it will auto-detect elements as you hover over the elements with the pointer. Here I had activated this image window and that is what was captured.
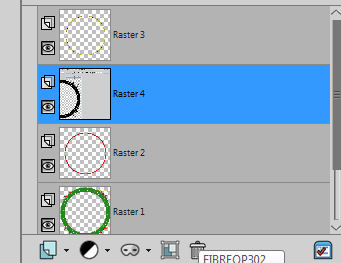
Area: Once you start/trigger the capture, your cursor will turn into a cross, allowing you to select a rectangular area of your choice, so you can really focus on a specific element on your screen. Here, I was selecting an area near the Layers Palette.
Full Screen: this one is pretty self-explanatory as it will capture EVERYHING that is visible.

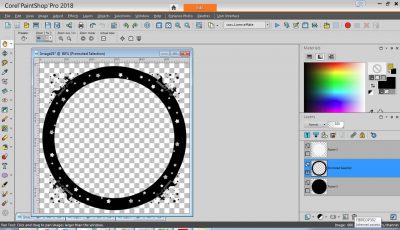
Client Window: This option will capture only the actuve program window. Here, it obviously captured my PSP, but notice the difference with the previous option: the taskbar is not captured.
Object: In this case, it will be a bit like the Smart Capture but you have better control of the object that will be captured. I find that this one is a little picky, depending on what particular element you can to capture. For example, once you trigger the capture, the first click will determine the area so you cannot open a window or pull down a menu after you triggered the capture. If you want it to be copied, you need to pull down the menu or open the dialogue window FIRST and then trigger the capture. Here, I captured a pulled down menu list.

Using the Screenshot tool often
If you tend to take screenshots often, you might want to set it up as a default (maybe using the full-screen method) that will be useful in most situations. You can always adjust it as needed on a task to task basis.
Another point to consider is that if you set it up to capture an object or an area or a window, the Paintshop Pro function will only work ONCE at the time. This means that if you want to take multiple screenshots, you will have to go back to the Screenshot command and click on START for each capture you want to take. In order to make this process a bit faster for you, you can either use the keyboard shortcut (Shift-C) or add that command icon to your menu bar through the Customize window.
With this method of capturing screenshots, it will be much easier for you to explain how to do something (in PaintShop Pro or other programs) or to show what is happening if your program is not working as you expect it. It becomes an invaluable tool to troubleshoot issues with the program, with a script, with a tool, etc. Give it a try and it will help you too!


4 thoughts on “How to create a screenshot with PaintShop Pro”
Great tutorial, easy to understand, and now easy to use. Thank you!
Gracias Cassel, un tutorial muy interesante. Tendré que practicar.
Aprovecho para felicitar las Fiestas!!
Besos
Stella
Great tutorial, Cassel. I knew it was there but I had no idea how to use it. Many thanks for showing us.
That was AWESOME! Thank you so much! I guess we all should investigate all the choices in PSP, but I stay with what I know. This has been a big help!
Hugs,
DeLoris