

When taking pictures, it is common to have it slightly angled. This will show up more if you have an obvious vertical or horizontal element and it might look odd. Sometimes, it could be the horizon, sometimes, it could be a door frame or a wall. But you can fix this with Paintshop Pro.
The Straighten tool
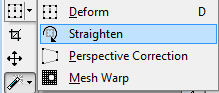
This tool has changed location at one point, so depending on the version of Paintshop Pro that you are using, you might find this tool in two different places.
In older versions, it will be hidden under the Raster Deform tool.
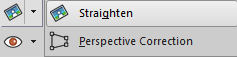
However, on more recent versions, it is separated from that tool and is just combined with the Perspective Correction tool.
Using the Straighten tool
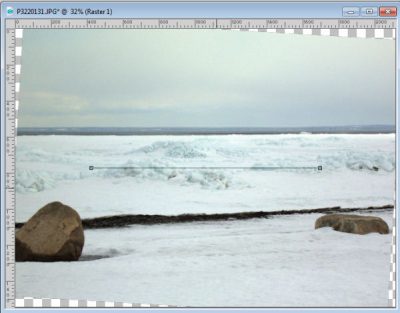
Once you activate the Straighten tool, you will see a horizontal line with a node on each end.
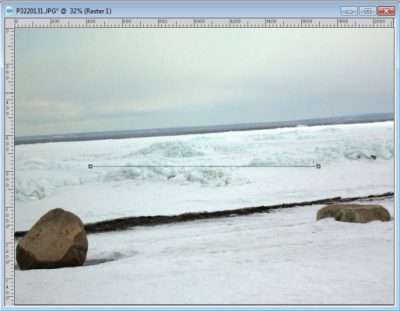
Move those nodes along an element that should be horizontal, in this case, the horizon.
When you are done, accept it by clicking on the checkmark in the Tool Options palette.

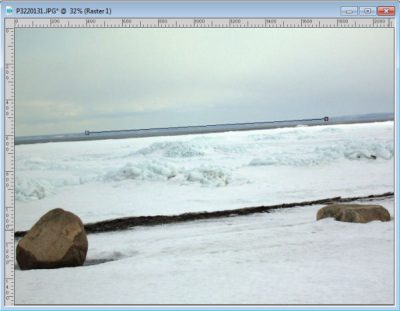
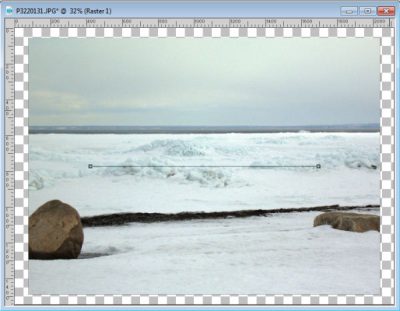
And the program will use that guide to rotate your image to have a perfectly straight look.
Notice how the image is rotated but you still have to crop it to avoid those newly created empty spaces. However, there is also an option in the Tool Options palette, which is to Crop the image. In that case, Paintshop Pro will crop the image to show as much as possible while still having straight edges.
Straightening vertically
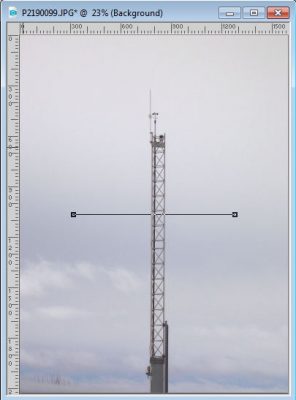
In the example above, the horizontal line was adjusted to match a horizontal element, however, you can use the same line (with two nodes) and place them along a vertical object (or one that SHOULD be vertical) and the program will know and align the photo correctly.
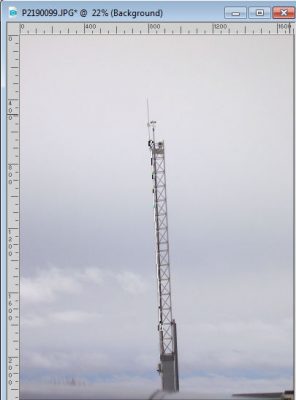
This image will become this:
With this tool, you have no reason to have a slanted photo in your projects. You can always straighten them, horizontally or vertically.


4 thoughts on “Using the Straighten tool in PSP”
LOL, I was with the others on this….trying to use the arrow to turn my image to make it straight to match the line segment instead of putting the line segment on top of my image. (I didn’t notice the tools options palette.)
Thanks for this!
I had to watch this again to figure it out. As the previous commenter said, it just “didn’t work well for me”. But I was using it wrong! The key words here are “Move those nodes along an element that should be horizontal” which I was NOT doing. I was moving the end nodes up and down to try to adjust for the off-set. Duh! Now I get it! Thanks.
Cassel, I have to admit that I rarely use this tool because it doesn’t work well for me. The problem is not the tool! I don’t know how I could design without you.
Can you clarify how it “does not work well”? Maybe there is a little detail that could help?