

If you are working on a particular project, you might want to keep track of what you are using, which supplies, which fonts, which settings, and so on. Whether it is for your own future reference, or because you need to give credits for some graphics, using a notebook might work for some projects, but there is a better way to do so.
Image Information
Did you know that Paintshop Pro has one feature where you can associate all kinds of information to the actual image you are working on? It is simply called "Image Information" and you can find it under Image > Image Information and there, you get a lot of details about your current image.
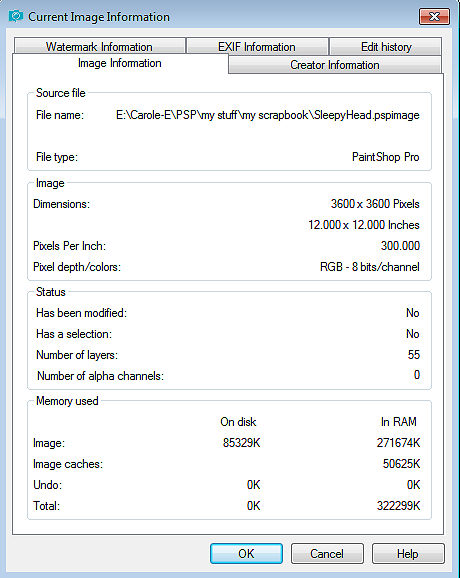
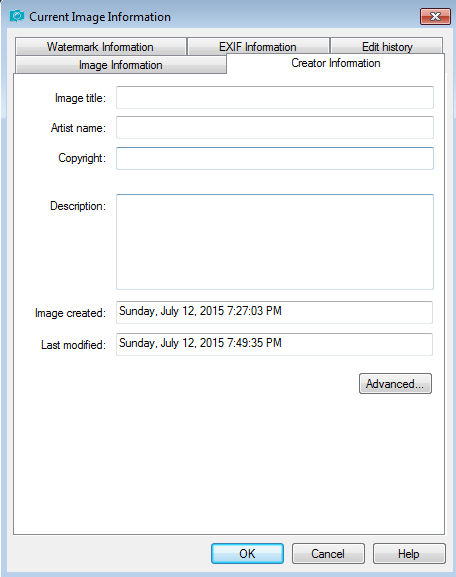
On other tabs, you will get information related to your image, if it is appropriate. For example, under the Creator Information, it will include the creation date, by default, although you would need to fill in the rest of the information yourself.
And depending on your project, some tabs will be pretty much empty, like the EXIF Information tab, which would only have information on a photo but not on a scrapbook page.
Use it as a notebook
As you might have noticed, in the Creator Information tab, there is a large empty area for Description. You can use that area for anything you want: a note about the story, a name or a date you want to remember when you complete your project, or a kit you used for that project. It is up to you how you want to use it. Although it has a set area in the displayed window, you can add more information than what is visible.
Use a Script to gather information
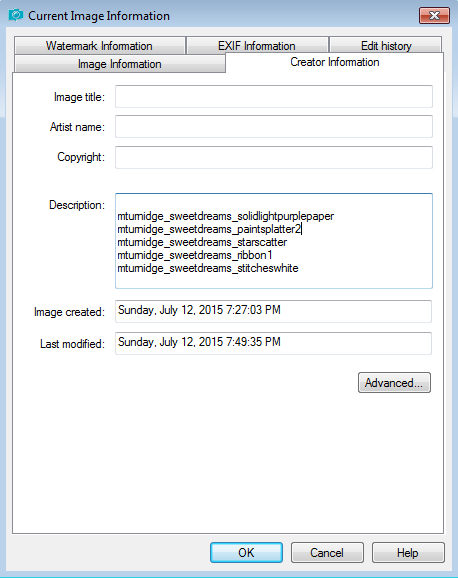
Adding information manually is easy but tedious, and it sure can lead to misses if you forget to add a particular element, or don't remember what font was used. There is a script called Credit List Compilation and you can just run that script on your layered project, when you are done. If you renamed each layer based on the kit or the element that you used, the script will extract those details, and will add them in that Description area for a future reference (and it will also extract the name of any font used on a still-vector layer).
Even if you close your image, the information will be saved. Even better, if you merge all the layers and save the image as a jpg, the information gathered in the Image Information will stay with it.
Renaming all those layers
I know, you will think that renaming all the layers every time one adds a new paper or element is quite cumbersome. I admit that doing it manually will also slow down your workflow and lead to forgetting that step a few times. But there is a solution for that too. One free script called Open as a Layer - Rename. This script will do exactly what it says: it will let you open any paper or image or element, and will copy/paste it onto your project, close the original and rename the layer based on the filename of the image you just selected. And you can even open several images at once in the same way.
And to help you be even more efficient, bind the script to an icon and move it to your toolbar, just beside the Open icon. So now, instead of clicking the Open icon, just click the Open as Layer one.
![]()
Tracking changes and edits
In Paintshop Pro X9, there is a new feature. It is not very obvious, so you might not even know about it. Whenever you will edit your image, apply effects or manipulate it in any way, once you save your image, those changes will be tracked and listed under the Edit History tab.
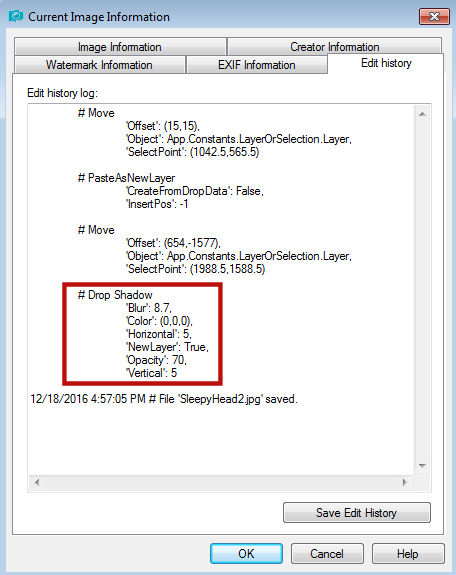
In the example below, I just made a few tweaks to my image: I copied one layer (I guess I moved it a little when selecting it instead of changing the layer itself), pasted it as a new layer, moved it on my canvas and added a drop shadow. Let's look at the Edit History entry:
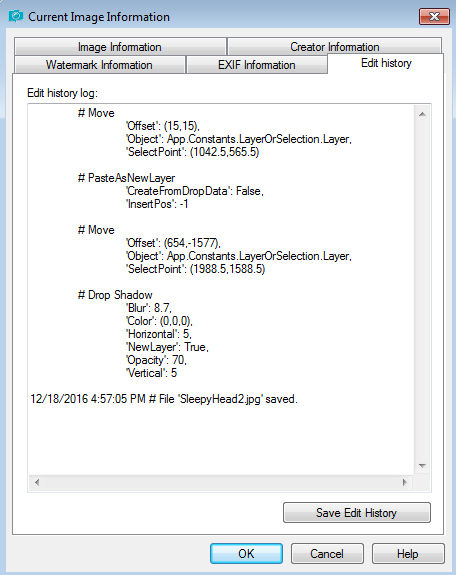
Of course, in this example, I only performed 4 commands, so my history is quite short. The steps following the # symbol just tell you, in plain English, what those commands were. Yes, it will be in English, no matter what language you are using because that is how it is coded using the Python language. What happens if you have hundreds of commands? Well, of course, you will have many more lines of data.
Where this information can become very useful is when the specific settings of a particular command is needed. Look at the settings used for the drop shadow. You can recognize those settings easily as they are the same ones you used in the Drop Shadow dialogue window: Blur, Color, Vertical, Horizontal, Opacity, NewLayer.
Now, you can refer to those if you are wondering "What settings did I use to get this effect? I want to get exactly the same result". Of course, for the Drop Shadow, it might not be too complicated to repeat but other commands might have many more settings or the settings might just have more subtle effects, which makes it harder to copy.
Now you have all the tools needed to keep track of your supplies and settings when creating your next project. Did you know about this? How were you keeping track before finding out about these tricks? Leave a comment below and share your experience.


5 thoughts on “Keeping track of image information”
Great information Cassel. I am almost tempted to buy X9 specifically for the Edit History. I do a lot of personalizing & I can’t tell you how many times I forgot the font & effects I used.
If you leave a vector layer for your font, and work on a duplicate, next time you will open the work, it will either use the same font (if you have it installed) or it will tell you what font you are missing, in which case you know what to open. And you can do that with any version. However, the Edit History is a new feature of X9. Maybe keep an eye out for a special?
Can this information be copied or printed out? When I need the information the most is when I am trying to provide credit/information on a graphic, or if I am trying to duplicate what I did on one graphic to another. My memory is very poor so it really helps if I can copy the information in some way.
Yes, if you highlight the text, it can be copied and then pasted somewhere else if you need to.
thank you Cassel… this area of PSP I have known nothing about, i will make good use of this for future projects.. i really appreciate all the helpful info
you place on the blog.