Several years ago, while I was still learning to use PaintShop Pro, I created a Yahoo group to share what I was learning. It was a great and friendly group of people. One year, for my birthday, they decided to send me money to purchase a graphic tablet. I chose the Wacom Bamboo Fun (model CTE-650).
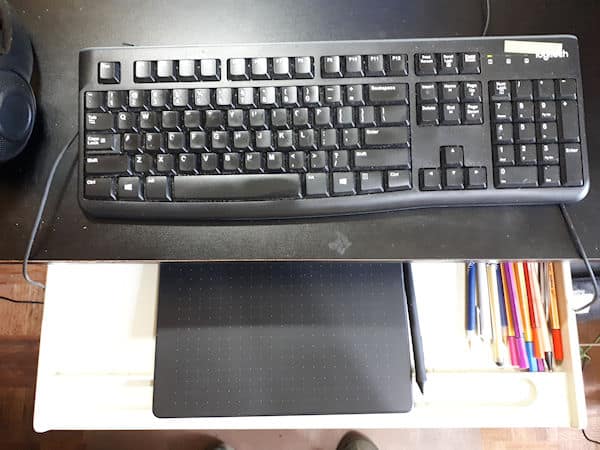
At first, it took a while to get acquainted with the tablet instead of a mouse. The position of the tablet was a challenge. I tried to use it on the right side of my keyboard, but that was on an under-desk and there was no room. I tried to use both on the desk, but I needed my other hand to access the buttons on the tablet. In the end, I placed the tablet on the under-desk keyboard drawer while I moved the keyboard on the desk itself. This allowed me to have both hands on the tablet, so I could use the stylus with one hand, and the buttons with the other. Perfect!
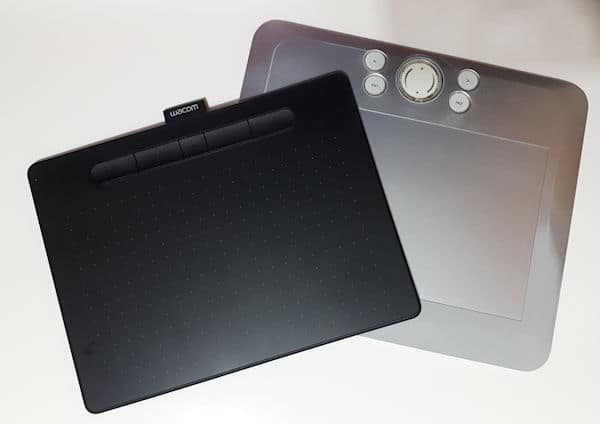
Even though my old Bambo Fun was not "officially" compatible with Windows 10, it worked fine until recently. Once every few months, I would have to reinstall the driver. However, this time, after many hours of reinstalling the driver, rebooting the computer, and repeating, I kept getting a "driver error" message. I reached out to the Wacom tech support and despite all their help (and they no longer support that model), it was clear that my Bamboo Fun had reached its end of life. I was directed to the Intuos Medium tablet (model CTL-6100WL) as a similar replacement. Lucky for me, it was available at 50% discount so I ordered it. It came in three days later. As you can see, they are quite comparable in size.
Installing the new tablet
The installation for the tablet is quite simple. Once I dowloaded the driver on the Wacom site, I just had to double-click on it and let the installation go through the process.
Customizing the tablet
Like most tablets, you can customize how the buttons work, how the pen interacts with the tablet, and how you want to use the express keys available on the tablet. Different models would also have different configurations with more or fewer buttons to customize.
The tablet I have has four keys and the pen has two buttons. Everything can be customized to suit your preferences and your workflow. Of course, you can also use the default settings if you prefer.
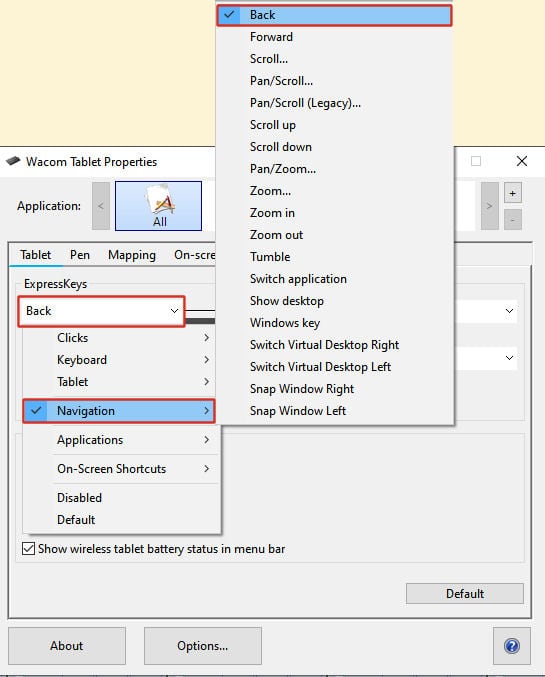
When customizing the keys, I got this window.

For the tablet keys, I only set up the two on the left. Why? Because I am right-handed and hold my pen with my right hand, so I only have the left hand available for those keys. I set one as the back button when navigating on the net, and the second key to zoom in/out (in combination with the pen movement). Those are the settings I chose:

You can see that there are many other options I could have chosen.
Customizing the pen
You are surely familiar with the left and right buttons on a mouse. Graphic tablet pens also have buttons and they can be customized to however you want. This is the dialog window available to set up those buttons:
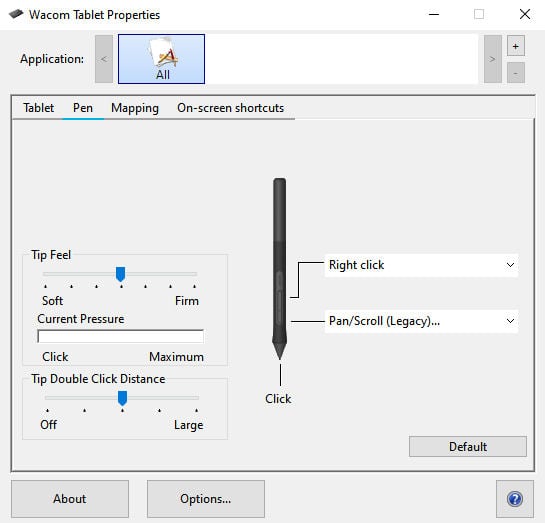
The tip works as the left mouse button, but the other buttons on the pen can be used for the same options the tablet keys had. I chose to assign the top button to the right-click, but I set up the bottom button to the Pan/Scroll function. That means that I can click on a page (text document or a web page), and drag it up/down. This is a similar behavior to the scrolling you do on a phone with your finger. This allows me to scroll without having to use the scroll bar on the right side of any page. I find it goes faster and it is more precise. Of course, that is my own preference.
Setting up additional options
When I click on the Options... button on the bottom, I get one additional setting that can be important in how the pen and tablet will behave together.
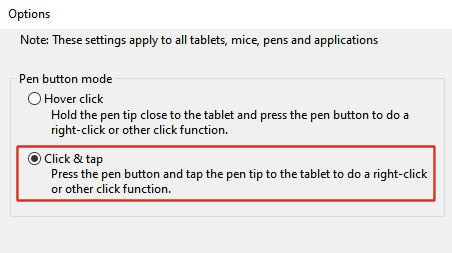
By default, the first option is selected. Personally, I feel I am more in control when the pen is touching the tablet when using the various click functions. Of course, other users might like it differently, and that is fine too.
Other features and functions
Those are the basic functions that I set up. This particular model has several more features that I just don't use (yet).
Although this model has bluetooth capabilities, I didn't set it up since my computer does not have it.
Mapping: this allows me to select a portion of the tablet to correspond to my monitor. In fact, I can even use it with my phone so the surface to match would be a different area. I could also set up two different areas for two different monitors, but since I have only one, I don't need to customize that.
One neat feature that this tablet offers is a way to save all my settings. This is great because if I ever change any setting (maybe to try a new function) and I don't like it, it is easy to come back to my current setup.
So I can replace the mouse?
Of course! A mouse will move the cursor as you move it around. Hovering the pen over the tablet does the same thing.
The mouse has a left click and a right click. On the tablet, the simple tap of the tip does the left click, and the top button does the right click.
A mouse has a wheel to zoom in/out and for the tablet, I set up one express key to zoom in/out.
If your mouse also has a possible click on the wheel, that is how I set the lower button to Pan/Scroll.