
Ann Seeber
-
Posts
3,108 -
Joined
-
Last visited
-
Days Won
69
Content Type
Profiles
Gallery
Forums
Posts posted by Ann Seeber
-
-
MoniqueN.- Carole showed us on her video to paint with white on the mask itself if you need to edit it. White = Window; Black = Block. Hope this helps.
-
 1
1
-
-
4 hours ago, Sue Thomas said:
Created a mask using a swirl brush and the vector paint script.
Sue, that's a very handsome mask. What exactly does the vector paint script do in this situation?
-
1
-
-
4 hours ago, Cassel said:
Out of curiosity, what is the compression setting you are using? The pixellation around the text seems a bit more than usual.
Carole: I've always kept it set on 72 but I do see the pixelation now that you mention it. I think some of my troubles started when the Gallery rejected my upload last week and I tried again by reducing the number of colors used.
-
44 minutes ago, sharon thompson said:
As for that font, it is from Creative Fabrica so you probably got it sometime as one of their daily freebies
Hi Sharon, I found the site for the font. It's 1001 Fonts.
-
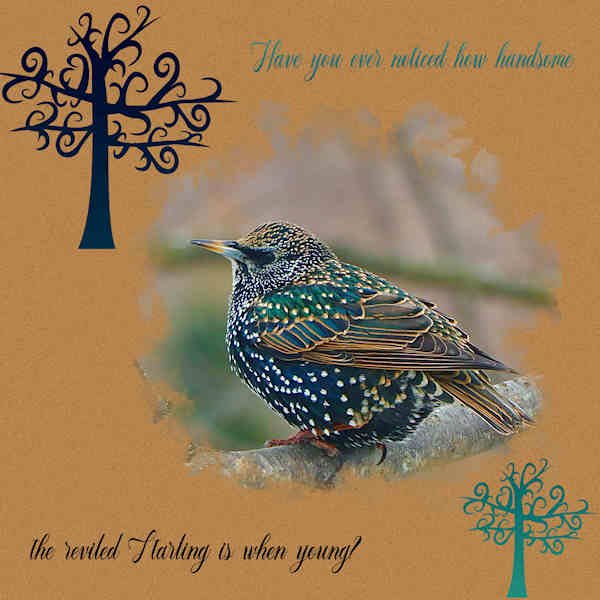
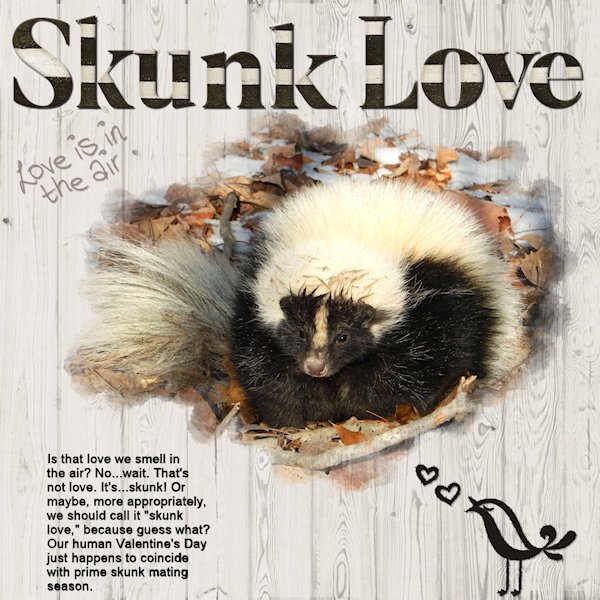
I think I need a Q & A on how to adjust the brush variants. They seem to jump with a mind of their own! I don't understand the settings very well. This cutie is one of my favorite bird photos. He looks a lot different when mature, a drab black with orange beak and spinning huge, pulsing murmurtions in the sky rather ominously. The trees are brushes from Sheila Reed that I used with the eraser to punch down to a lower gradient layer that I made from the bird's colors.. The font is "The Hardcover-Personal Use" (yes, really, and I don't know where I got it ?)

-
 6
6
-
-
51 minutes ago, Sue Thomas said:
I hadn't considered the reason that Carole gave, but it does make sense to me. Sizing down from 3,600 to 600 pixels is such a huge reduction in size. I adopt another way to resize.
I'm surprised I haven't encountered "banding" until now. Those specs have been used with almost every full-sized layout of mine for the last 2-3 years. And I use gradients quite frequently. ?
-
7 hours ago, Lesley Maple said:
(Another client pooch)
Lesley, what sort of occupation do you have that entails dogs as clients? Sounds like a dream job! ?
-
2
-
-
10 hours ago, Anja Pelzer said:
@Ann Seeber I work on 3600x3600 pspimage in my projects and I often save,
when ready I save export as Jpg. close and open this again, then resize to 600x600 and sharpen the image, export as jpg again
some detail goes away without sharpen after resizing.
hop this helps
Yes, that is my usual method, too. Thanks
-
1
-
-
10 minutes ago, Sue Thomas said:
Out of curiosity, change the gradient you used with a similar one, and see what happens.
Here's the new result. The gradient is called Rising. Still shows that texture in a jpg! I give up. Maybe Carole will have an idea.
-
2
-
-
4 minutes ago, Sue Thomas said:
You can always resave the Png as a jpeg, if need be.
That doesn't work, either! Aarrgghh!

-
8 minutes ago, Ann Seeber said:
Now I'm curious if I make a copy of the pspimage and flatten it first before making a jpg maybe that would work. Back to the monitor! ?
Tried the experiment with flattening the pspimage file but the jpg conversion created the texture again. Oh well, it's probably that particular gradient.
-
1
-
-
14 minutes ago, Sue Thomas said:
Ann, that is strange, does the same thing happen when you save it as a PNG file? Before saving as a jpeg, do you merge all (flatten) before you resize and then save. Perhaps Carole will have an explanation.
I was trying saving as a .png while you were answering. It is perfect as a .png! (I also fixed the kerning) Now I'm curious if I make a copy of the pspimage and flatten it first before making a jpg maybe that would work. Back to the monitor! ?
-
1
-
1
-
-
25 minutes ago, Sue Thomas said:
Ann, I afraid I don't have an answer for the gradient. I haven't experienced that before.
I took a screenshot of the .pspimage version and there is no texture visible. It didn't show up until I made a .jpg. Here's the original...
-
1
-
-
15 minutes ago, Sue Thomas said:
With regard to your text, I notice that your joined up writing isn't joined up. Was the kerning set to 0, if it was try a minus number to join the letters.
Thank you, Sue. I didn't notice it was separated like that until you pointed it out. I'll check next time. Thanks, again.
-
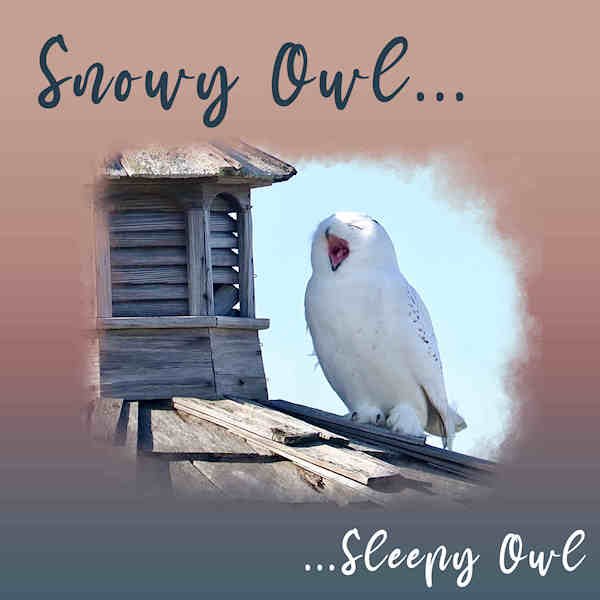
DAY 4 - SNOWY OWL - I used a gradient called Sunset for the background. The font is Mama. I was seeing a strange horizontal blinds texture on the background that I didn't apply. We'll see if it shows up here. -- Yep, I still see it. ??
-
2
-
6
-
-
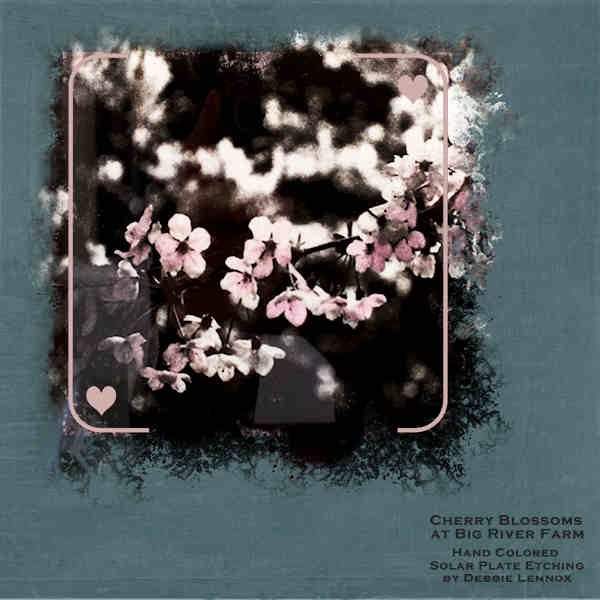
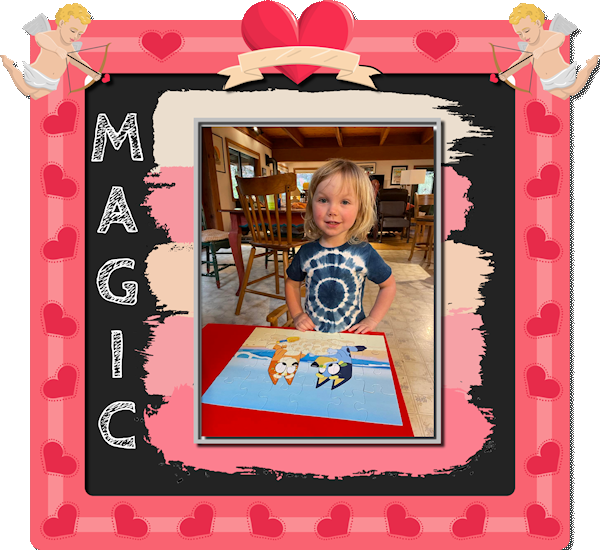
DAY 3 - CHERRY BLOSSOM ART by my daughter, Debbie Lennox. She said it's a "hand colored solar plate etching of the cherry blossoms" at her Big River Farm. Kaleidoscope pattern with an Exclusion layer effect background over paper from "lou lou love stopover" kit. I put an extra mat behind the mask group in order to color the framing and hearts. The font is Copperplate Gothic Bold. (This font strongly resembles Debbie's handwriting because she had to learn proper labeling when she trained as an architect -- she still prefers doing it by hand.)
-
3
-
6
-
-
3 hours ago, Cassel said:
As requested, some written instructions are now available as a bonus to our DIAMOND members. I uploaded them for days 1, 2, and 4 (tomorrow). I'll try to finish the others in the next day or two.
Where are you posting these written instructions? Thanks for this.
-
1
-
-
I just had to resurrect one of my favorite mask layouts from years past.
-
1
-
 2
2
-
7
-
-
Re-posting this for the challenge. It's one of the extra masks in the workshop. I totally did it over as square to match the frame. I went back and found the colors were restricted to 256 so I upped it.
-
3
-
2
-
-
5 hours ago, Cassel said:
@Ann SeeberBe careful not to distort the elements! Your Cupidons seem a little stretched. Maybe you used a square frame and applied it to a rectangular image?
@Cassel : Not sure what a Cupidon is...is that French for Cupid? If you mean the Valentine PSP Frame, the program sizes it for your canvas but it does start out square. It seems I forgot those shadows you mentioned, also.
-
Euka: Here is a link to the ongoing pages for the Mask Workshop 2023 -
-
 1
1
-
-
4 hours ago, Susan Ewart said:
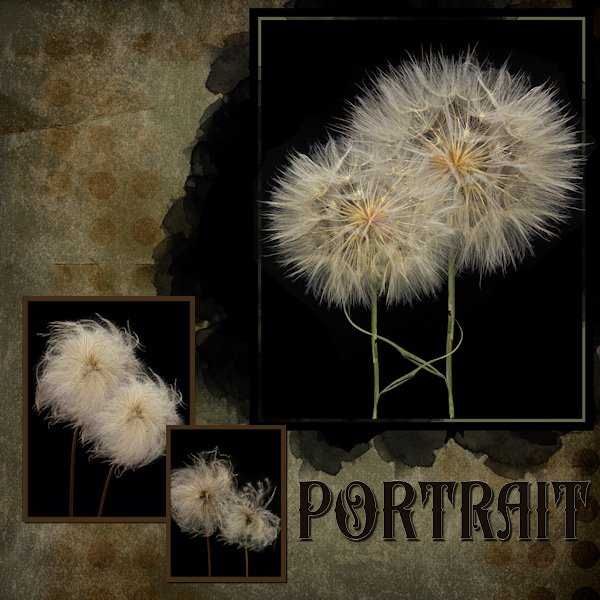
Day 1 - Diamond Extra. This one is for Ann Seeber. You wanted a photo of me...here is me and my whole family (sibs and parents). ? My parents (Bob and Audrey - represented here by Western Salsify), are lovingly embraced while looking down towards us 4 kids. What? you say, how can that be, surely we kids, with those stunning hair-do's cant be from Western Salsify. You are quite right; we siblings are represented by Clematis Terniflora, which is another way to say, we are all Adopted! In the bigger of the small masks is my oldest brother and my older sister and in the lower smaller mask is my other older brother and lastly me (with the crazy hair). Incidently my older sister and the oldest brother are actually full blood brother and sister, but 2 years apart. Ann, I will try and get a picture up soon, even if it's not a great one, I'm on a mission for you.
The important stuff: Font is NS Blackbooks Victorian (Creative Fabrica, I think), and back ground is Brook Gazarek - Crisp Fall Air (Digital Scrapbook) that I darkened and desaturated. Photo's are mine, photographed separately and composited using a blend mode (lighten).
Susan, Love the hairdos - please share the name of the stylist! ?
-
1
-
-
9 hours ago, Liz Hubbard said:
Too bad I can't read the instructions to know what to download, or the diagram labels on the mask instructions to figure out what to do. I am not completely lost in using French, but there are special terms there which I don't know. I would not have signed up for a French language class with such minimal instructions if I had realized it. I think it could be presented in both official languages to be more inclusive.
Back to using the help files and Corel videos instead. Have fun!
I didn't see any instructions in French. I was referring to the template layers being labeled in French. I actually did use Google Translate to figure them out. LOL
-
2
-
1
-
-
26 minutes ago, MoniqueN. said:
The written out directions are available for Diamond members??
No, they were on the very first day's email so I assume everyone could read them.


Mask Workshop 2023
in Showroom
Posted
I just looked and I do have both scripts, but they are way down the list and if they don't say "cass" initially I tend to miss them. Thanks. I'll have to experiment.