

Susan Ewart
-
Posts
3,768 -
Joined
-
Last visited
-
Days Won
111
Content Type
Profiles
Gallery
Forums
Posts posted by Susan Ewart
-
-
3 hours ago, Jeni Simpson said:
I agree, Middie, I played with many different options with the size of tube to shapes to add the tube to. The font you have used for your creations is fabulous, and works so well in this instance.
I have always loved doing Richie Dumlao's tutorials using the ampersand. It is such a beautiful shape. I also loved the x shape, Gill Sans Ultra Bold. I tried several different fonts and shapes, there is so much to enjoy with this day 6 vector tutorial.When I just watched the Lesson 6 tutorial with the Vector Tube script I thought of Gill Sans Ultra Bold immediately. It's one of my favorite fonts. I am thinking of the small 'i' and wonder if the script will find the dot since it's not attached. I'll find out tomorrow when I do the lesson. Everyone has done really awesome stuff in Lesson 6, I'm excited to get to it.
-
 4
4
-
 1
1
-
-
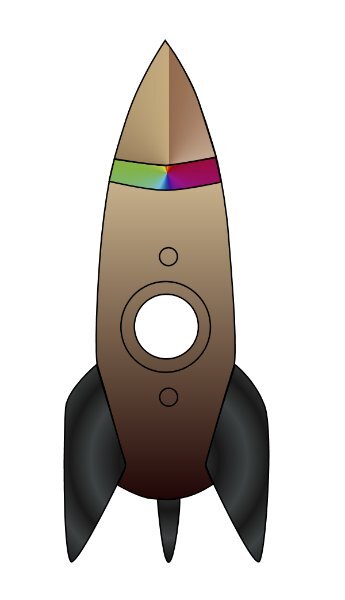
2 hours ago, Cassel said:
Yes, you just activate the object and Recover anti-alias. I have imported some EPS files as WMH files that PSP can read, and I had noticed those jaggied paths. I even had to write a script to go through all the objects as sometimes, I would have over 100 tiny shapes to "recover". It looks like you did a good job on the rocket. I'll wait for the specific questions. (maybe it could go to the Q&A if necessary). Once you are in the Edit mode, try clicking anywhere outside the box, while the Object is active. It should get rid of the box. As for your version, you got the correct one (I always check, just in case).
Thank you Carole. I will try that. I know that it's something I'm not doing right and that it's a simple fix like you've offered. Often my issue is "where" I am clicking as opposed to where I "should be" clicking. Clicking the mouse in the right spot is important I am learning.
-
3
-
1
-
-
2 hours ago, Jeni Simpson said:
Your images are quite beautiful, Susan, inspirational.
Thank you so much Jeni. That means the world to me.
-
1
-
-
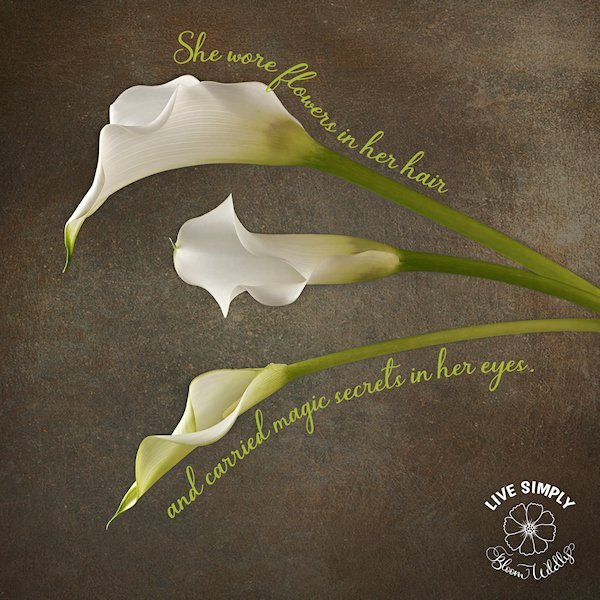
Lesson 5 #2
A fun exercise to do. I spend more time trying to learn how to work with layer masks (not sure that's the correct terminology), photographed on grey so I could add a textured back ground with blend modes (easy part), then needed to mask the blended texture layer to let the flower show through (hard part to wrap my mind around - which layer is the mask, is it black or white etc). the hardest part was wrapping my head around what on the top layer needed to be blocked, it kept thinking it was everything but the flower, but it turned out it was the flower I needed to block. Hopefully I will remember for next time.
I added the little round label thinking you couldnt see it, but it seems to show up well and I have no idea why the top text on the flower is blurry, the original is not and even looking at the 600 version on my own computer it is not blurry. PSP is acting really slow today. Yesterday fast, today the opposite. And with the all temp files and cache cleared.

-
1
-
 2
2
-
9
-
-
Lesson 5
first one
-
1
-
9
-
-
7 hours ago, Cassel said:
Just to troubleshoot something, what is the EXACT version number of your PSP?
it is: 25.2.0.58
-
1
-
-
Another question:
Sometimes the bounding box is around all the nodes and I need to go back and edit the nodes again but the box is covering the nodes and I cant get to them. I activate another layer then go back and then the box is gone but no nodes, so I click on the edit button and bounding box comes up again preventing me from getting to the nodes. What am I doing wrong. When you were doing the crack paste your bounding box only came up when you did Select All but mine had the box already. Does this make any sense.
-
1
-
-
Lesson 4
Whew, this is an emotional rollercoaster lesson. As I told Daniel in an earlier post, I thought I was rock star, I finally got it. And today? failure after failure (the rocket). I could get the cut out, but could not get it to show when I filled it. I finally got it, but I don't know why I got it or why I didn't get it, which is important to know so I don't continue that way. I have lots of questions about the rocket I did. About how to go about it. The words arent in my head right now and it's lunch time...must be hungry and cant think (it cant possibly the entire week of only 3-5 hours sleep a night, naaaaa 😜)
Carole, I'll try and formulate what I want to aske about making complex stuff like rocket with overlapping lines and other issues that came up. I'll wait until I get caught up first.

-
2
-
8
-
-
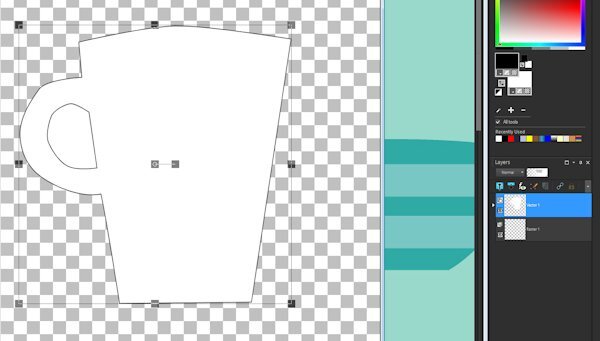
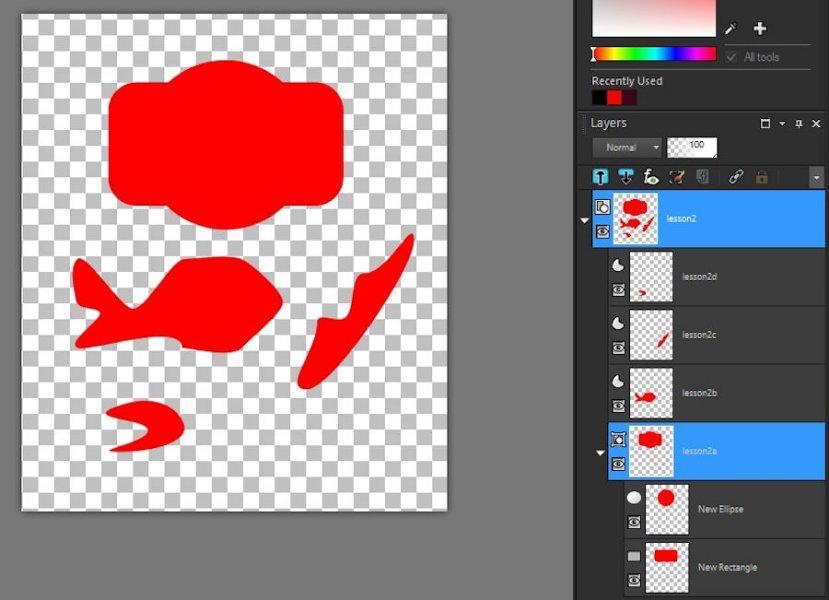
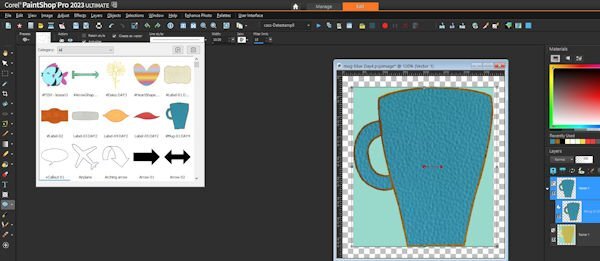
4 hours ago, Daniel Hess said:
I honestly don't know what I'm doing wrong at this point. I've deleted everything and gone back the drawing board and followed along step by step with Lesson 4, pausing the video with each step. It "cuts" the cutout vector and I can paste it into the "cup" vector and reposition it but the cutout is filled when I check it. The only thing different is that I'm working on the original canvas of many cups and started with the upper left one. The vectors are in the layers palette and show up on the canvas and when I switch to fill AND stroke its all there except the cutout is NOT cut out. GRRRR !!! To the best of my knowledge I'm set up exactly as Caroline was in the video for the pen tool. The image below is what I have right after I paste the cutout into the main cup vector and reposition it. The "test" fails (so far) every time.
I"m not sure if this is anything, but when i was pasting I was trying to paste on the canvas in the hole it came out of, but when I did it again and pasted on the body of the main object (the cup) it worked. Now, this may just be a coincidence. Why can I do it one time, then not the next, makes me scratch my head at what step I miss.
-
2
-
-
6 hours ago, Daniel Hess said:
Lesson 4 "Failure". Haven't figured out where it went wrong but the "cutout" isn't truly "cutting out" for me. Maybe I missed one of those double node merges but I didn't see any to merge. At any rate I should be seeing transparency in the handle after using the Preset Shape I exported and it is filling just like the main cup.
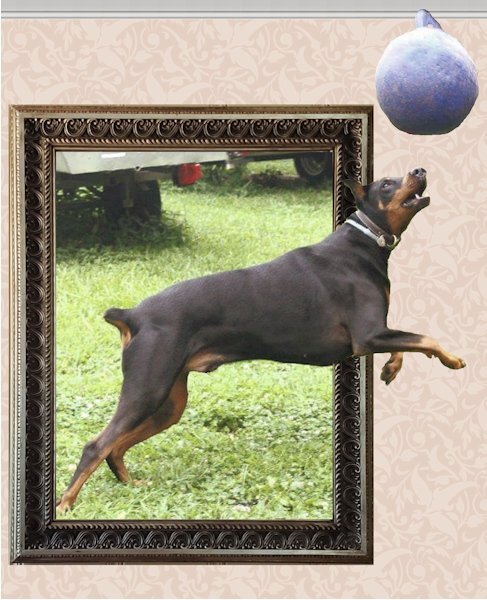
The dog is pestering me for his walk and he won't let me concentrate on anything else until that "ritual" has been observed. As of September last year, we had 3611 (and change) miles logged with my Garmin watch (since Nov 2016) and have done a couple or more hundred since September. He is almost 11 and we won't have him for too much longer...he is a large doberman...getting gray and he runs out of steam early after commencing our walks these days. Pretty much maxing out at 1.5 miles on good days.
Daniel what a beautiful dobie. So sad and heartbreaking to see our pets age. I've had my share of issue's with the cut tool. Just yesterday I realized when you do the right click this, right click that, I was doing it on the layer in the layers palette. that did not work. Then when I thought I truly understood it yesterday, today was maddening (I will be posting the results) and I couldnt cut anything. So, I feel your pain. Very cool stats on your walking, I love that sort of stuff.
-
2
-
-
7 hours ago, Ann Seeber said:
Oh, wow, I didn't know this. I also hadn't noticed that my anti-alias would stop working spontaneously from time to time. I do take special care with the settings for the Pick Tool which seem to change without warning. I've also realized it may depend on if I just used a script as they do change settings without warning.
Oh, yes, the pick tool is a mischievous little devil.
-
 3
3
-
-
14 hours ago, Cassel said:
I don't know why the Anti-Alias gets unchecked either, but I notice it too. But if you have a path that is jaggied, do you know that you can recover the Anti-alias without having to redraw the lines? Activate the object in question and go to Selection > Modify > Recover Anti-Alias.
Oh wow, I did not know that. thank you, I will go back and fix it. Speaking of fixing it, on the camera I see I went over with line, is there a way to get rid of that mistake? Oh wait, would I just go back to the vector, in edit mode, mode the node back?
-
2
-
-
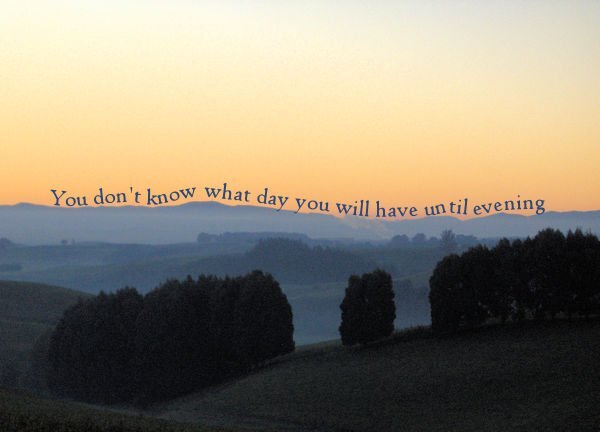
15 hours ago, Jeni Simpson said:
Day 5 part 2
I found a photograph I took in the early evening from a road up in the hills near where I live.
I love this time of day, and have a few pix taken at a similar time.
Quote is by Sophocles.
Jeni
LOVE this phot and the quote.
-
 1
1
-
2
-
-
21 hours ago, Corrie Kinkel said:
With this 5th lesson the fun is starting, at least for me. I use text on a path regularly on all kinds of projects, so no problems here. For this assignment I used a photo from a friend which I have for a long time, but never used it. I vividly remember the very first time I tried to make a postmark in the first Travel Challenge I participated in when I was a newbie to scrapbooking and the Campus. It took me for ages and I didn't understand what I was doing! Now I use postmarks very often for a date or a place and this time I played a bit with my postmark, made it in color with 2 little flowers left and right and a photo in the middle. As it is suppoost to be a postmark I used a distressed brush to give it some grunginess.
What a stunning photo Corrie. Both of them
-
1
-
2
-
-
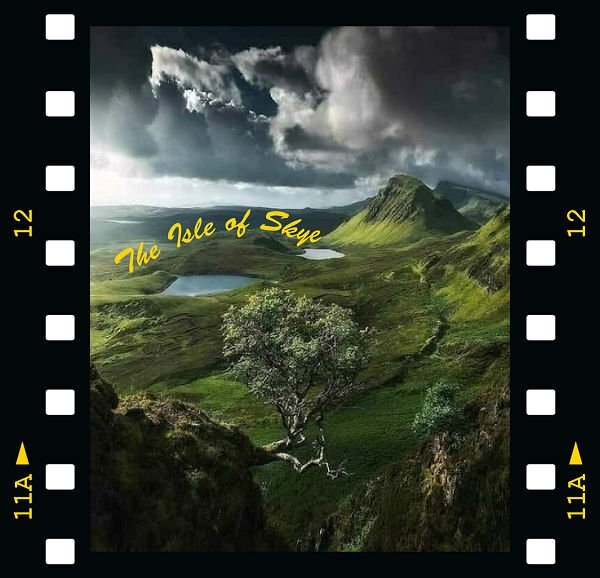
22 minutes ago, middie said:
Getting better.... only took 3 tries to get these assignments done. the first is enclosed.... sending second one separately as I am not sure if the two together will create issues. This one doesn't fare well in a small size but it is gorgeous as a wallpaper. Couldn't resist adding the frame.
I love this. My best friend (since I was 12 yrs old) has just moved to Scotland (Nairn on the Moray Coast ). What a beautiful country. My dad's side of the family hails from Scotland too.
-
3
-
-
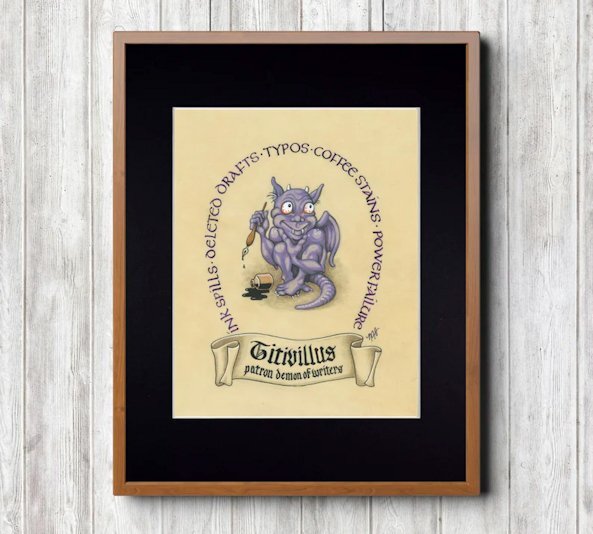
1 hour ago, Gerry Landreth said:
I found this on Etsy while researching my new favorite demon. I couldn't resist ordering one for my office.
I love this! You think spelling something wrong in a layout...try hand lettering a quote and seeing a typo at the end...especially if you got all the spacing correct and the lines straight. There is no undo only a do-over.
-
4
-
-
2 hours ago, middie said:
Don't bang your head against a wall as it achieves nothing. Eat choclate or shortbraed instead - calories are calming..... vey calming..... as I munch away during this lesson.
Agreed, eating your feelings is very calming! (BTW, I LOVE shortbread)
-
1
-
1
-
-
Lesson 3
I thought everything was going great. Somehow my anti alias got unchecked. I wondered why things were so jaggy despite not being that zoomed in. Ah, the newbie in me rearing it's mistake-ridden head again. I will post what I did so far because I'm out of time now. I did the camera parts as different objects that I WAS going save as a preset shape. I liked the camera (from the summer collection download) so I will do it again, I can sure use the extra practice since I see some mistakes I want to fix. I also showed the outline on the camera so you could see the parts. I need to go bang my head against the wall and repeat: Anti Alias ALWAYS checked. If I had a blackboard I'd write lines too! 😩
-
3
-
1
-
1
-
7
-
-
3 hours ago, Ann Seeber said:
Proofreader's Notes: "Lilies" (only 2 "Ls" in lilies); "pistil, the female reproductive part of a flower." (Only one "L" in pistil).
Has your letter L developed a stutter? 😉😉
Beyond my ribbing you, I do love this layout. ❤️ I must try that with a swashy font!
OMG! hahahahahaha, ya, that's it! It's not ME, it's my KEYBOARD! From now on I will run all my layouts by you first. Sheepishly, I will admit I used cut and paste from the internet on that journaling. Did you think I could actually write that well? I could have gotten an AI to write it, but since the google AI has recommended using "glue" as pizza sauce and another recommendation of how many rocks a person can eat, I think I might be able to piece some words together better than that. I just looked at the bigger version. It is an "i" but it's hard to see the dot. Poor choice of font on my part. As looking at the version here, it looks like two L's for sure. Keep up the ribbing and editor extraordinaire duties, please!
-
1
-
1
-
-
17 hours ago, Julie Magerka said:
You said it so well about the change in MODE! I have to always remind myself: am I on the right layer? Is the mode in edit? Do I have the pen tool selected? These vectors are demanding.
These are good reminders, I wrote them down. thank you.
-
3
-
1
-
-
On 6/19/2024 at 7:03 PM, middie said:
Sorry but I finshed lesson 2 & forgot to post it. Been distracted by that massive heat dome over our area & the fact that our electricity has been out so no airconditioning all day today. I didn't get fancy with this one, just tried to get the nodes & grouping right.
I love the organic designs(and that we can make original ones anytime). That label is a great shape with the rounded corners.
-
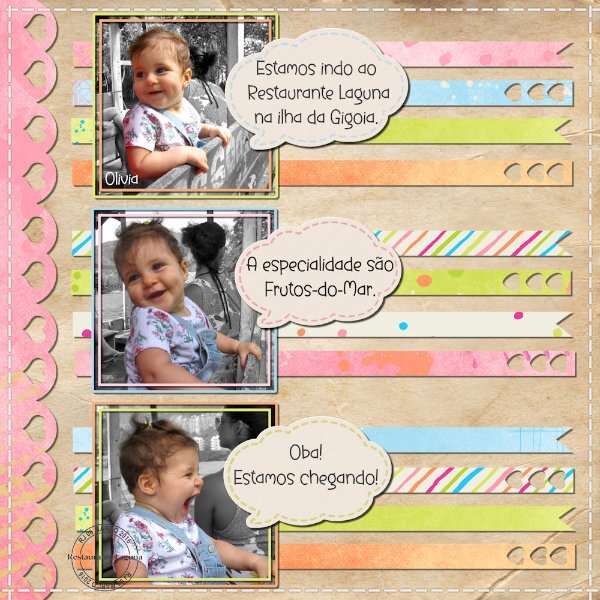
On 6/19/2024 at 8:45 AM, Cristina said:
I was able to finish another layout from my "Unfinished Layouts folder".
Credits:
- The edge strip and the ribbons were created using papers from a Pixel Scrapper/Digital Scrapbook freebie by DiHiller (mini kit DH_SummerLovin)
- Cassel's DateScript#8
I love the expressions on the Olivia's face, especially the bottom one. It sure makes you smile. The cut outs are such a great idea, I like the strips, the whole design is so well balance and interesting to look at.
-
1
-
1
-
I have fixed my mistakes, here is version two. Thank you Sue, for the info about the text kerning and stretching. Really good point about going vertical AND horizontal in regards to possible distortion on the glyphs and letters. I must admit I had not thought of that. In this new version everything stayed in it's original shape and size. Thanks again to you and to Ann for finding my mistakes. Sounds like you (Sue) are having a good time with all creatures great and small on your farm. I'm just about through a crazy work week then I will reunite with my camera, which probably feels pretty abandoned.
There is a little more texture in the background (lower portion) but it's hard to see here.
-
5
-
-
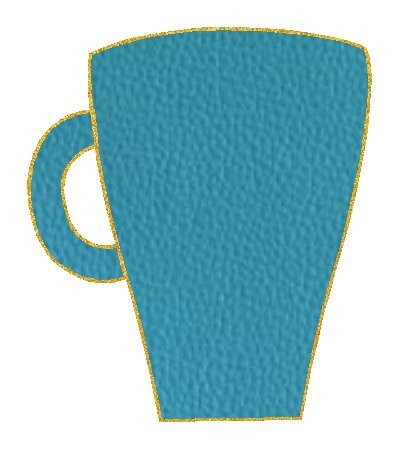
1 hour ago, Cristina said:
Here is Day 4. I chose a simple mug as I don't have much time today to deal with the "so-called" &%$nodes§%&. 😄
It was good to review this lesson, as I didn't remember the "c-r-a-c paste" tip.
As I am traveling tomorrow morning, I will catch up with the lessons once I'm back. The workshop will be over by then, but I want to finish it. 🙂
Have a good trip, "see" you when you are back!
-
1
-


Vector Workshop 2024
in Showroom
Posted
Lesson 6 part 1
What a fun script this is. I learned I NEED way more picture tubes.