Rene Marker
-
Posts
1,028 -
Joined
-
Last visited
-
Days Won
16
Everything posted by Rene Marker
-
Thanks. I didn't see those typos. My new glasses need to come in ASAP!!! I made the corrections on my copy.
-
Finally got this layout done. I took a few liberties (aka did steps different than Carole) in making my layout. For the photos, they were all the same size but larger than the canvas so I put them in a group and resized them to the size I wanted. I also used the "align bottom" command from the Arrange menu to align them while in the group. I also needed to make an exposure adjustment on all 3 photos so did that with them in the group. That way the adjustment did not affect any other layers. I ended not having to do the pattern step because the glitter from the kit I used was already 3600x3600. (Kit is Check-In by Meagan's Creations at Sweet Shoppe Designs). I also saw in a video I watched that the Frame Text Tool is especially handy when you want text in paragraphs. So I tried it out. Evidently this is Affinity's way of doing wrapped text. I drew a "rectangular frame" in the area I wanted to put the text then started typing. It adjusted automatically at the end of the line.

- 445 replies
-
- 13
-

-

-
I don't use the shortcut keys so didn't realize that both have the same shortcut. Although I wish there was a shortcut for "Rasterize". Or even a way to add it to the toolbar at the top. Heck, I would like to have Undo and Redo on that toolbar but you can't add them. Since I use my mouse, I tend to use that toolbar instead of the menus for a lot of stuff.
-
I actually ran across that accidentally. I was trying to move a layer and it ended up clipping which actually was OK. I was using a template and have always selected a paper element then put a kit paper in the layers file and delete the outside to get my paper element. (Old habits die hard... been doing this since I started 17 years ago!). So I was trying to figure that out in AP. I was just moving the kit paper to where I wanted it and it got clipped.
-
I found a tool that works a lot like the Magic Wand. Pays to watch youtube videos. It is called the Flood Select Tool. Keyboard Shortcut = W. Its icon is just above the rectangular selection tool on the tools sidebar. The icon is hard to see but it does look like a wand, only it is blue instead of yellow like PSP's magic wand. It enables you to select pixels of a similar color. It has 4 modes (new, add, subtract, and intersect), tolerance and contiguous just like the magic wand tool in PSP. I played with it using a template and it works just like the magic wand tool in that I can select for example, the outside of a rectangular paper layer. Then if I add a paper from a kit, I can just hit delete on the kit paper and I'm left with the portion that matches the rectangular selection. I'm much happier now!
- 445 replies
-
- 10
-
-
-

-
Yes, I got to see the lobby. Visitors were not allowed in the actual working areas of the building. I have some photos, probably should do a layout. Maybe I'll use those in boot camp.
-
I found that right away. Did some research to see if the PSP palettes could be brought over in some way. Of course, that is a no. Google AI said that PS files for color palettes could be imported but when I tried it, I got an error message. I did find a video that showed the process of making new swatches which seems to be labor intensive. I quit researching and will explore it again later.
-
The company was located right here in Ohio. All the baskets are hand woven. They were very popular in the 80's/90's/early 2000's but after the man who started the company passed away, it didn't fare as well. His 2 daughters tried to keep it going but they really didn't have the vision that their Dad had. Heck, he even had the office building built in the 90's in the shape of the most popular basket they sold. Just google "Longaberger Basket Building". I was there several times when I went on day trips to the Longaberger Homestead (sadly no more) that had a great shopping area and the factory where the baskets were made. You could watch the weavers working on baskets. And, they had an area where you could make your own basket. I had friends do that but I didn't.
-
I still have my slide rule from high school. Not sure I could use it now but I could back then.
-
That is quite normal for scrapbookers. I've gone through phases where I don't scrap much at all. Quite often other things going on in my life become the focus and scrapbooking takes a back seat to those life things going on. But I will get my "mojo" back due to a challenge or some other inspiration later on and off I go. The other thing for me is when a layout isn't coming together, I just do a basic page and call it done. Then move on, quite often doing multiple basic pages. Eventually the creative part will come back maybe because of the photo(s) I've chosen to scrap.
-
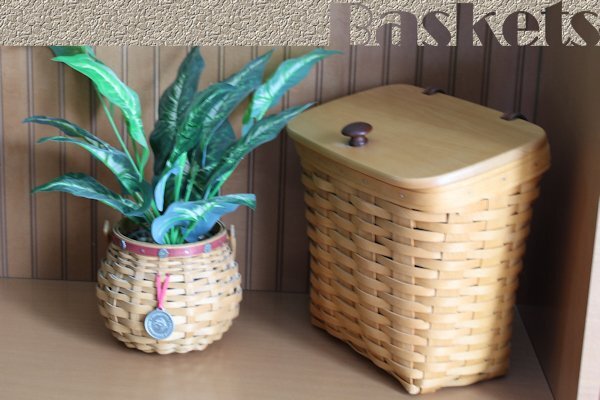
B is for Baskets. Specifically Longaberger baskets. I fell in love with them in 1983 when I went to a home party. I still have the 3 baskets I bought that night. I got Mom hooked on them as well. In the late 90's/early 2000's I was a consultant and I was my best customer! I have downsized my collection over the years but still have a lot that are pretty much in use or used to decorate. These 2 baskets are in my dining room.
-
I haven't run across any videos on using pre-designed masks yet in my youtube viewing so I don't know if there is a way to use them. However, I have come across some other videos and it appears there are multiple ways of using masks. I certainly want to try them out when I've used it enough to feel more comfortable with the program. I've actually started a One Note page on tips and tricks for Affinity. I'll probably spend tomorrow watching a few more of some of the beginning videos to see what other tricks are out there. I've run across several videos about masking but haven't watched them yet.
-
I added the link to the kit in the post. It is a current kit sold at Sweet Digi Scraps called "A Cold Snap: Snowy Days" by Kristin Cronin-Barrow. I am a big fan of her kits and have bought a lot of them over the years. She has things in her kits that I could never design on my own! @Gerry Landreth Peyton has been using steps to get on the bed for a couple of years. For the longest time, she had no problem jumping up on it but she started struggling. For some reason, she started jumping straight up in the air and of course, not getting on the bed. My bed does sit high as well. So I bought a Rubbermaid 2 step unit and it sits by the bed. She didn't take long to learn to use it. It is also handy for when I need to get something off the top shelf in my closets. Funny thing about the bed though, if Peyton doesn't think about it, she can jump on it without using the steps.
-
@Corrie Kinkel You can do a reverse shadow. Just change the angle of the shadow. 160 looks about the same. You can enter the number of degrees you want since just moving it goes in increments of 15.
-
Nope. My issue was that I wasn't "dragging" the dropper to the color I wanted. I was trying to use it the same way you do in PSP. Once I figured that out, it worked fine. A little look at the help file was all it took for me to figure it out.
-
I used a kit by a designer that's been retired for over 10 years. I liked the trick with the selection to copy/paste. Now if only the color picker would work. Gonna have to get it figured out. Think I have an idea why but wanted to get this layout done before I play around with it.
- 445 replies
-
- 14
-
-
-
Abr are Photoshop brushes (have to do the import to use in PSP). I found out that they can be used in Affinity and it is such an easy install. Much easier than the PSP install. If you want to test it out, just drag and drop the file on to the Affinity workspace. I actually went through my files to find the abr files and installed some of them already. Just didn't mention since they aren't being mentioned in boot camp right now. I have to say there are some features of Affinity that I really do like because they are easier than PSP but there are others that PSP does much better. For me the perfect program would have the best of both programs!
-
This is the layout that I worked on using the selection brush on the frame. Edit: To add a link to the kit used. Kristin Cronin-Barrow's "A Cold Snap: Snowy Days" available at Sweet Digi Scraps.
- 445 replies
-
- 11
-
-
-
@Linda J Walker I think once we get past the basics, we will see how it can be used for photos. I've been watching YouTube videos today since we had no assignment and I've seen some pretty cool things done with photos (it's too cold to venture outside). But none of the videos even come close to "scrapbooking" as we know it.
-
I was playing with it today and struggled to make a selection (miss that magic wand) using the selection brush. I wanted a simple selection. I wanted to select the inside of a frame and delete the part of the photo that extended past it. I kept at it because I wanted to get the hang of using the tool. I did eventually get it. After I was done, I thought of the rectangular marquee tool and realized that is what I should have used. But I just watched a YouTube Video and my mind was blown. You can make a selection with the Pen Tool! But that is for something later down the road. I don't like the pen tool in PSP but I just may like it in Affinity!
-
Grouping only works if all the layers you want linked are next to each other. Same as PSP. I don't think linking is available in Affinity. It is a useful feature in PSP for sure. I have a feeling that Carole will get into this in future lessons.
-
I agree about scale with object. I saw a video where the presenter talked about having it checked all the time. She actually wishes it was checked by default. I tend to agree with her as I check that box before making any other adjustments.
-
Anne, your problem might have been with the installer your were using. There are several different installers for Windows and not knowing there was a difference I downloaded all of them. I tried one of them and got the same error. Then I looked into it and realized the 2 of them were for specific types of windows installation and that the plain old .exe installer was the one I needed. Once I tried it, it worked fine. The instructions are not very clear unless you know a lot about configurations of computers.
-
I know this one was not electric. I honestly don't remember where Mom got it but it had probably belonged to one of her grandmothers. That little piece of info was never written down in the info Mom wrote down about heirlooms she had. I do have a photo of this table in the living room in 1973. I know that the candy making started in the early 70's so that is probably when it was done. These days, it has a lamp on it except for Christmas when I put a table top Christmas tree on it.
-
Woohoo! Nice to be back. Didn't realize it was fixed so posted my layout in the old forum. Well, I was able to get a layout done. I used a kit from a designer that retired over 10 years ago. After figuring out that when you drag and drop something into Affinity, you need to rasterize the layer before you can delete, it went quite smoothly. And, I love that you can add a shadow to the text layer even if it isn't rasterized.
- 445 replies
-
- 13
-
-