Home of the Scrapbook Campus › Forums › Showroom › Bootcamp – January 2020
Tagged: Day 5
- This topic has 332 replies, 32 voices, and was last updated 4 years, 10 months ago by
Liese Strupp.
-
AuthorPosts
-
January 22, 2020 at 1:31 pm #37903
Lydia, when you use the Fill tool, make sure the Match mode is set to None (the first one). That can easily change accidentally or for another project and we forget to bring it back.
January 22, 2020 at 2:36 pm #37905Lesley: That bravery Bead Box is so beautifull!!!
T
Cassel thank you, tomorrow I try again.
January 22, 2020 at 3:08 pm #37910Hi everone,
Thank you, Cassel, for the tip on using a different zip program. Btw, I heard back from WinZip and they think some program or setting on my computer is automatically upgrading my WinZip, even though I didn’t request it. I’m still going back & forth on how to get it fixed. But in the meantime, I’m using a different free program, so I’m back in business. 🙂
So, here is my day 3 project. I know that the string is on top of the paper, but under the pic. I preferred it that way because of the pic being so small. (I wasn’t able to get the pic to a larger size, which I knew, but I still wanted to use it.)
Also, I like having more of a drop shadow, so instead of 10, I used 20 and I like that effect. 🙂
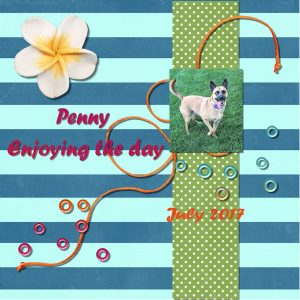
January 22, 2020 at 3:12 pm #37912Now, here is my day 4 project. I really love Christmas and I love this pic of my dog, Penny, so I used different supplies. Again, I like more of a drop shadow on the elements, so I used 20, but on the font, papers, & pic, I used 10.
I am really enjoying this! I am learning so much, so thank you for doing this!
P.S. Will I still have access to the videos after the bootcamp? Because there is no way I’m going to remember everything, so I will need to go back and watch again.
January 22, 2020 at 3:18 pm #37913Hello Carole,
Even at my age (I will be 87 in two weeks) I learnt a few new things. All thanks to your patience and dedication in the way you have been teaching us.
Since you asked for ONE thing, I have to say, “EDITING TEXT”. Until now I couldn’t make corrections to any text. I would delete it all and start all over again – a royal pain. You showed me how easy it is: just select it and do whatever you want with it!
Having said all that, I do have a question: Will we be able to ask for your help when this session is over? If so, how can we contact you? Your “Contact me” tab doesn’t seem to work for me.
Inam.
January 22, 2020 at 3:24 pm #37914Inam,
I’ve been having the same issue. I finally realized I could make a new layer, as discussed in day 4, or I played around and found that if I clicked on the pick tool, I was then able to highlight the text. So, where is it mentioned about just double clicking? Is it somewhere in these messages?
I’ll admit that I haven’t read through all the posts on here, so I will need do that.
January 22, 2020 at 4:28 pm #37919My first attempt. I’m looking forward to learning more.
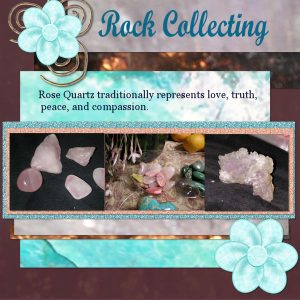
January 22, 2020 at 6:02 pm #37921At last here is my day five , I was delayed by being a bit under the weather , a gas leak that had crews with jack hammers in the yard for 48 hours, family drama , and my pspfreezing repeatedly, and then I just could not settle on photos or paper or etc. and started over more than once . here are a few rose quartz from my rock and crystal collections , the papers are all close up photos of crystals and one marble sphere from my collection, the flower is one recolored from a script that I used to have and the ornament is a digital wire from long ago . I AM picking up some of the short cuts finally got snap to guide to work .
January 22, 2020 at 6:29 pm #37924Hi Cassel –
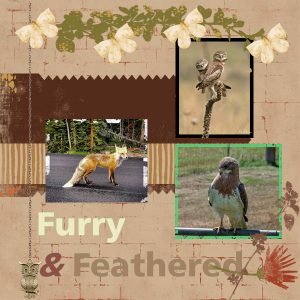
I had some fun and some problems with Project 4; It was fun to play with several different things such as the Owl and chain; to get it to span the full length of the page without making it huge I copied just the chain 2x and pasted them then copied the owl with a little chain and pasted it; then I needed to resize all of them to about 90%, align them and group their layers. Hopefully I did this correctly so that it looks like all one chain.
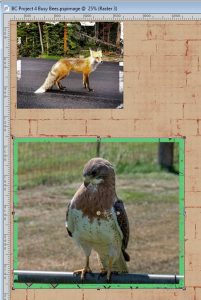
I have a problem with the photo frames – they will not fill as solids! Each of the frames has holes in it and I needed to click on the fill several times in different places to get them as solid as they are. I imagine there is a setting that is off somewhere but I tried to look to be sure I didn’t have any texture or pattern set. Please help.
January 22, 2020 at 6:34 pm #37926Hi all,
Here is my Day 6 Project. I had fun and learned a better way to work with my Materials palette and the new approach to the Text tool. I am certainly starting to feel more comfortable working with layers.
January 22, 2020 at 9:07 pm #37930Day 4 Project. I get stuck on composition but creativity comes with practice.
I had trouble with extra blank layers. I’m not sure where or when I created them. I deleted most of them. It would help if you have any guidance on that.
The other technical question deals with using arrow keys for fine-tuning the position of an element. I tried but there didn’t seem to be any measurable difference.
January 22, 2020 at 9:31 pm #37932Hi Cassel & All,
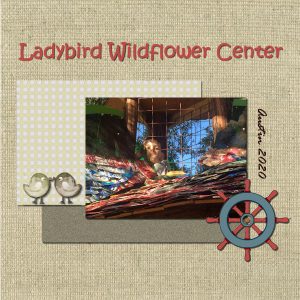
This is my day 4 scrapbook page. I used the free kit for this SB. I changed the color of the plaid image to match the photo better. I used MS Word for the steering wheel also changing the colors. I copied the little birds from the lesson (hope that is ok). I had to use the background eraser to remove the white background then saved it as a GIF. The class videos are excellent. Will the links go away after this class? I have learned a lot so far and I cannot thank you enough. I want to keep learning PSP 2020. Thanks Much!
s
January 22, 2020 at 10:37 pm #37933Leslie, you are right; the shadows are really making those leaves stand out. Next time you use an element several times, you can slightly rotate them so it can give some “variation” to them. But make sure you do those rotations BEFORE adding shadows otherwise, it will make the shadows look odd. You are really making great pages, but also great woodturning projects!
Colleen, you read my mind; I surely would have mentioned the string under the photo, but to address the fact that your photo was small, you know that you can size down the string too! Even the beads could be sized down to seem more like “seed beads”. But it is interesting that you are now thinking about your layering, which is a good habit to learn. On your Christmas layout, I agree that larger shadows are very suitable for those elements, and you kept the smaller shadows for the papers. You are really getting to understand the effects of shadows and not just setting them at random. And for the Candies, you could probably have gone even larger than that too! 🙂 And yes, you will keep access to those tutorials after the Bootcamp.
Inam, glad that you are able to edit your text instead of starting over again! And typically, to contact me, that yellow tab on the right should work. Are you getting an error when you use that? If that does not work, you can always reply to any of my emails, or send me an email directly. Everything comes in the same inbox and I will be happy to answer.
Colleen, for the text to edit, if you select the Text tool, then, double-click on the text, it should get the blinking cursor to appear. This requires you to click on an actual pixel of the text, so if you click in-between characters, it might not work. One way to help is to “aim” at a thicker character or even to zoom in.
Gerry, glad to see your projects. You are using a great background paper. Is that a kit you used? For the extra blank layers, maybe they were not really blank? Various commands and tools might generate blank (or seemingly blank) layers, however, it is hard to know which one caused it not knowing your workflow. Next time it happens, take a screenshot of the Layers palette and post it. It might give me some hints. As for the arrow-keys, it will work under 2 conditions: the Move tool has to be active AND you have to have clicked back on the image (even the title bar) so it put the focus back on the image.
Peggy, using a photo as a background is a great idea! Yes, picking photos and supplies can sometimes be the longest part of creating a project!
Cyndi, your strategy to make a longer chain without making it thicker is excellent! For the photo frames, the issue is common: it is because the Fill tool has a setting called Match Mode, and it is probably set to something other than None. This means it will try to fill only on some sections. Make sure it is set to None, and it will ignore any color of the image itself.
Henry, I am glad to read that you are feeling more comfortable. That is the main goal of this Bootcamp!
Sally, when you save in .gif format, you might lose some colors. If you create your own elements without a background, you are better to save in .png format instead.
Tomorrow, you will get your last project tutorial. It will only need one photo, so it might be a bit easier. But you will still have time to catch up if you had to take time off or if you started late.
January 23, 2020 at 1:07 am #37953Hi Cassel,
Hi all and Lurkers I think I am up to date. I think I bout got my program where I can follow a lesson good. Wanted togo and redo some but was so busy today 🙁 I have tomorrow Ill try then, cant wait. I am talking the next class How many
lessons are in it? Is there free supplies, like there have been in bootcamp? Well got to turn in got to be up at 7 and
then have a drive to babysit. You rock Cassel. night all
January 23, 2020 at 6:59 am #37955I’m a little late jumping in. I used PSP in an earlier version, but it’s been several years. I have been using other programs to scapbook, but just recently got a copy of PSP 2020 and find that I don’t remember a lot of the basics. So much has changed as well. Looking forward to getting comfortable with the software. Here is my Day 3 project. I used a kit by Meredith Cardall called Ticket to Paradise.
January 23, 2020 at 10:12 am #37962Hello friends, my scrapbook is alright, but you all do awesome work.
January 23, 2020 at 11:19 am #37964Jnet: c’est merveilleux de voir les Pélicans dan leurs habitat!
Ici, on peux voir des pélicans dans le Zoo d’Anvers …
For exercise and undo the mistake with the fill-tool for the frame around the foto’s:
a second scrap-page!
Cassel: The fill-tool was indeed on RGB mode instead of ‘none’
Thank you, just learned more!
January 23, 2020 at 1:51 pm #37973Hi Cassel, Everyone…. lurkers sad for you, You should of been here. Okay so 1st I just did my lesson 1
it was fun. I didnt swear, or sweat, or get frustrated, and it didnt take me 5 hours not kidding either.
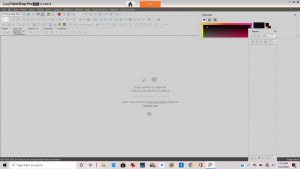
It was just 1 2 3 4 5 6 7 8 done and fun. so much fun heres my desktop too. And I got lesson 7 really feeling good.
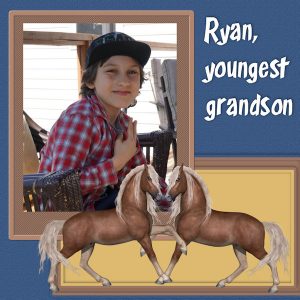
January 23, 2020 at 1:52 pm #37974Helen, meant to say your grandsons so cute… my granddaughter she’s 9 she said so 🙂 I agreed and she loves
horses too. Love everyone’s work btw
on to lesson 7
January 23, 2020 at 1:54 pm #37976opps
January 23, 2020 at 2:27 pm #37978Hi all,
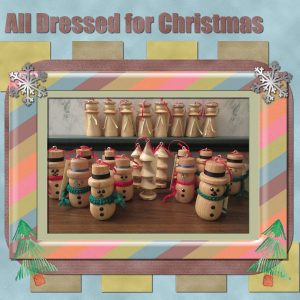
I really like what everyone is coming up with. Here is my attempt at the Day 7 challenge. I chose a picture of my Christmas ornaments that I like, but used the tools from the Day 7 kit so the colours are not perfect for Christmas, but I like the overall effect. I didn’t have space to add the copy text piece, but I did change my header text from Vector to Raster to add the Drop Shadow. The Merge/Merge Down function was very helpful with the squares.
January 23, 2020 at 2:54 pm #37979Still working on my problem with the CTRL key. So far Corel has not been helpful – it’s like they don’t understand the question. I will make another attempt to contact them when I get time. Do you think I should try reloading the program?
Another question is that I like the idea of hybrid scrapbooking. That is printing digital elements to use on paper pages. Is there a trick that I might be missing in getting my printer to print in the colours that I see on my monitor in PSP? I’ve tried using the color management tools without much success.
Nancy
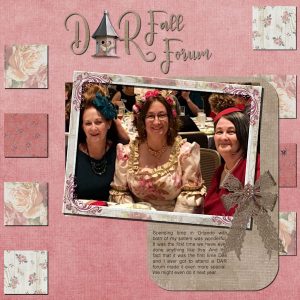
January 23, 2020 at 5:04 pm #37986Hard to believe it is day 7 already. This one seemed perfect for using a photo from the DAR fall forum. I used Kimeric Kreations Vintage Pink kit. The bow was made from the lace in the kit and Carole’s big bow script (which I love and have been having a grand time playing with).
January 23, 2020 at 5:27 pm #37988Hello friends,
Here is lesson 4! I do feel like it is taking a bit less time. Text is still a challenge.
Hope you like it!
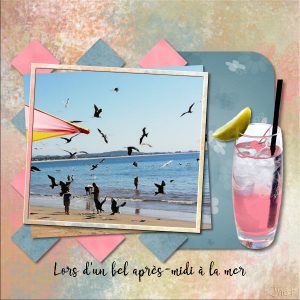
January 23, 2020 at 6:39 pm #37991Bravo! Bravo! tout le monde se débrouille très bien et malgré que je fais le bootcamp une 2ième fois, j’approuve tout comme vous. Carole, le billet jaune fonctionne pour moi et oui les photos des pélicans sont de moi. Celle de mon travail d’aujourd’hui est de mon amie Danielle (elle va plus souvent à la plage que moi). On y voit des pêcheurs sortant de leurs poissons de leur filet et les pélicans et autres oiseaux qui veulent une partie. Oui Lydia, je suis chanceuse de pouvoir les voir dans leur milieu.
Bonne continuation à tous!
Voici mon jour 7
January 23, 2020 at 6:43 pm #37994Désolée, j’ai essayé de corriger mais rien ne fonctionne
J’espère que pour vous ce ne sera pas rempli de codes comme pour moi
January 23, 2020 at 7:46 pm #38003Here is my next to last my three girls as babies they are now 44, 33 and 31now, again I never really settled on papers and redid them repeatedly. the dragonfly and heart are from tutorials that I followed over a decade ago probably from Hummie before she changed software but possibly from Tigger who focused on stationary and web page backgrounds even further back in time. I no longer recall how to do most of these things . but I think there are some similar things in the campus
January 23, 2020 at 8:35 pm #38009Hi Cassel,
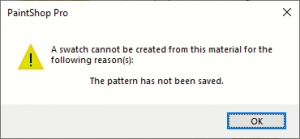
In this lesson I found out how important is is to create the layers in the composition in the correct order. I accidently deleted my whole scrapbook.psp not once but twice. UGH Is there a way to save the glitter pattern to my materials palette? I kept getting a message… see-attached screenshot. I could not figure it out. In addition, I cannot get my materials and layers palettes to stick. They keep appearing in different places. I should know this but I do not. Thanks for the help with these issues.
SallyJanuary 23, 2020 at 10:19 pm #38010Cindy, practice helps so if you want to redo previous lessons, you are welcome to do so. Some members are repeating the whole Bootcamp more than once as they say they keep learning something every time, and also, it helps make the steps more automatic for you, even if you use different photos, different supplies, different commands. To answer your question, the “next step” would likely be the Basic Scrap Course, which will have suggested free supplies, but you can always use any other supplies. That course includes 5 projects (and 5 additional mini-tutorials).
L (how would you like me to call you?), welcome to the Bootcamp. You might be starting a bit late, but if you have already used PSP before, you might be able to still catch up. It looks like you are getting back quick nicely into it! Looking forward to your other projects.
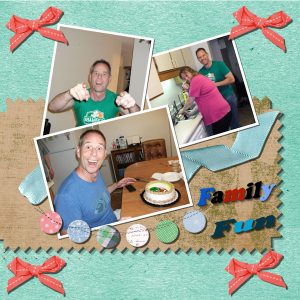
Helen, it is great to meet your family through all those projects. May I offer a little suggestion? It might be just me, but when you are putting a frame so close to the edge of the page and it is cut off, it seems “incomplete”. Maybe it is just my need to have something “complete”?
Lydia, glad that the flood-fill issue is addressed. Something you will remember next time it seems to misbehave!
Leslie, all Christmas related photos don’t need to have Christmas color layouts. I really love seeing those wood projects of yours. Glad that you found useful tricks with the Merge function. For the text, remember that you can (should) duplicate the vector before converting to raster, just in case you change your mind and don’t want to start from scratch.
Nancy, the match in color would start with the color management, but also you need to have your monitor calibrated correctly AND each printer has its own profile. It is not always easy to have exactly the same thing on both. I have had that happened at work when I was doing some graphics work to be sent to a professional print shop and they insisted it was the same color (hex code) yet, it didn’t look the same at all!
Karon, that kit is fantastic. I love Kimeric’s style. Too bad it is no longer available 🙁
Liese, with practice, you will feel more and more comfortable with the steps, the commands and the tools, and will be faster to pick and use them. I think the layout you posted might be missing the shadows. Maybe you posted the wrong version?
Jnet, it is a fun idea to rotate the squares. It gives a unique result! As for the code, don’t worry’ it was easy to fix on my end: it looks like you had copied the “text” code into the “visual” editor.
Peggy, it is so fun to have all those photos at the same age! As for other tutorials in the Campus, oh yes, there are hundreds in the Creative Scrap section that you have access to.
Sally, if you want the glitters (or any other pattern) to be saved and accessible later, you just save the .jpg file in the Patterns folder. It is that simple. The pattern cannot be added to the Swatches as those are simply a “collection” of existing patterns/colors/gradients that you want to use often, but they will be in the Patterns tab of the Materials properties window anyways. For your project, I love the idea of the larger image as it fit better and it looks like you also resized the photos correctly: no distortion.
January 24, 2020 at 12:24 am #38011Merci Carole pour la correction
-
AuthorPosts
- The topic ‘Bootcamp – January 2020’ is closed to new replies.


