Home of the Scrapbook Campus › Forums › Showroom › Bootcamp – January 2020
Tagged: Day 5
- This topic has 332 replies, 32 voices, and was last updated 4 years, 10 months ago by
Liese Strupp.
-
AuthorPosts
-
January 20, 2020 at 7:50 pm #37805
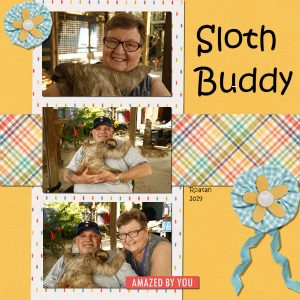
Here’s my Day 5 attempt. This was a lovely day on a tour from the cruise we took for our 50th anniversary.The sloth was great fun to hold. I’m learning not to go too fast – you have to wait for the program to do its thing sometimes. I have a tendency to think – well that didn’t work you dummy – you must have done something wrong when all I have to do is wait a few seconds and it happens.
A question about the program if anyone can help. I recently updated to the 2020 version and I am unable to open more than 1 image at a time using the control key. If I try, I get an error message that says the file does not exist or cannot be read. I tried contacting support but have not had any luck yet – never had this problem in previous versions.
January 20, 2020 at 8:47 pm #37809Figured out my mistake! Hallelujah!
I did not pick the area on my project, I was just highlighting it on the layers palette.
So here is the final copy of Lesson 3. I will sleep well tonight and not toss and turn over it!
January 20, 2020 at 9:08 pm #37786Hello everyone, and hello Cassell…Thank you for your sweet encouragement, it is such a pleasure to be amoung all of you cheerful, pleasant people who are so anxious to learn new things, it does the heart good. I just wanted to drop in and let you all know of a fabulous, FREE site I found at https://www.cleanpng.com/free they have literally hundreds (or more) of the most fabulous PNG files and they are happy to share, more good people. I am trying not to be greedy…BUT, I’m already planning on going back. (SLAP! Bad Diana, LOL) They would be a great resource using PSP for making your own…STUFF! Enjoy!
Oh, BTW I corrected the size of the text of my golfer’s layout, it didn’t look that small until I really looked and printed it out for my Husband.
Group Hug,
Diana, aka PandorasHatBox
January 20, 2020 at 9:56 pm #37818Diana Craft
I have using them for a long time, your right, they have almost everything even overlays I Love, I have several folder full of there stuff. 🙂
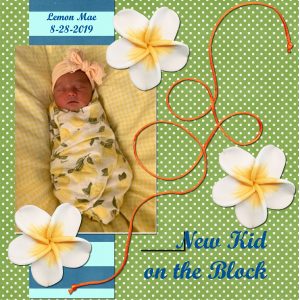
January 20, 2020 at 10:23 pm #37819Liese, I am not sure what you mean by “filing and retrieving”. Are you referring to organizing your supplies? If so, I guess it depends on what kinds of supplies you have. Knowing that, I could find a way to make a tutorial. To make a screenshot, you simply click the PrintScreen button on your keyboard, then go to your PSP and go Edit>Paste>Paste as a new image or Ctrl-Shift-V. There is also a screenshot feature inside of PSP, but it is not as intuitive. For the text issue, maybe you have created two separate “pieces” of text that ended up in the same vector layer, and when you convert the duplicate to raster, it keeps them together and you can’t manipulate them separately. That is why I always prefer to reactivate a raster layer before adding another line of text or such. That way, they stay completely separate. That is my own little trick. On Lemon’s layout, I see a black line beside the text. Is that on the layout or just on the display?
Colleen, glad to have you back. You got my message about the unzip utility. If anyone has issues with WinZip, there are other utilities that are free, including 7-zip, so there is always a way around it. Just ask!
Aletha, my old eyes seem to read GRATE instead of GREAT. That is what it looked like. But I might be wrong as it is small on my monitor (but you posted it the correct size, so you did nothing wrong as far as posting).
Lydia, I read later that you fixed the Text issue you had. Glad you figured it out.
Karon, sad to hear that this tool has changed. I had it listed on my conversion tools. I guess I’ll have to update my article. In fact, both tools I knew of are now replaced by Calligraphr. That is really too bad!
Leslie, welcome back. It is quite annoying when technical issues get in the way of our projects! Glad to see you use that first photo you had posted. Looking forward to you catching up!
Trudie, sometimes, that is the longest part: finding what to use! You seem to have a good grasp of the shadows in that layout. Good work.
Henry, for the shadows, sometimes, to soften the end result, you can play with the Blur setting and the Opacity setting. Even though there are some “common” settings, you should always adjust based on the size and the color of the elements you want to shadow and the background too. There is no “one size fits all” in shadows.
Lyn, yes, sometimes, it does not take much to make a big difference in a layout. I have been looking at layouts for 15 years so some of the details really catch my eye. I even see experienced scrapbookers make some “rookie” mistakes like layering or shadowing. It takes time and practice, but you’ll get there! and your next layout is lovely. Yes, digital scrapbooking is so much more flexible with no waste!
Nancy, I thought sloths were not that friendly with those huge claws!? I love that layout and the bright colors! As for the issue you have with opening several files, I am a bit puzzled because I don’t remember seeing that error, so it is not a 2020 issue per see. Are you able to open several files in other programs (like Word)?
Diana, thank you for the link. I might just add that to the Resources page of the site.
I am really happy to see your work. You are all very determined and won’t be stopped by obstacles. I see that you are all learning new tricks, even through mistakes, and that is wonderful (not the mistakes but the learning). Tomorrow, you will get your next project. It will also be using 3 photos, so check out what you have. A new project means new tips, new supplies, and more fun!
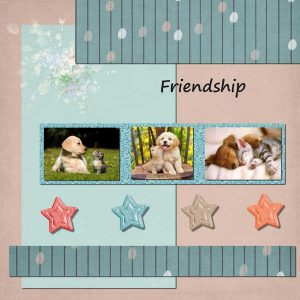
January 21, 2020 at 12:03 am #37821January 21, 2020 at 12:08 am #37822Yes she does have them. They are of good German stock. Sadly the breed is kind of messed up in this country. That is why the next page should be about her flight to here in the states to be with me. To this day she can tell the difference of the military vs the commercial airliner. She always looks up at the sound of a commercial jet and we are just a few miles from the Oceania Naval airbase full of fighter jets who seem to be constantly training.
January 21, 2020 at 3:40 am #37823Yes Cassel, I’m puzzled too. I can use the control key to open multiple images everywhere else except in PSP. Even there, occasionally it will work if the images I open are in the same row of a document file but not always. Very frustrating because I like to hybrid scrapbook so want to open multiple digital elements and arrange them in PSPs print làyout for printing.
I will make another attempt to contact Corel support.
The sloths don’t move fast enough to scratch and we were shown exactly how to hold them so they feel supported and won’t try to grab you.lol
Nancy
January 21, 2020 at 10:34 am #37831It looks like my submission of the corrected version of day 5 went astray. So here it is, again:
Inam-ul Majid <imajidkakar@gmail.com>
Mon, Jan 20, 10:11 AM (23 hours ago)to Scrapbook, bcc: me
Hi Carole,Mia Culpa. I completely forgot the drop shadows for Day5.
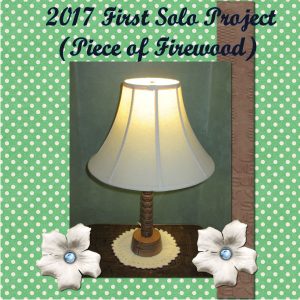
Here they are cum umbratio!January 21, 2020 at 12:18 pm #37836Still getting caught up, but here is my Day 4 page. I used some of the flowers and the background from the Dandelion kit, but then I copied some of the pieces from my Day 3 page to bring in continuity. I’m working toward establishing some standards for how I show my turnings either on-line or in a book. Loved the use of the shortcuts, but I’m not sure I’ll be able to remember any more than a few. I like the shadow effect. I think it will make a bigger difference when I get my corrected photos ready for use.
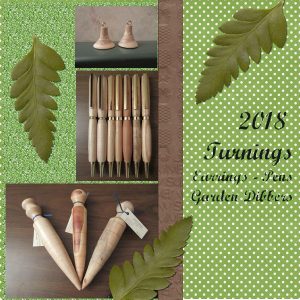
January 21, 2020 at 1:38 pm #37839Almost caught up. Here is my Day 5, Multi-picture project. I’m still looking for the right background. The green polka dots are OK, but I think I like the glitter a little better. I’d really like a little more brown, but it’s fun to just play at this point. I had to put my pictures above each other, rather than beside or the size of the objects would not have made sense. The earrings are much smaller than the pens and the pens are much smaller than the garden dibbers. Since all of the items are made from wood, I like the leaves as an accent rather than flowers. I think I’ll play with solid colours behind my titles in my future posts.
January 21, 2020 at 1:57 pm #37843January 21, 2020 at 3:29 pm #37847January 21, 2020 at 4:54 pm #37851Bootcamp Day 6:
Instead of one of the papers I used a gradient in sunburst mode via flood fill tool into a rectangular selection. I believe that this provided a unique spot for photo titles in this setup.
January 21, 2020 at 5:03 pm #37853Hi Cassel and Everyone, even the 150 Lurkers
I still can’t do text I fell out on that lesson still haven’t caught up 🙁 I have to work on it but worked around
it so I can’t do the things you showed still not there from the last text lesson, it’s because of my settings I am going to send
you a picture of my workplace it’s crazy I have to hunt for everything you show us. But I am doing better this only took me 2
hours. Where the last was at least 4 each, and some and some sweat and frustration. This time no Sweat I forreal sweat. Going
to ss my program I hate it I can’t figure out your settings.
January 21, 2020 at 5:34 pm #37855ss of my messed up program I cant ever find the things you show it horrible.
January 21, 2020 at 5:36 pm #37856Cassel
I never can see my layers either unless I click on where it says layers hiding to the top left then soon as I do it closes.
January 21, 2020 at 6:22 pm #37862Interesting lesson!
What you show in the beginning was new for me. (Making the white around the pfoto’s in your project).
I learned to do it first on the original foto an then copi/paste to the new project.
For me it seems that the errasing tool did not do the same format up and low ….
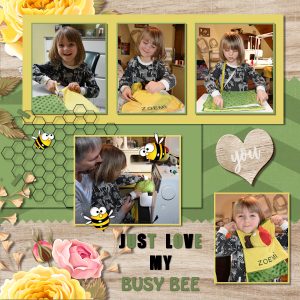
This is my grand-daughter (then 6 years old).
She loves to ‘copy/paste’ me on my embroidery and sewing machines …
This was her project: class-doll ZOEMI (a bee !!!) needed a new sleepingbag!
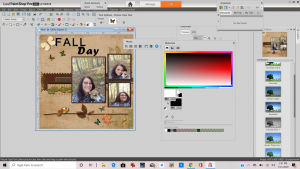
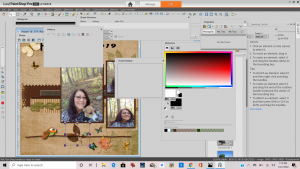
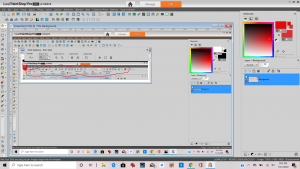
January 21, 2020 at 6:36 pm #37865Cindy, thank you for the screenshots. This shows exactly what is happening, and I can show you how to solve the most of your workspace issues.
First, as indicated by the pink arrow, you might want to close the Effects palette, as we don’t use it during the Bootcamp and it will take up space unnecessarily. Then, as indicated by the red arrow, you need to hover over that tab on the side to get the palette open. You have it set as auto-hide, which is exactly what it does: it hides back when you don’t “use” it. So, click on it to open it.

Then, when it is open, click on the little pushpin, to “pin” it to your workspace and remove the auto-hide.
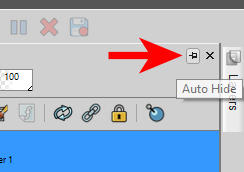
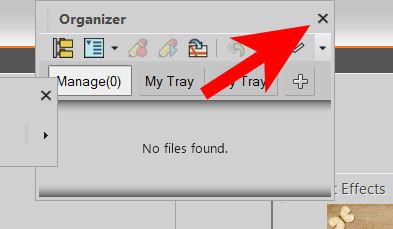
To make more room to work, for now, close the Organizer too.
Now, several of your palettes and toolbars are floating, which means they are overlapping each other and hiding some commands you are looking for. The Tools Options toolbar should be docked. Double-click on the “title” of that toolbar and it should snap into place, somewhere.
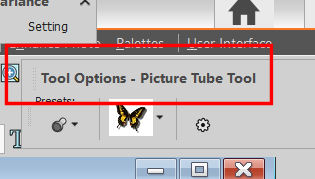
This will allow you to see the tools underneath, including the Text tool that you have a hard time using.
If you want the Tools toolbar on the left like mine, grab the end here, and drag it downward and then, to the left of your workspace. Then, double-click on it. Typically, it will snap in place on that edge. If it does not work, try it again and move it a bit lower on the left edge.
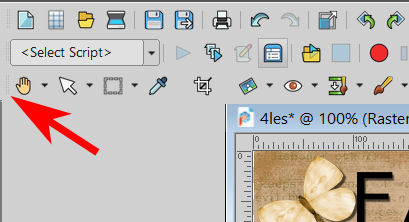
Try that and let me know how things are after.
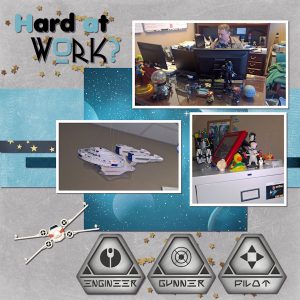
January 21, 2020 at 7:26 pm #37869Day 6 finally done. I used Galactic Adventure by Magical Scraps Galore; which seemed to be appropriate for the subject which is my husband’s office.
January 21, 2020 at 9:37 pm #37874Cassel
Oh my gosh I see now what your talking about going back in, wanted to pull my hair out and run. But I was following the
email now I came here I see what your talking about, I was looking for red and pink arrows ect in the program I didnt see
this email till now going back to try again, what I did from just the email made it worst… trying again ty you deserve
wings…
January 21, 2020 at 9:52 pm #37876Cassel
You are a Angel Cassel I like everything now except for about my layers that says open and I Like that I dont have to
chase it now, but above it dont look like yours. you rock you are Awesome. I can see stuff now
January 21, 2020 at 10:03 pm #37878Day 6 Lesson:
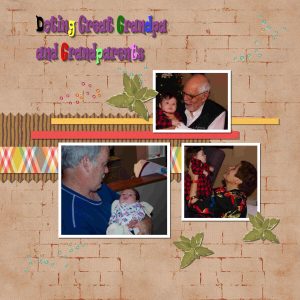
I used My pic. of My Second Great Grandbaby & free Items off google sites.
Neat how to add the frames to the pic. Cutting the Ziggad, Color the different Letters in the Text, Enjoyed the Lesson.
Dropped shadow on all.
Resize to 600 pixels
Thank you
January 21, 2020 at 10:56 pm #37879Cindy, you still have a few things that you can remove to unclutter your workspace. Go to View > Toolbar and uncheck everything EXCEPT the Standard, Status and Tools. The others are not necessary now.
For the Layers palette, above it, it is the Materials palette. You can resize the Layers palette by grabbing the very top of it, and dragging it lower, so that will display the Materials palette more, similar to what I see. We’ll get there, one step at the time.
January 21, 2020 at 11:07 pm #37881Cassel, you rock you’ve bout fixed it, ONLY what I circled in RED is what I need look mines almost like
Yours…
soon as I get this next part done I am going back and started over, and do it all the way you showed me. I want to learn to do
it right not just make due. But wanted to put up my homework but it took me always over 4 hrs because I could NOT do it your
way. I am almost there Because of You
then I can start over and learn the text the ways you showed Us.
January 21, 2020 at 11:21 pm #37882Yes Cindy, you are almost there. Do you see just above that circled area in your screenshot, there is a Tool Options? That is just supposed to be docked. Double-click on it and it should dock. The Tool Options toolbar will change depending on the tool that is active. In your screenshot, it is the Pan tool. Notice that if you select another tool on the left, it will have different settings. That is normal.
If you go to View > Toolbar, you probably still have some options checked that you should UNcheck, like the Effect, Photo and Web. UNcheck those and you will have more room for the “useful” commands and settings.
January 21, 2020 at 11:34 pm #37883Going now, I want to be able to follow all your teachings can’t wait to get it all right Then I am taking the lessons over
then I think I can do it. The right way, not my 4 hour way
thank you!!!!!!!!!!!!
thank you
January 21, 2020 at 11:58 pm #37889Gwen, those pictures are lovely. Are those your furry friends?
Nancy, let me know if you hear from Corel about that odd issue.
Inam, it is possible that you sent it by email? Since we get notifications when there is a new post, it is almost a reflex to reply to it instead of coming to the forum. Could that be the issue? At least, you noticed and reposted, and it is worth it. The shadows really give a 3D effect on your papers and photos. You can also add more prominent shadows on the flowers. You seemed to have fun with the multicolored title of your Day 6 project!
Leslie, creating some continuity is a great idea when you plan to have several pages on a single general topic. Yes, the shadows really add to the montage. You can be even more generous on the shadows for the flower. As for the shortcuts, don’t worry: you will remember those you actually need and use often. In more advanced classes, there is a technique to tweak the shadows to make the leaves look like they are “flipping” up a little on the tip. But for the Bootcamp, we stick to basics!
Jnet, those are fun photos. Did you take them?
Dorothy, that is a good idea to use a gradient. In fact, it is like making your own papers! Your photos could probably use some shadows to “pop” more. Those photos are fun to look at.
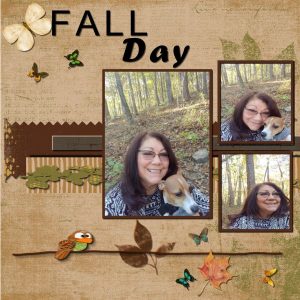
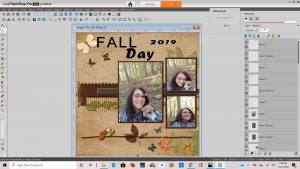
Cindy, for your Fall day project, did you resize the image using the corner handle? the bottom right photo looks a bit distorted. You added great shadows to several elements. I think you might have forgotten the ones on the papers, but your progress are noticeable! Keep it up, you are definitely determined!
Lydia, that bee theme was perfect for that story!! Fun, fun, fun. I am not understanding what you are mentioning about the Eraser tool. What is it doing?
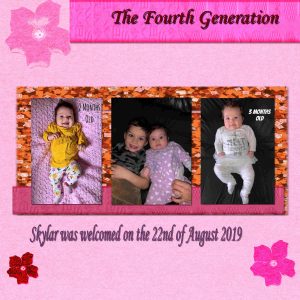
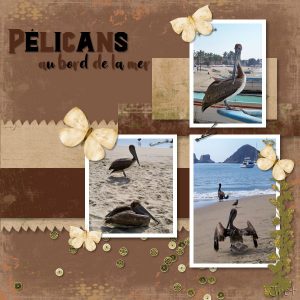
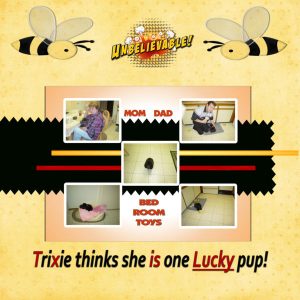
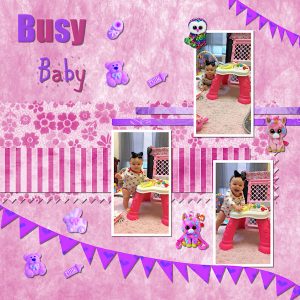
Karon, those photos made me giggle; it is really a playroom!!!
Aletha, it looks like you are getting more and more comfortable with those projects and the use of shadows. Fun photos.
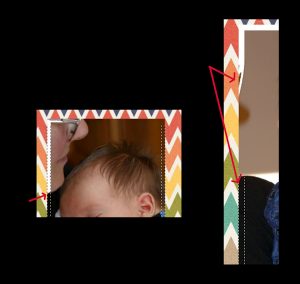
January 22, 2020 at 12:44 pm #37897Today I practice to put frames around multiply photo’s in a project.
Filling the selection border with a colour was not good.
So I made a new layer and then it went perfect.
Is this because of the hight quality of the photo’s … ?
Or did I do something wrong?
January 22, 2020 at 1:08 pm #37901Hi all,
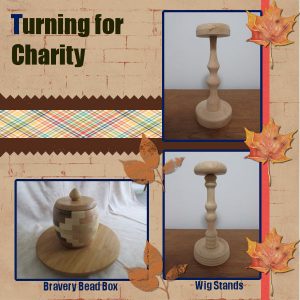
Here is my attempt at Day 6. I really liked the Pinking Shears. Still looking for a use for the multi-letter colouring, perhaps on my Christmas turnings (Red & Green). Added a few Maple leaves to this one, although the Wig Stands are actually made from 150 year old Pine (reclaimed from a mill that was torn down/rebuilt long ago) but the Bravery Bead Box is made of Maple, Cherry and Walnut. I like these photos better too and the drop shadow on the leaves makes them jump off the page.
-
AuthorPosts
- The topic ‘Bootcamp – January 2020’ is closed to new replies.


