Home of the Scrapbook Campus › Forums › Showroom › Bootcamp – January 2020
Tagged: Day 5
- This topic has 332 replies, 32 voices, and was last updated 4 years, 10 months ago by
Liese Strupp.
-
AuthorPosts
-
January 25, 2020 at 9:17 pm #38122
I tried to follow this tute very closely ill need to redo my buttonlater because I now see that it turned out very jagged I also think I doubled shadow in a coupl;e of places too.I am really glad I decided to repeat , I definitelylearned a lot this round . I am also reallyinspired by the beautiful work of everyone here .
January 25, 2020 at 9:43 pm #38124This is small redo of my day five as it seemed a bit too busy. I replaced the blue in the background with green and darkened it just a bit ,
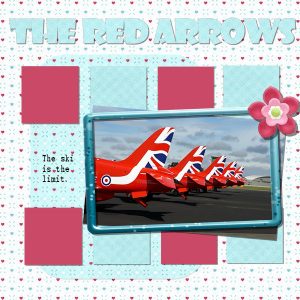
January 25, 2020 at 10:11 pm #38126I created the background, rectangle, and squares using the color picker to select colors in the photograph and the frame. The colors are a bit bland but it was an interesting exercise.
I tried using a drop shadow on the icon in the bottom left corner but the result was blurred. After trying different settings, I left it alone. I am grateful that there is a <Default> option to get me back to the start.
Before, I mentioned being confused about extraneous blank layers. They were being created when I deleted the content, not the layer. When I changed my mind on an element, I would hit the delete button which left a blank layer.
Now that I am more comfortable with the process, I will be revisiting the previous projects to practice, and hopefully, improve on them.
Thank you for an excellent workout at the Bootcamp. One of the best parts of this course is the real-time application and feedback. I look forward to more of the webinars that you have done. They are always informative and worth the time.
January 25, 2020 at 11:01 pm #38136<p style=”text-align: center;”>Final Assignment–
CONCENTRATION definately required</p>
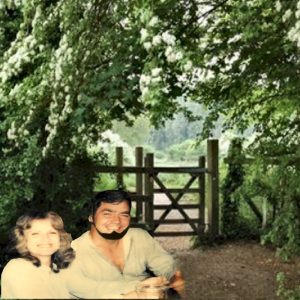
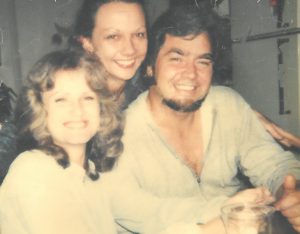
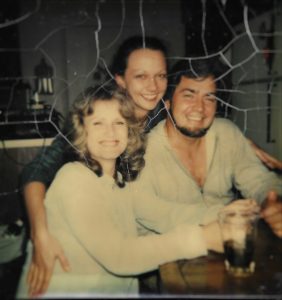
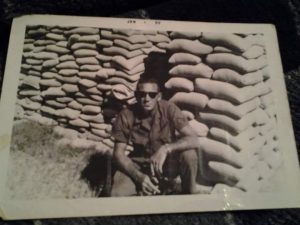
Here is my final project, although I did not make a scrapbook page and I hope that is all right. As I was going thru old images for the “BEE Happy” layout I discovered this old, faded, cracked photo that I loved. It had gotten wet at one time and the backing came off causing it to crack and curl, but I resisted disposing off it because it is one of the few photos I had of my husband and me together since I was always the one taking the photos.Since working with 2020 and Cassell I read a tutorial about the scratch removal tool. I had tried this very tool with no noticeable result. Seeing the video and finding out there was a special way it was used, sent me scurrying back to my pc to check it out. I had just cliked in the center of the image and expected the cracks to simply disapear, they didn’t. Everything is technique, isn’t it? I apologize for being so long-winded but I am so excited.
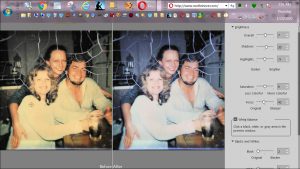
I am posting several pics, the original, cracks removed, image improved and my husband and I separated from the background and then inserted in a lovely country landscape. My photo is saved and I have learned so much. The process was very time consuming since I had to learn a totally new process with many steps. I have made many tubes so this was the easiest part, The crack removel was amazing and although I couldn’t restore all of the image I am very pleased. Thanks to Cassell for the instruction and Corel for the loan of this fabulous program.
I will be sorry to see this bootcamp end, but hope to see many of you again in March (?). Good-bye my friends!
Diana Craft aka PandorasHatBox
January 26, 2020 at 12:21 am #38138Bootcamp Day 7 Continued:
After you comments about missing shadows, I went back and took a look at what I had done. I had made a very dumb mistake trusting the Coral Auto Preserve feature. I had done the shadows on everything and did one selection on a layer when the electricity did and up and down in the neighborhood. Our computers did a nose dive. After awhile we could see again and turned on our computers. I opened PSP and then my file. It was gone! I then opened theAutopreserve fo;e and there it was, so I opened that one. It looked identical to what I had been doing so I just continued on my merry way.
Then when I started my merged layer of Trixie with wall etc , this what I discovered.
It is not easy to clear away from two crooked pieces, but you will see they did have a drop shadow, just not where I thought I had placed it.
Please learn of using from the auto save to unhide all layers and check them carefully. I spent most of this evening using the selections and the delete tools. I tried to get the freehand selection to work but it must be different.
So here is my new final day 7 submission.
January 26, 2020 at 12:24 am #38139Diana, I agree that PSP7 does not allow to see the content of the layers, but I think that if you just hover your cursor over a layer, you should see a thumbnail. I have not used PSP7 and that is one version I don’t have so you will have to tell me if that still works. Your extraction of your and your husband is great. When you added it to the other background, I suspect that you distorted it (not using a corner node) as you look a bit squished. I think that will result in a headache pretty soon! And yes, that Scratch Remover is a great tool, and the fix on your photo is remarkable
Inam, can you explain a bit more what didn’t seem to work? Maybe my instructions were not clear enough? The Text Wrapping is a feature that had been asked for many years as it has so many possibilities, but you need to know how to use it so how can I help?
Cindy, did you finally got your workspace all set?
Shirley, I guess I also forget about those!
Cyndi, if you are not afraid to play with PSP now, my objective is reached. One common thing I see with newcomers is that feeling of “what if I break something?” or “what if mess things up?” and once you overcome that fear, exploring PSP becomes fun.
Peggy, was the button part of a kit or something you made? At least, on the resized image, it does not look jaggied at all! 🙂
Gerry, I am glad to hear that you experimented with the shadows on the small logo and made the conscious decision not to add it. The reason it probably didn’t look right with a shadow is the size of the element: when it is smaller, you would need a smaller shadow and often fainter too. If you want to try and experiment more, try something like 1,1, 30,5 settings and then tweak some more. I am not saying those are the settings you need, but you will see how that kind of light shadow can give a different look than a “regular” one. Nevertheless, you might still prefer no shadow, which actually looks good on your layout.
Dorothy, oh those crashes/failures!!! The auto-preserve is good but it also has to be set and maybe it saved a previous version, several minutes before you had added the shadows!
Remember that even though the lessons are done, you can still post your projects until Tuesday (late afternoon for me). If you have posted 4 of the 5 projects, your name will be entered for a random draw. Some participants are only “missing” 1 project to post (some, 2), but you still have almost 3 days.
And there is also a survey you can fill to give your feedback on this Bootcamp.
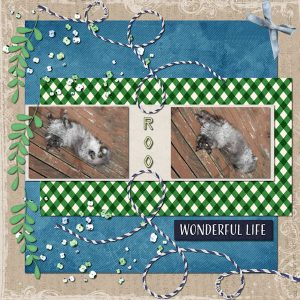
January 26, 2020 at 4:14 am #38143Hi Cassel and friends, Here is my day 4 in the camp, “Adventure”. This is my friends Main Coon, he is beautiful and this is about as adventurous as he gets as he has a disability.
I downloaded the freebie dandelion wishes 2, which is an add on from Dandelion wishes that we used last time, and have used all my papers and elements from there. I did darken some of my papers with the levels tool. I couldn’t get things to sit just right with one photo, so I cheated and it looked much more balanced with two.
January 26, 2020 at 4:49 am #38146Hi guys, I just managed to get down to complete my 1st & 2nd Days
I hope I am not too late?!January 26, 2020 at 5:10 am #38148This is my sandwich on the table
January 26, 2020 at 6:23 am #38151Hi Everyone….it takes me a while to find everything I need… so i’m on catch up… here is my go at day 6.
January 26, 2020 at 11:21 am #38157Your not to late
welcome I think you did good but when you grab your cup it will be hard cause the handle is facing you lol
2 projects down a few to go 🙂
January 26, 2020 at 11:30 am #38160yes Ma am cause of your file, its finally set up like yours
i haven’t had fun free time cause babysitting sick granddaughter was grandson hes better now his sisters sick lol
but I am going to redo 4 5 6 and do it right I don’t like my way its the search all over hunt and peck method. I like the
Cassel way.
January 26, 2020 at 11:43 am #38163Re: Reply reference # 38139
Hi Carole,
To make a very long story short:
I followed your directions; created a rectangular selection on the left side of, what I call, the cork board; activated the TEXT icon, dragged it to the North West corner of the selection rectangle, saw the T turn into a [T]; I copied my text from WORD, clicked in the “selection”, saw the [T], clicked on EDIT and saw that the “paste as new layer” and some other options were dimmed out!
I got small square window on the screen. The title read: Meta Picture Import. The window was divided into two columns. The left column titled Original Size Width in Pixels and the right titled Import Size Width in Pixels. The left side gave the width and height (of the selection rectangle, I presume) and the right gave you the option to change them. Below and outside the columns was a “check box” saying Maintain Original Aspect Ratio and right at the bottom OK and Cancel buttons.
I clicked on the OK and what I got was a VERY small copy of my text, right in the centre of the screen, outside the selection area.
I checked to see if I was on the right layer, I was!
Eventually, after many different tries, I decided to try just plain old “cut and paste”. I copied the text from word, took it to my selection rectangle and right clicked the mouse to paste. Well, that worked, except that although it was contained in the left and right boundaries of the selection, it carried on out of the bottom, until it was all copied. All I had to do then was reduce the size of the text to make it fit INSIDE the selection area!
I wish I knew how to take a screen shot. That would have made it easies to explain.
I hope you can see where I’m going wrong.
Thank you for trying to help me.
Inam
January 26, 2020 at 11:43 am #38164Hi Cassel and class
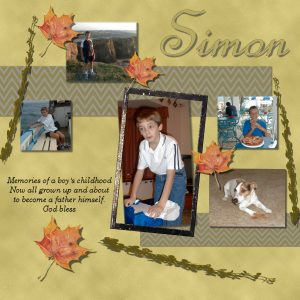
Having been through the 7 classes, I thought I’d finish off with something dear to me and mix in lots of the things I’ve learned.
My subject is my son Simon, now a grown man of 32 and expecting his own child soon. Although this was a rush job to use the techniques, I now have the tools to go back over his life and our time together and make a full scrapbook of memories, rather than envelopes of photos sitting in a shoebox. I may have to d a full book of his pre-teen years spent in south Africa and all our adventures there.One thing I found useful (and I don’t think mentioned in the tutorials), I found it much easer to navigate the umpteen layers, especially duplicates, if I renamed each layer to something meaningful (leaf, copy of leaf etc) I know this adds a little more time to the project but having learnt the hard way by deleting the wrong layer, I find it useful
See ya around, thanks to all
graham
January 26, 2020 at 12:08 pm #38166Hi everyone, here is my go at day 7.
January 26, 2020 at 12:20 pm #38167Inam, I wonder if you are not ending up with extra steps that cause issues. Here are the simplest instructions:
- Make a selection with the Selection tool
- Activate the Text tool by clicking on the T in the Tools
If you want to type in the text manually:
- Click inside the selection; it should give you that blinking cursor inside the selection
- Type in your text directly; it should stay inside the lines of the selection
If you want to retrieve the text from another document (Word, Notepad, etc.)
- Go to your document where you have the text
- highlight the text
- Copy it (Ctrl-C)
- come back to PSP and click inside your selection so you will have the blinking cursor
- paste (Ctrl-V) your text (the Edit menu won’t work for that, apparently which is why the keyboard shorcut is so useful)
From your description, it seems like maybe you didn’t highlight the text so it tried to copy the “page”. That popup window asking you questions should not happen at all. I can see why this was a struggle for you if you were bombarded with unexpected (and unwelcomed) popup you had no idea about!
Give this a try even on a blank image to test and see if it works better.
January 26, 2020 at 12:56 pm #38168Just to make sure everyone is on the same page (no pun intended), the last email was sent yesterday and was titled “All done”. Did you receive it? It includes a $20 coupon for the Basic Scrap Course if anyone is interested and a list of all the links and passwords for the various tutorials, all in one.
Drop me an email if you didn’t receive it.
January 26, 2020 at 1:52 pm #38170I GOT MY EMAIL ALL DONE
SO EXCITED I SIGNED UP FOR THE BASIC SO I CAN LEARN MORE, THANK YOU FOR THE COUPON, WOW… YOU ROCK
SO HAPPY TO START THE NEXT LOOKS SO AWESOME THANK YOU FOR THE EMAIL AND COUPON
January 26, 2020 at 3:34 pm #38171Re: Reply # 38167
Carole, you did it again!
The way you explained it this time, it was so intuitive, logical and easy. Thank you so much.
NOW, to tell everybody what I have learnt:
(1) How to edit my text, including changing colours and font of individual letters.
(2) How cool CTRL Y is.
(3) With so many layers floating about, it’s best to NAME them as you create them.
(4) What a fantastic instructor Carole is. Don’t ever hesitate to ask her anything you can’t figure out.
January 26, 2020 at 3:44 pm #38173Hope this is where one is supposed to post their results using the provided elements & papers
I skipped the sandwich because I learned about layers in the 1st Bootcamp
Here is Day 3 … some of the provided kit and some I found on my hard drive
January 26, 2020 at 3:47 pm #38176January 26, 2020 at 3:50 pm #38178January 26, 2020 at 3:53 pm #38180January 26, 2020 at 3:56 pm #38182January 26, 2020 at 7:59 pm #38187Hi Cassel,
Thanks for the information on the text tool. I am saving that link. I have a new problem. There is something wrong with my PSP2020 software. It has locked up on me. It was running very slow at first now I can’t get it to work at all. Finally, I was able to close PSP2020 down then restart my computer. I ran my utilities to clear out my files. I was able to open PSP back up but it is unresponsive now. It’s like it’s frozen. If I click on the file tab the background of the tab changes to white then it freezes. Do you have any suggestions as to what to do next? Thanks in advance for your help. By the way word is working well.
Sally
January 26, 2020 at 8:18 pm #38188Sally, I might not have very good suggestions but the few ideas I have are the following:
- Empty the PSP cache. It should be in a location similar to this (depending on your actual system): C:\Users\Users\AppData\Local\Corel PaintShop Pro\2020\Cache You can delete what is in there as it will rebuild them as you restart PSP.
- Reset PSP to default; you can do it either with File > Preferences > Reset preferences OR, you can hold the Shift key when you start PSP until you get the dialog window asking you to confirm the reset.
Those would be my first suggestion before even considering reinstalling.
January 26, 2020 at 8:46 pm #38191Hi hey that happened to me, to It was a hassle and Its not happened anymore hope no more. but mine did that froze and wouldn’t respond and bunch of stuff. What Sally said mine did the same thing, I had only dl it and had it on here like a week or so before I found you but didnt want to use up my d/ls so just hoped it would knock it off and it did.
January 26, 2020 at 10:13 pm #38192Shirley, it is quite ok to change a layout. That is also what will happen when you create your own page: you will start with one idea in mind and then change something, and then something else, and you end up with a completely different result! It is ok; you are the creator anyways!
Wafi, that is a good start for the homework. Now that you have played a bit with the layers in the sandwich exercise, it should be a bit easier.
Trudie, fun layout. I think I see shadows but they seem quite faint. If you already have them, you can probably use a bit larger to add even more dimension.
Cindy, I see that photo of your dad. The photo was photographed crooked so I think you would like to have a peek at this article on straightening photos taken like that.
Graham, that could be a great long-time project as it will surely take a while but digitizing your photos will allow you to also back them up for safekeeping. On your layout, I see that you used a different shadow setting for the papers and the leaves, and that is a great effect as the leaves would likely be a bit thicker than the papers, so that is very consistent! And yes, your tip of renaming layers as you go is a good one. I don’t mention it because I have to admit that I don’t take the time to do it (blush).
Inam, glad the latest instructions are clearer for you to use that new feature of the Text Wrapping.
C, you are working very fast! I think that either you skipped adding some of the shadows OR you posted an unshadowed version of the layouts (I do that sometimes).
January 26, 2020 at 10:19 pm #38193Question about the coupon code for the Basic Scrap Course. If you got the “All done” email and there is no coupon code in it, it could be for a couple of reasons:
- maybe you already purchased that course, so the code was not necessary
- maybe you have a DIAMOND membership, in which case, you already have access to hundreds of tutorials, and I thought you prefered to skip that “basic” course.
If you didn’t get the email in question, or if you still want to purchase that course, just drop me an email and I will send it to you.
January 26, 2020 at 11:54 pm #38198Cassel, your script for my workspace made it so easy Love it. thank You…
Ok on dads pic and thank you
Just finished mode 1 Loved doing it did everything like you said, I think, and enjoyed every bit of the extras and those
instructions. loved it. totally love no sweat no walking away no 5 hrs, just 1 2 3 4 follow cassel out the door… done
going to mode 2 thank you for the coupon it Big thanks.
-
AuthorPosts
- The topic ‘Bootcamp – January 2020’ is closed to new replies.


