
When creating various graphic projects, we often repeat the same steps over and over again. That is when scripts become very helpful tools. Several of those tool scripts are available in the Creation Cassel store, a related site to the Campus. The script we will feature here, is the "Open as a Layer".
What does it do?
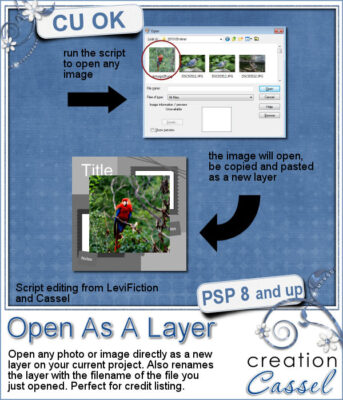
When you need to layer various elements in a graphic project, you will typically open an image, copy it, paste it onto your current project, and close the image you just copied. Even if those steps might be only a few clicks, if you need to add a dozen elements to a project, that means over 50 clicks. When using the script, it will open your navigation like you would when opening a file, and as soon as you select the element, the script will take over and execute all the same steps in order for you. In the end, you will have the new element on your project, in the center, on its own layer.
What else does it do?
One additional task that the script will perform is renaming the layer based on the file you opened. This can be a great help if you need to refer to the source of the elements later on. In fact, it was renamed to Open As A Layer-Rename to remind you of that. Something else that is convenient with this script is that it can open several images in one go, just like you would open multiple images with the Open... command.
 Where to get this script?
You can get this script in the store, HERE. And this is a FREE script too!
How to install it?
Unlike most scripts in the store, this one needs to be saved in the Scripts-Trusted folder. This is because the script will close the file after it is copied and pasted onto your project, to keep your workspace tidier.
How to run the script?
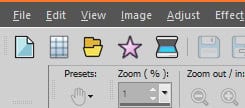
Although it might be easy to go to File > Scripts > Run... and navigate to the script in question, it is more convenient to open (and dock) the Scripts toolbar. You can open it under View > Toolbars > Scripts, and then, moving it to the top, alongside the other toolbars.
Another way to save even more time is to bind the script to an icon of your choice, and put that icon in the standard toolbar, just beside the Open command. That will save you time as you won't have to scroll through the pull down list of scripts to access it. It will be a single click on the toolbar.
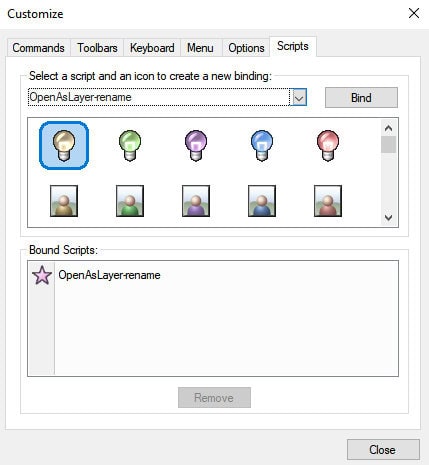
To bind the script, go to View > Customize... and choose the Scripts tab. There scroll and select the Open as a Layer script that you installed, click on an icon of your choice (there is no right or wrong icon), and click Bind. You will then see the bound script display on the bottom pane.
Simply click and drag the icon where you want it, likely on the toolbar, beside the Open... icon.