
PaintShop Pro offers one feature that is not often used. Did you ever use the Layer Styles? This feature was added with version X2. It allows you to apply various effects in a non-destructive way.
Advantages of Layer Styles
One of the main advantages of using Layer Styles is that the effects are non-destructive and editable. This means that if you add an Inner Bevel effect, you can come back later and remove that effect without having to undo dozens of steps. In addition, since version 2020, you can actually copy and paste the settings from one layer to another. It can save a lot of time and allow you to have identical settings when needed.
Another advantage of using Layer Styles is that you can edit the settings without having to start over again. Although some effects like Drop Shadows could be created on separate layers and removed as needed, others would not allow to you to start over.
A third major advantage of using Layer Styles is the ability to apply those effects to vector layers. This is something that is typically not possible using the regular effects.
How to use Layer Styles
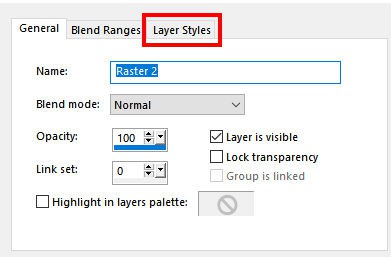
The Layer Styles is an additional tab in the Layer Properties dialog window. You can access it when you open that window directly by double-clicking on a layer in the Layers palette.
You can also find the Layer Styles option on top of the Layers palette.
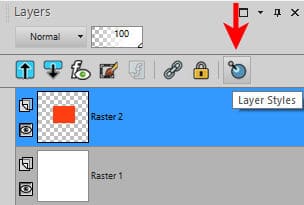
Once you click on that icon it will automatically open the Layer Properties on the Layer Style tab and you will see these options:

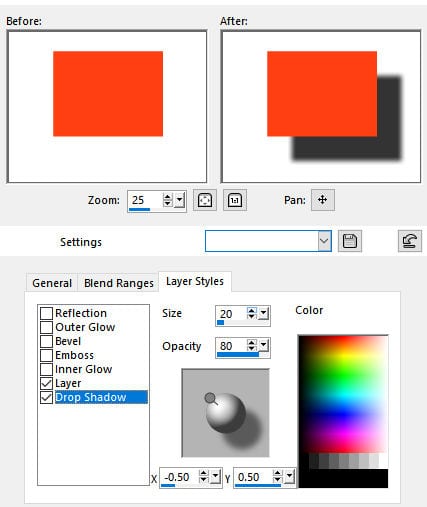
As you can see, on the left side, you can apply 6 effects, in addition to showing the base layer. Each of those effects will be similar to its counterpart from the regular menu. However, they will be non-destructive.
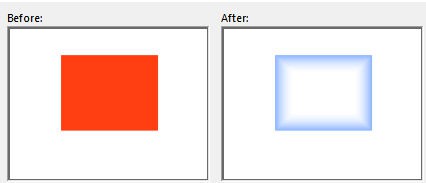
You can check one effect, or two, or more, and they will applied to the active layer. Even if they are combined, they are still non-destructive and editable. Here are the basic effects, using the default settings (except the colors so you can see better).
The Drop Shadow:
Inner Glow:

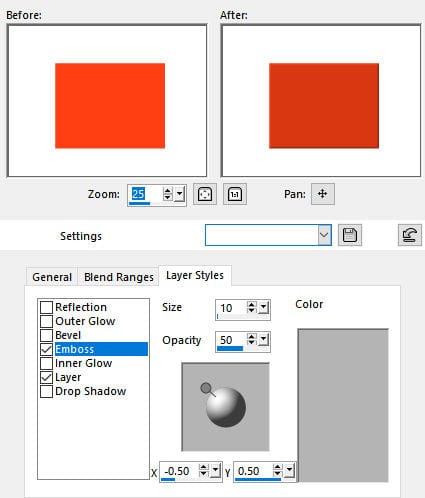
Emboss:
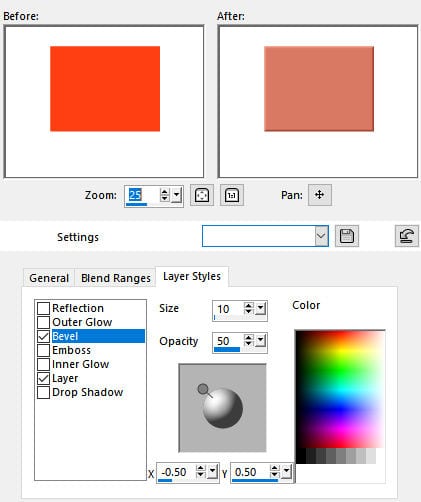
Bevel (which is an inner bevel):
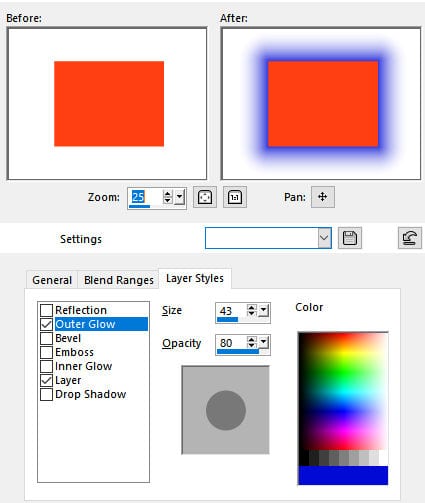
Outer Glow:
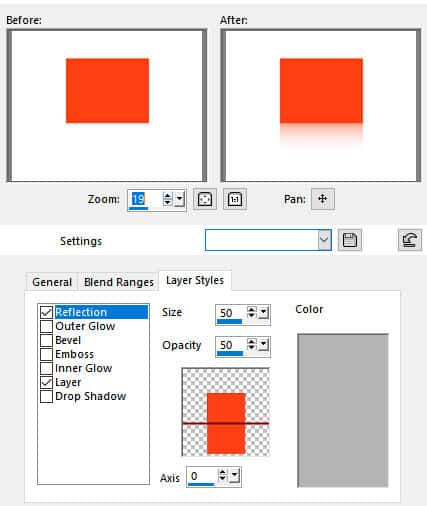
Reflection:
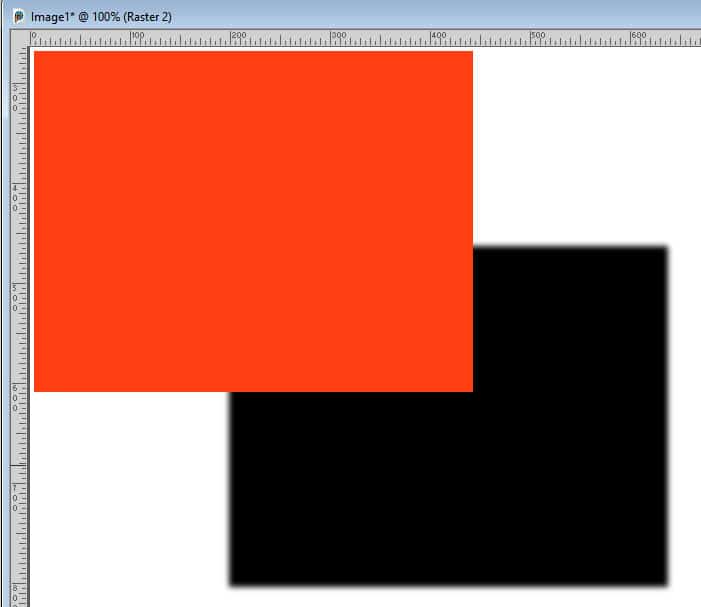
By default, the layer itself is visible, but you can also apply an effect, and remove the layer. This is what you would get with the Inner Glow without the layer:
How cool is that?
Using the individual settings
Unlike the "original" effects, the settings are not as straightforward to use. For example, if you want to apply the Drop Shadow, you will notice that the settings are in different locations and often have different names:
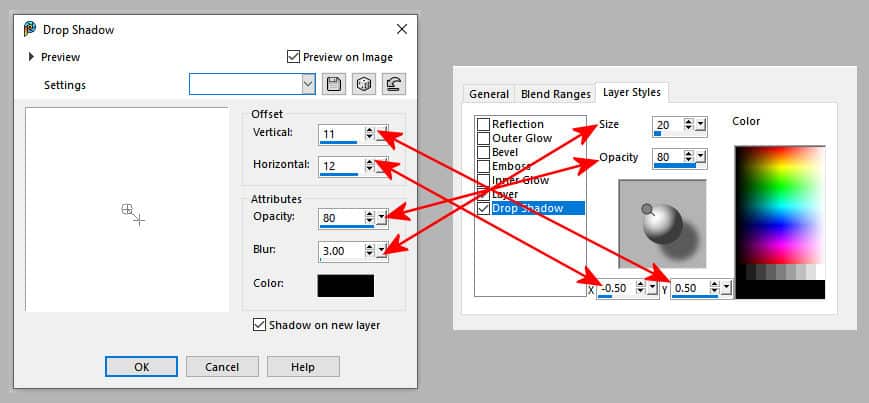
If you look at the Offset setting in the "regular" dialog window, the values will refer to pixels. On the other hand, in the Layer Style, it is not as precise. Here is the drop shadow if the offset settings are -0.1 and 0.1:

It looks like about 25 pixels offset.
But if the settings are -1.0 and 1.0, you would get this result:
This offset is about 200 pixels.
In addition, the Size value in the Layer Style can only go down to a value of 5. In the "regular" drop shadow dialog window, you could go down to 0.
Whatever effect you want to apply, the settings are always named Size, and Opacity, even if the "regular" effect has no setting named like that. It means that you likely have to tweak each setting and watch the result either in the preview pane or on your project. This would be one major annoyance, especially if you don't use those settings often.
How to edit a Layer Style
If you want to edit a Layer Style, you simply have to double-click on the layer in the Layers palette to open the Layer Properties dialog window. By default, it will open on the General tab. You simply have to choose the Layer Style tab to get the various options. From there, you can adjust the settings as you want. You won't need to delete anything or start from scratch.
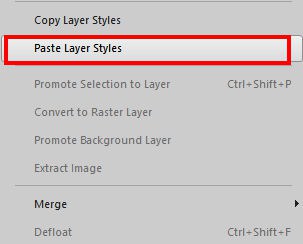
Since version 2020, you can copy Layer Styles and paste them onto another layer. The process is simple: right-click on the layer you want to copy the Style from, and select Copy Layer Styles.
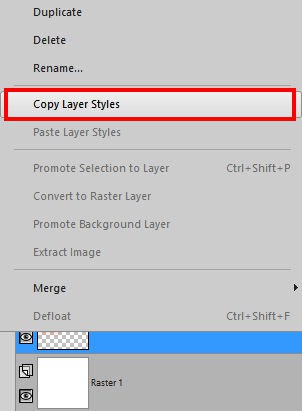
And then, right-click on the layer where you want to apply the Layer Styles.
Warning about compatibility
One detail you have to be aware of is that since the Layer Styles only appeared in version X2, if you ever want to set the compatibility mode to an earlier version, when saving your .pspimage, you might have bad surprises. PaintShop Pro will actually warn you with this window:
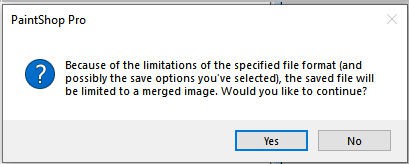
However, this is a common warning we get and we often overlook it (right?). If you do, your whole work will be flattened, even if you saved it in a .pspimage format. This will be a really inconvenient situation when you try to open this file in the future, even if you are using a recent version. So be careful.
How about Photoshop Layer Styles?
Although Photoshop has some options with the same name and similar functionalities, they cannot be shared. So if you find Photoshop Layer Styles, you can't use them in PaintShop Pro. That is unfortunate, right? However, as a small consolation, in many cases, when you download Photoshop Layer Styles, the zip file will include a seamless pattern in .jpg format. You can always use that pattern in PaintShop Pro. Simply add it to your Patterns folder and you can use them. Of course, that will not include all the effects, but you can add those yourself, as needed. How about checking out some Photoshop Layer Styles that you could download and see if you can use those patterns?


3 thoughts on “Using Layer Styles in PaintShop Pro”
Thanks for the information about how to use the layer style, I tried it out using a tube to see what the different effects did.
It’s something I could see myself using in the future.
Thank you, Carole. This info is new to me and seems quite useful. Also nice to tweak PS toes a bit, eh?
Thanks for the link. I didn’t know some jpgs come with the PS styles. I downloaded some to see which ones have. Some of the previews say “jpg included” and some show what’s in the kits so I thought those would likely have jpgs too. Good information about PSP’s Layer Styles, it really helped to see how the setting related to the settings we are used in the drop shadow. Interesting effects can be made from deleting the layer, I would have never thought about that.