
Stickers are common elements in traditional paper scrapbooking. Whether they are for alphabets, speech bubbles, decorative shapes, or others, there are stickers for everything. But what about digital scrapbooking? We can create our own stickers very easily, also for any shape. Let's see how easy it is.
Filled, outlined or as is
There are three types of "sticker looks" we can create. Which one to use will depend on our own taste, or on the project we are working on.
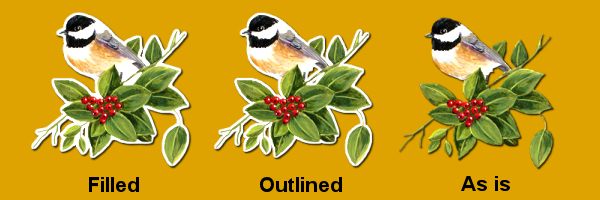
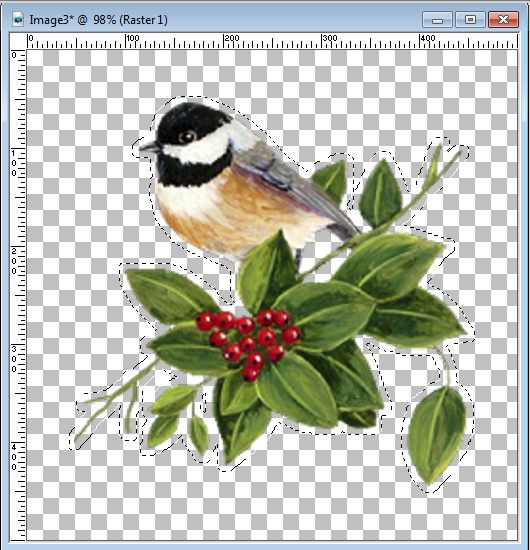
The Filled and the Outlined stickers are quite similar and in some situations, they will look identical. The main difference will be if the shape you want to convert into a sticker has any inside "holes". If you look at the example above, under the tail of the bird, there is an empty area that is either filled or not, depending on the option.
Filled Sticker
In order to create a sticker with a "filled area", there are just a few steps to take:
1- Start with a png image that already has no background. If you have a photo, you will need to extract the element before turning it into a sticker.
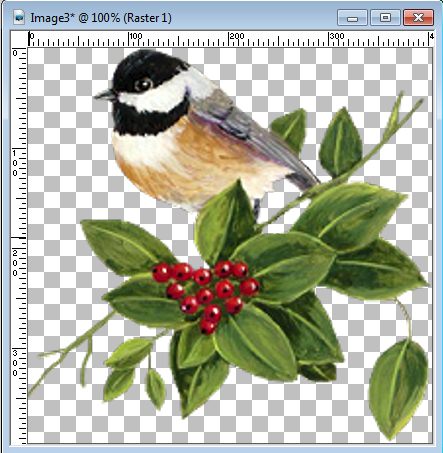
2- Expand the canvas to have some room around the element to add an outline the size you want.

3- With the Magic Wand, set to Opacity, and check the Contiguous option, click in the empty area around the element.
4- Invert the Selection with Selection > Invert or the shortcut Ctrl-Shift-i
5- Expand the selected area to what you want (that will also depend on the starting size of your element) with Selection > Modify > Expand. Choose how many pixels you want the border to be.
6- Add a new Raster layer and move it under your element.
7- With the Flood fill tool, fill in that selection with the color of your choice. Although white is typical, you can be creative and use a different color too.
5- To make sure you won't have a very pixelated outer edge (which often happens when you need to fill a selection made from the Magic Wand), invert your selection (Ctrl-Shift-i) and smooth the edge with Selection > Modify > Smooth.
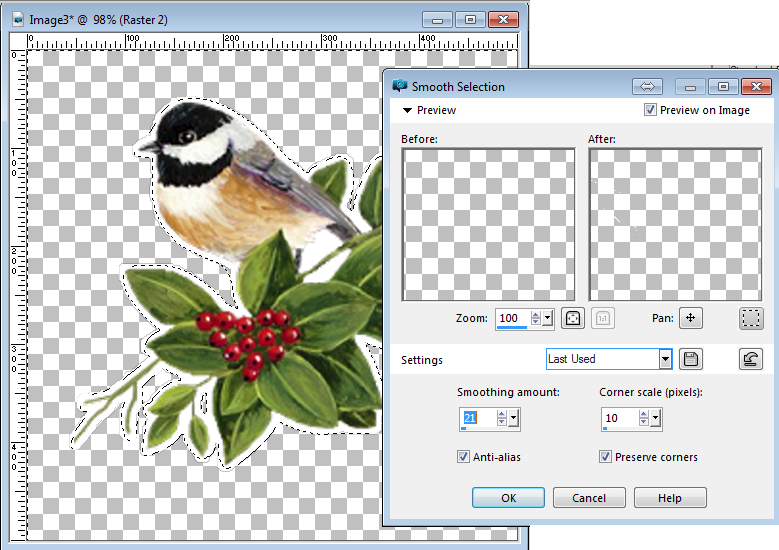
6- Hit the Delete key to soften those edges.
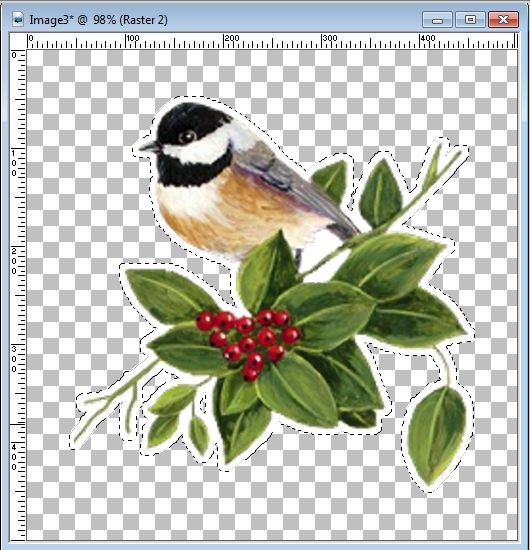
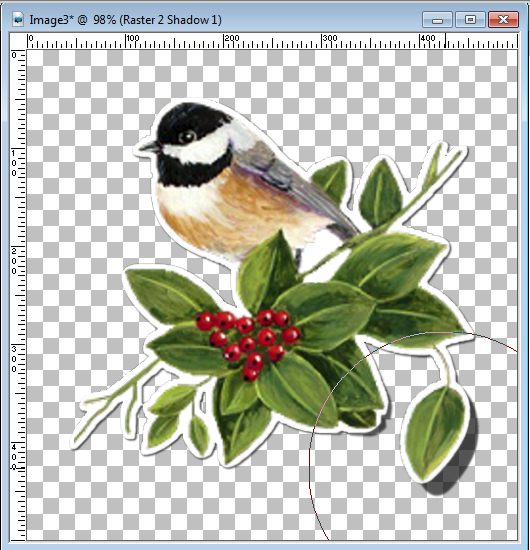
7- Merge the two layers together to get your sticker.
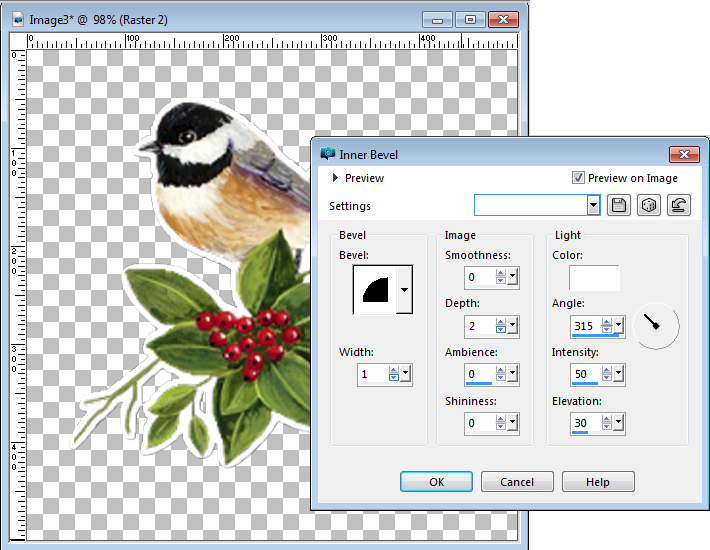
8- To make it more like a piece of paper that has some thickness, add a tiny Inner Bevel like this:
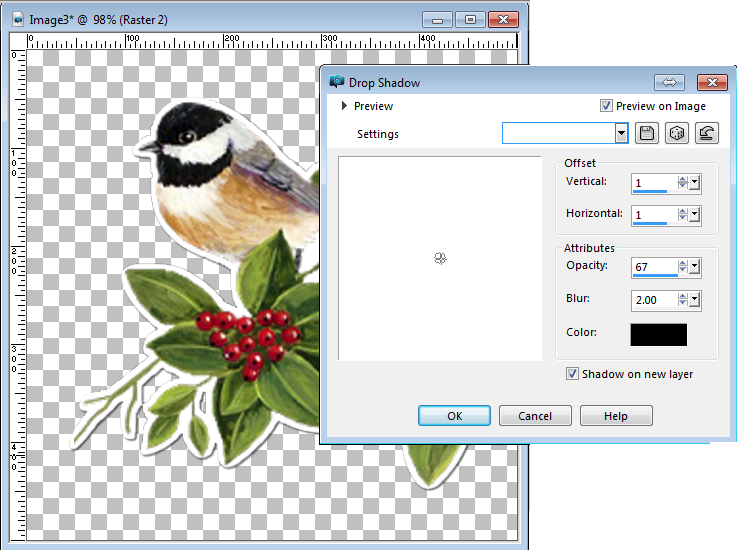
9- Finally, add a tiny drop shadow on a new layer. The new layer will allow you to tweak the shadow for a lifted element. If you don't want anything lifted, then you can keep that box unchecked.
Outlined Sticker
For an outlined sticker, the steps are the same except that you need to UNcheck the Contiguous setting on step 3. This will allow any empty area to NOT be selected from the start, and have a border that is the same thickness as the outer edge. However, if the holes are smaller than twice the border thickness, that border will likely fill in the area, which would then give you the same result as the Filled sticker.
"As is" sticker
When you are using a shape or a design "as is", it means that you are not adding any border around it. It is like the element itself was cut exactly on the edge. How do you make it look like a sticker and not just another digital element? With the Inner Bevel. That is a tiny detail that will add just enough dimension.
Lifting the sticker
One thing that can happen is that a sticker will lift off the paper in a corner or other places. In order to give that look, you will need to tweak the element (where it is lifting) and the shadow of the same area. This is done in two steps:
1- Using the Warp Brush, set it large enough to cover the whole area you want lifted, and choose the PUSH warp mode. Then, push the element in the direction you want. In my example, I pushed it toward the left.

2- Then, you repeat the same process on the shadow layer, but this time, pushing the shadow toward the bottom right. The distance between the element and its shadow will indicate how much it is lifted.
Whenever you create a sticker, you can save it as a png file to reuse later, or to share with friends who might want to use a similar sticker. Make them as large as you can since it is easier to size them down, but nearly impossible to size them up with good results. Also, the edges will likely be smoother if you work on a larger image than a smaller one.
Can you show us some stickers you have created and how you use them in a project? Let's see your creativity shine!
If you want to create many other elements on your own, to embellish your scrapbooking projects, join our DIAMOND membership. Hundreds of tutorials and classes for all levels await you.


8 thoughts on “How to create a sticker with PSP”
Thank you very much for this good trick!
Never mind. I restarted my computer and it worked. I think I found another glitch in the software. Thanks, Jackie
This is what I’m trying to do but I can’t get it to work. I expand the selection and create another layer, so I’m good till step 6. But then when I try to apply the flood tool nothing happens. And are you supposed to copy the selection to the layer created in step 5 first? Thanks, Jackie
Jackie, do you see the Selection that is larger than your initial shape? When you have the Flood fill tool, where do you click? Are you clicking inside the “empty gap” or on the initial shape itself? Also, what is the mode set at for the Flood Fill tool? Some combinations will give the impression that nothing is happening.
I tried to click in between the element and marquee and on the element itself, but I think it was a computer/software problem because I restarted and tried again and it worked. I sent you an email back explaining that but I guess you didn’t see it in time. Thanks for the response though!!
i am never to old to learn.
thank you Cassel, you give me inspiration
i am very happy with psp 2018, infact i think i say goodby to photoshop
I saved this to refer to and see what adjustments I have to make for PSE13…technically, I’m a novice, so we’ll see. You make it sound easy.
I am sure you can transpose this tutorial to PSE.