
It is still the beginning of the year and maybe you are the kind of person who likes to plan, or journal, or just have a fun booklet for anything you need to put in writing. Of course, you can buy a variety of planners and diaries but how about making your own? Using basic supplies in Paintshop Pro, you can make something simple, but, you always have the option to add more details and embellishments if your feel like it by using digital scrapbooking elements too.
Start with a blank image
You might want to create a full size page, or a half size one. Whatever you choose is going to be fine for you. For this illustration, I will be creating a full 8.5 x 11 inch paper that I can print and place in a regular size binder.

Find a Dingbat font
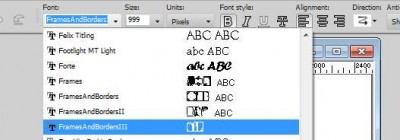
Whether you check on DaFont or FontStock or 1001FreeFonts or any other font sites, you will find many dingbat fonts. They are designs and drawing instead of letters and numbers like we would expect from a font. Check those that offer frame like designs. Choose one, and using a font viewer, make one or a few available in your PSP (read more about using fonts without installing them). I chose the font FramesandBordersIII.
Choose one frame
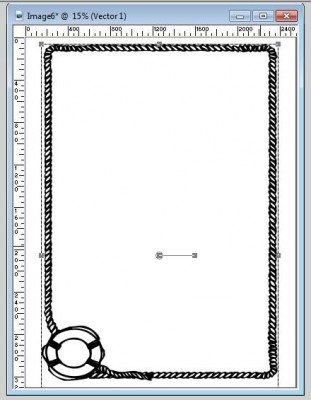
To help with the visibility, I flood filled the blank image with white. Using a black fill, and a very large font size (999 pixels), I tested which key stroke would give me a frame that I liked. The one I picked ended up being done with the letter "f".

Adjust the size
Although you might have used the biggest size you could (999 in my case) it is probably not large enough to fill your page (unless you created a very small page). While your Text tool is still active, use the corner nodes to adjust the size to cover as much of the area as you want. If the frame and the image are of different proportions, you might have to decide where you will want the element, as you will not be able to fill all the space without causing an unwanted distortion. Maybe you will want to have a blank area on one side or on the top. You can always fill those areas later with other decorative elements.
Change the color of the frame
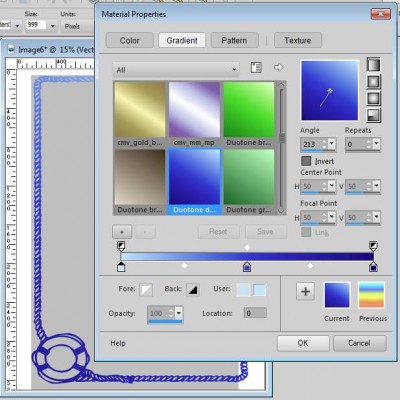
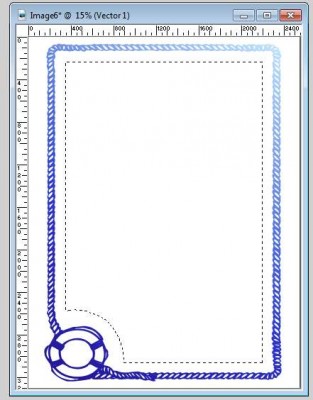
Although I started with black, it was only to see the design better. It is time to change the color. Double-click on the object in the layer palette OR you can double click on the frame itself on the image to activate it. Then, in the Material Palette, you can change the background either by a solid color, a gradient or a pattern of your choice. I picked a blue gradient (which seemed interesting with a nautical theme), and applied it.
Create lines to write on
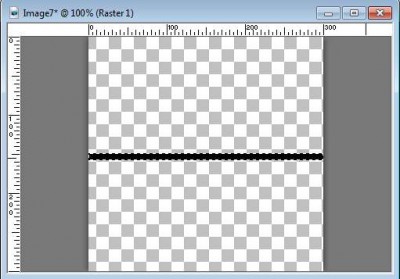
Of course, if you want this new page to only be for doodling, you won't need any lines, but if you plan on journaling or planning days and events, you might prefer some lined paper. Let's create our own. Open a new blank image, 1 x 1 inch. With the selection tool, draw a thin rectangle, about 10 pixels thick for the whole width of this image. It does not matter if you are drawing it on top, in the middle or at the bottom. Then, flood fill it with black (again, it will just be easier to see). Then, deselect.
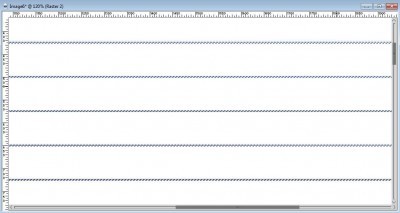
Add the lines to your page
This tiny image with a single lonely black line, will become your fill pattern on the actual page. Add a new raster layer to your page, and with the selection tool, select the area you want the lines to be. It could be a basic rectangle, but if you want to add or remove some sections, you can activate the freehand selection tool (the Lasso) and add to it (while holding Shift key) or removing from it (while holding the Alt key). Here is my selection:
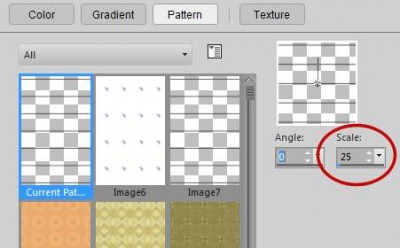
And then, choose the "line image" you created as a pattern in the Material palette. Since the small image is one inch, you can adjust the scale of the pattern to 50% if you want the lines every half-inch, 25% if you want them every quarter-inch, and so on. I chose the scale at be 25% to give me enough lines to write (after all, my handwriting is not THAT big).
Now it is time to flood fill with this custom pattern.
If you want, you can stop here and just play with the opacity of the lines layer and you have already a fun page that you can print. But, if you want to change the color of the lines, you can do that too.
Change the line colors
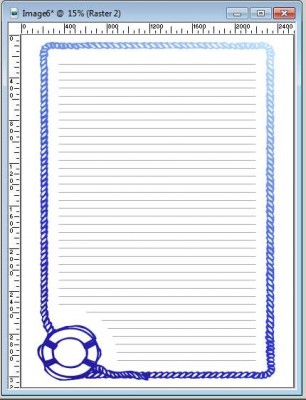
One simple and fun way to change the color of any element is by simply selecting them and flood filling. When you have lots of small details, like these lines, use these three keyboard shortcuts in a row: Ctrl-A (select all), Ctrl-F (float) and Ctrl-Shift-F (defloat). This will automatically select every non-transparent pixel on your layer, even the tiniest ones. Then, using the Flood fill tool, you can fill with any color you want. In this instance, I decided to use the same blue gradient that I used on the frame.
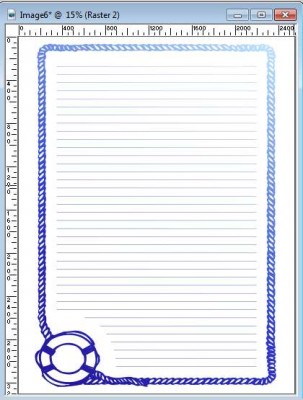
The end result
I am done. I will leave the background in white but since it is on a separate layer, you can also change it to a different color, a pale pink, a light gradient, or even a subtle pattern. But for this one, I'll keep it in white.
What will you do?
Using various frames, even from the same font, but also from different fonts available, using different colors and color combinations, different backgrounds, you can create a whole notebook of many pages. Or you can keep the background white and just print them on colored papers! Make your own book or create one for someone else. The sky is the limit when you use Paintshop Pro.
Of course, you can now add scrapbooking element, embellishments, or even add some hand painted details. It is YOUR planner, it is YOUR work. Add YOUR personality to it!
Why not use those pages to review your past year? Even though they are called planners or diaries, you can surely create fun pages and write down stories, anecdotes or events you can to document, even if you don't have photos for them.
Show us your version of a planner/diary page by linking in the comments below or posting on our Showcase Pinboard.


4 thoughts on “Create your own planner page with Paintshop Pro”
Thank you, Cassel! I design printable items such as cards, candy bar wrappers, and bag toppers. I have always used planners but I guess I was afraid it would be too hard to create my own. Now I can’t wait to make some! I agree with Joanne about the lines….this will help with my recipe cards too!
Oh yeah, it would work just as well for recipe cards. Maybe we should have a collection of cards, pages, etc. to share between us!
Thanks, Cassel! I have been messing around with making my own pages for To Do lists in my “planner”. It isn’t really a planner yet, but I am working on organizing stuff.
I was having a hard time getting the lines to work for me, and this will make it SOOOOO much easier!
Making those lines will definitely be easier now!