

With PaintShop Pro 2022, came a brand new tool in the AI family, which is the Background Replacement tool. Let's have a look at how this tool work and the various options available to you.
The AI tools
With PaintShop Pro 2021 came to AI tools, which were the AI-Powered Resize and the AI Denoise. Those tools were listed separately in the list of commands. When PaintShop Pro 2022 came and more AI tools were added, they all got combined in the AI tools under the Adjust menu.
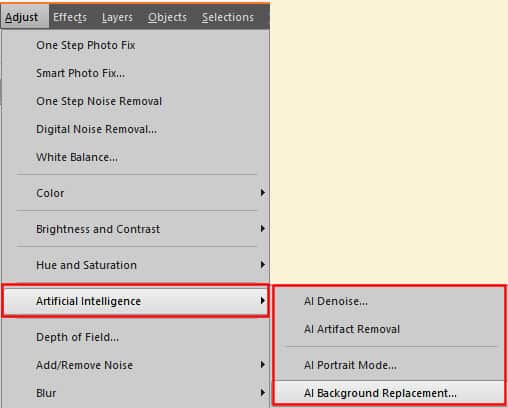
What does the AI Background Replacement do?
As its name suggests, the AI Background Replacement tool aims to extract your subject and replace the background with something else. Overall, the tool will make a selection of human subjects in your photo. It will do a fairly good job at identifying those subjects, using its artificial intelligence, however, it won't be perfect by all means. That is why you will still have options to tweak its selection before applying it.
Selecting the subject
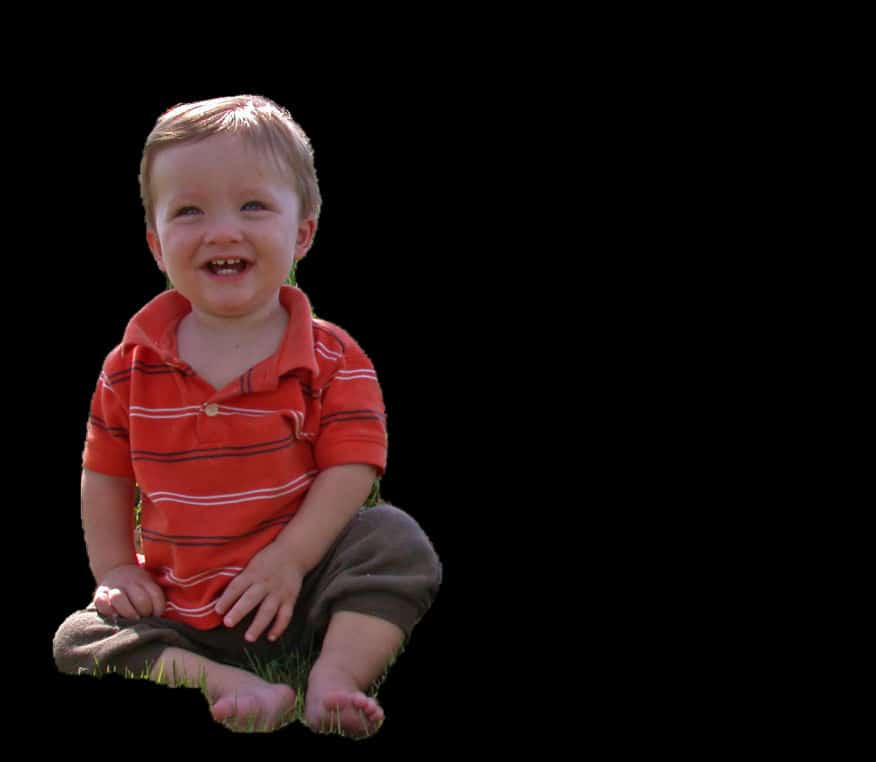
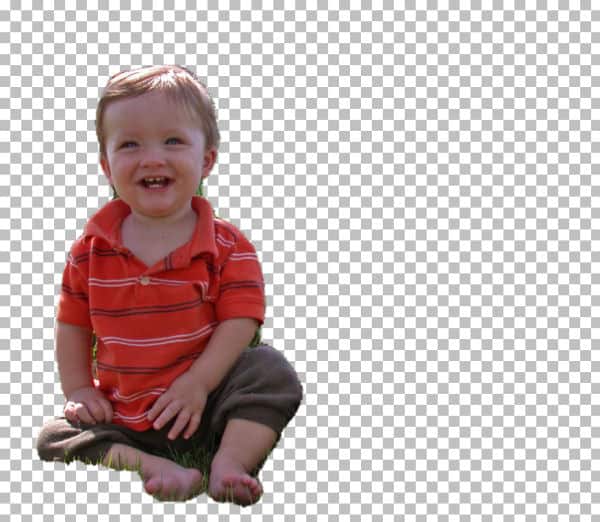
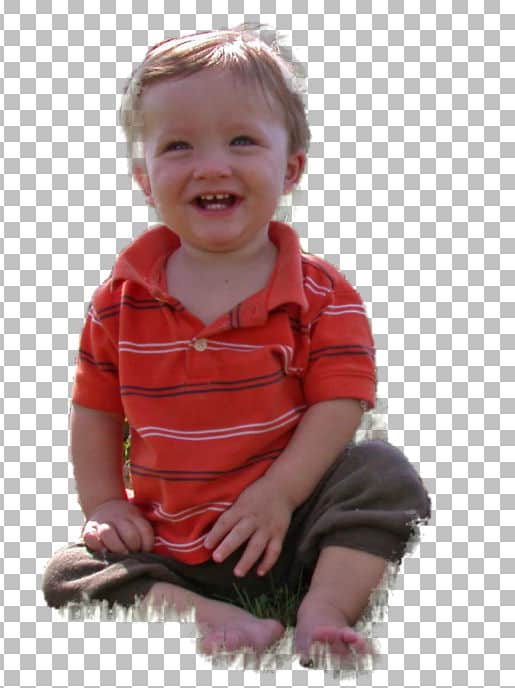
The first step will be to identify the human subjects. This is what I get with no adjustment. Notice how the toys are not selected, while the child is fairly well defined.

Checking the selection
Although the program will make a fairly good approximation to select your subject, you might want to tweak that. On the right side of the first window is a set of tools to help you.
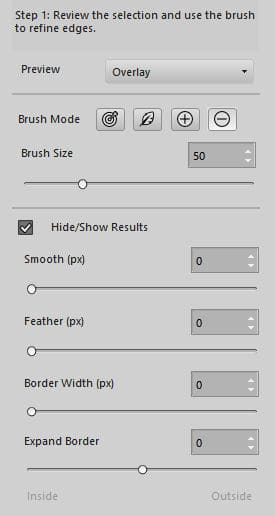
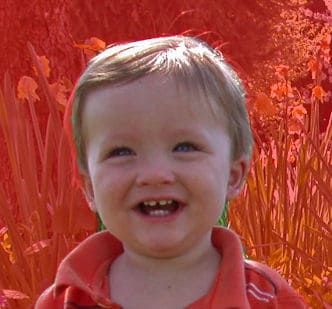
The preview offers 4 options to display the selection. The reddish image above used the Overlay type of preview. If you choose the Black option, everything will be black except your subject. This could be helpful if you plan on having a dark background or if your subject is light in color:
On the other hand, if you choose the White option, the unselected area will show as white, around your subject.

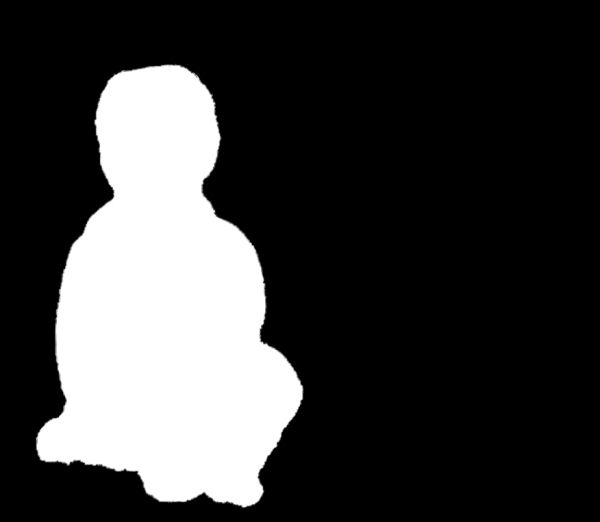
The Black and White will display the selected area in white and the rest in black. It could be useful if you want to identify any holes or specks inside the selection of the subject.
The last option, the Transparent one, will show you the subject with no background at all.
Any of those options can be used when you want to tweak the selection. It will depend on the color of your subject, the color of the background to be removed, and maybe your own preference too.
Tweaking the selection
Typically, you might want to start by using the default Overlay preview. This will give you a view of what is selected and what is not selected from your image. It will allow you to see if there is a part of the shirt that should be added or an object that was the same color as the pants, that should be removed.
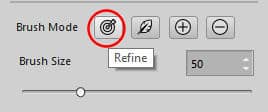
Using these settings, you can now Refine the selection that was auto-generated.
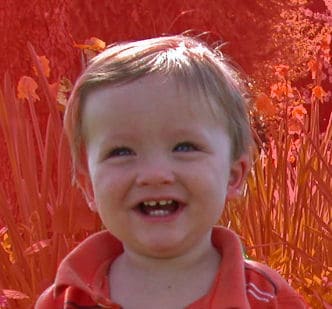
Let's brush around the head, along the edge of the selection itself as you can see that some hair, on the left side, seems to be missing and on the right side, it extends a bit more than it should.
This is the first result.
That seems better, doesn't it? Let's see the same selection with the Black and White option. You can actually see that some areas were added, but apparently, at a different opacity level. It has added some hair on the top and removed some extra below the ears. This might still work.

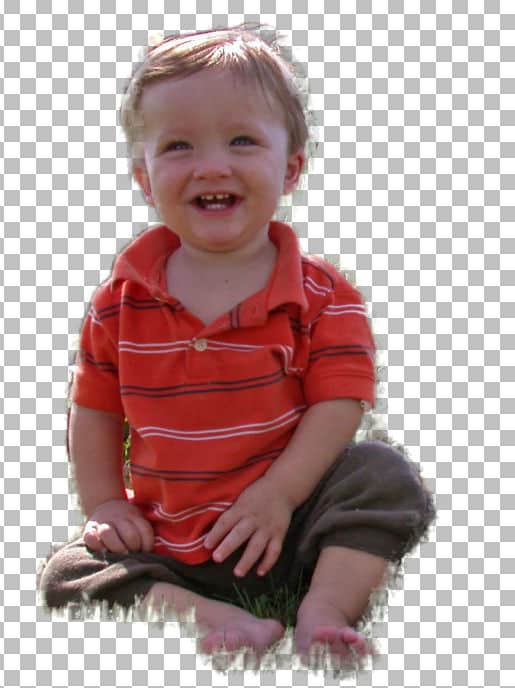
Let's look at it on Transparent background.

That might not be as good as it looked initially. However, we have to remember that the AI is not perfect and we might still need to tweak the end result further.
More tweaking
There are other adjustments that you can use to refine the selection. Although none of them will be "perfect", you can get some pretty interesting results. It will depend on your initial photo and also what you want to do with it.
Here is the selection that I got after using the Refine brush all around it. Here is the starting selection.
Changing the Smooth (px) settings, it will modify the edges in this way.

On the other hand, adjusting the Feather setting will obviously give a softer edge, as expected. Depending on your subject, it might or might not be needed.

The next setting, the Border, is interesting as you will see the grey border appear WHILE you are setting it, no matter what is the preview style.

And when you let go of the slider, it will apply to the selection and give you the end result.
The last setting is going to be either contracting ...

or expanding the selection.

There are lots of tools that you can use the refine the selection of your subject, even if the AI will give you a headstart. If it is still not to your satisfaction, don't worry, you will be able to adjust the result later. Nothing will be definite.
Now that you have your selection good enough, it is time to add the background to it. Click the NEXT button at the bottom right of the window.
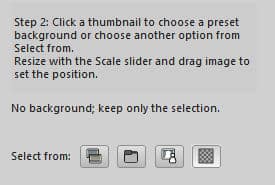
Choosing a background
The next window will offer you four main options: Preset, Custom, Original and Transparent.
The Preset will immediately display some existing backgrounds that are included with the program. They are also categorized so it might be faster for you to select one.

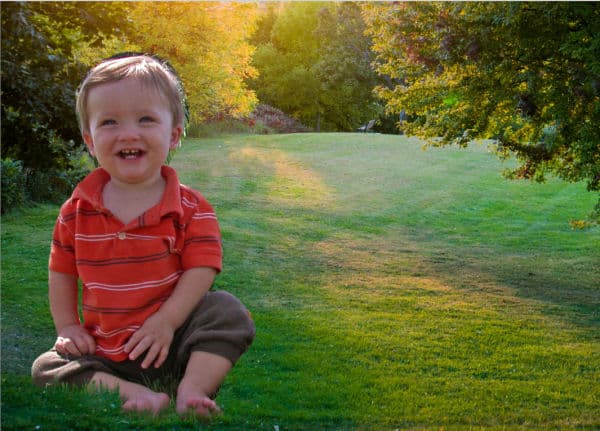
As soon as you select one of the backgrounds, it will be displayed behind your subject, so you have an idea of what it will look like (don't mind the odd selection around the head, it will be adjusted later).

At this point, you can move and scale the background. The subject will stay in the same place and in the same size at this point (that can be changed later).
If you choose a Custom background, you will simply navigate to the desired image on your computer and it will be displayed.
At this point, there is no way to keep this custom background as a new preset.
If you choose the Original option, it will simply keep your current background BUT will keep the selected subject on a separate layer, so you can still change the background as you would have done, without this tool. It will just have helped you extract your subject.
Finally, the Transparent option will remove the background completely, leaving you with the extracted subject only.
Almost done
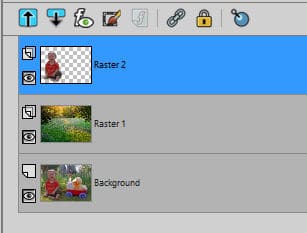
After you click the DONE button at the bottom right of the window, you will be back inside your typical workspace and your image will have a new background. In fact, your original image is not even touched: your subject and the new background are all on separate layers.
At this point, if your subject was not extracted to your liking, you can still tweak it with the Eraser tool to get something better.

Pros and cons of the AI Background Replacement tool
Although you might use this tool to speed up your process of extracting a subject from an image and adding another one, beware that it is not a perfect tool. It might be referred to as "artificial intelligence" but at this point, it is still not any more intelligent than you are! You are likely to still need some tweaking afterward.
One little detail that I find is that although you can always erase some extra, afterward, using the Eraser tool, you can't UNerase anything. My recommendation is that if you want to tweak your selection afterward, you better have more to remove because you won't be able to add if too much was removed.
If you don't have access to this tool because you are still using an older version of PaintShop Pro, don't despair. There are other ways to achieve something similar, using a combination of the Background Eraser tool and my favorite technique to Extract elements.


