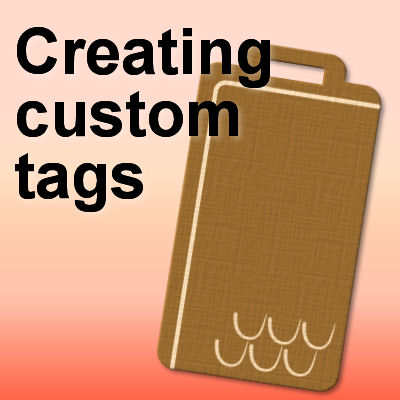

Whether you are working on a scrapbook project, a sale flyer or any other type of composition, you might want a custom tag that you can customize with the color, texture and text of your choice. Let's see how you can create custom shapes that you can use and reuse again.
Creating a shape
Although you can have a very simple rectangular or round tag, you might want to get something a little more creative. Let's use the Vector tools to create something a little bit more unique for you.
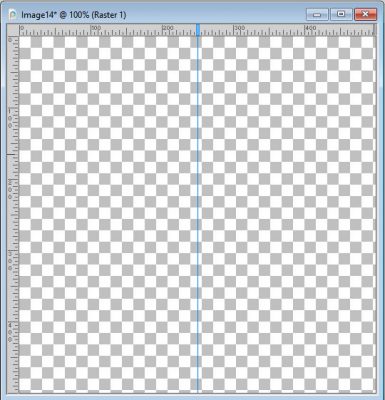
Open a blank image and add a vertical guide in the center. Since we will work with vectors, you don't have to have a huge image. I am working with a 500x500 pixels image.
I will start with the Rectangle tool.

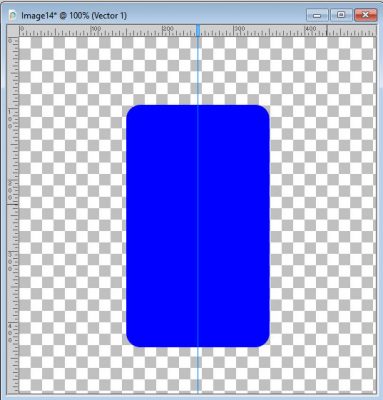
In the toolbar, I want to set the Mode to create a Rectangle (I could have chosen a Square, but not this time). I want it created as a Vector and I like the idea of rounded corners so I will set the Horizontal and Vertical radius to 20.

In the Materials palette, I will choose a Fill color but no outline. Although the color has no real importance, I tend to create mine in blue, simply so I can find them quickly among a bunch of black shapes. You can pick a different color if you want. After all, you will change that color when you use it in your project.
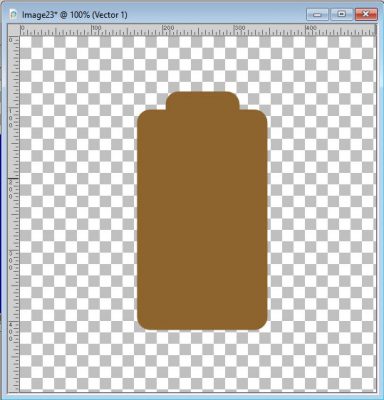
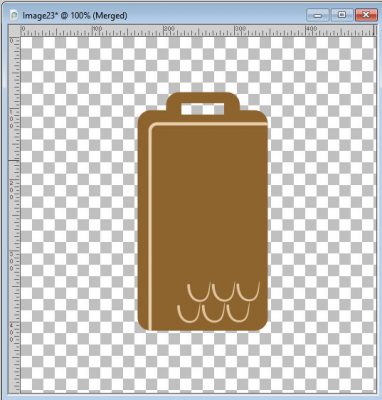
Let's draw a rectangle that will be about the size I want for the tag. Then, move it in the center, using the guide for that.
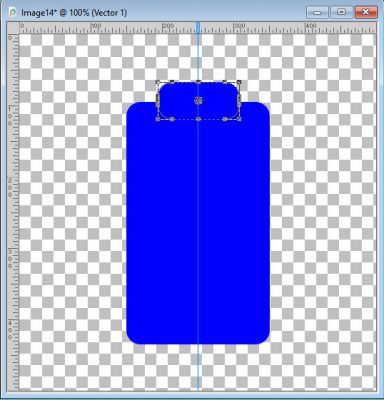
This would be a boring tag if we left it as is, so I will add another rounded rectangle to the top part. Changing to the Edit mode after, it allowed me to move that smaller rectangle to the center.
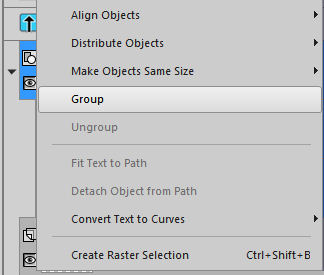
Now that you have the basic shape for your tag, you will want to export it as a preset shape. In order to do that, you need to group the two rectangles into one Vector group. Go to the Layers palette, and click on both Objects, holding the Ctrl key.

Then, right-click on one of those objects and select Group.
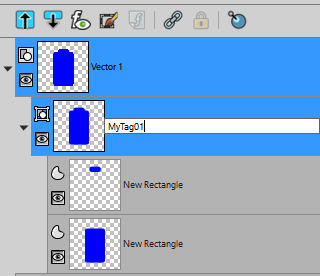
Now, the Layers palette will look like this. By default, the name of that group will be called Group1, and that is the name you need to change.

Change it to a name that will not be too generic so it won't overwrite any other existing or future preset shapes.
Export your shape
Once you have created the combination of shapes, grouped the objects, and renamed the group, it is time to export it. Let's go to File > Export > Shape, and on the popup window, I will choose the same name as I had used for the Group. It is not essential, but a good habit as it will just make sense.

Use your shape
Now that the shape is exported, it should appear in the drop-down list of shapes.

When you are ready to use this shape, you can choose any color in your Materials palette as a background. Don't use a foreground as it will add a stroke around the individual shapes of your design, which is not going to make much sense. In the toolbar, when you are ready to use that shape, UNCHECK the Retain style option. Otherwise, it will stay the same color you had drawn the shape in the first place.
![]()
And finally, when you add your shape to your next project, hold the Shift key to make sure that the proportions are respected. If you want, you can change them later but keep it standard to start.
Customizing your tag
Once your tag is sized the way you want, you can right-click on the Vector layer and Convert to raster. This will allow you to paint on it, or draw, or add various designs since you cannot do that on a Vector.
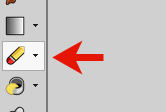
One thing you might consider, however, is to add a hole so you can insert a string, a chain or a ribbon. You can create a variety of holes, whether it is round, oval, or rectangular. Whatever shape you want, you will do that with the Eraser tool.
Select the shape you want from the basic shapes (round or square) and adjust the width (if you want the hole to be oval or rectangular) and the size to fit the dimensions of the tag.

At this point, since it is a Raster layer, you can apply various effects, paint, draw, add a texture, add a bevel, etc.
One thing that you might want to consider is that it is always better to add the bevel once the tag is on your project; that way, the bevelling will match the other settings of your project. If you ad a bevel now, and then rotate or flip your tag later, the light and dark areas of the bevel will no longer match. Just keep that in mind.
Make more
Of course, you can create a variety of tags using this approach, whether they are rectangular, circular, square, oval or triangular.
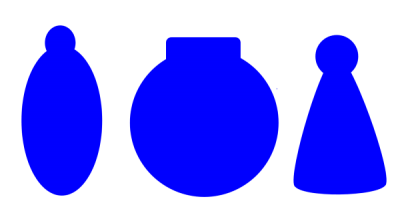
What will you make?


