

Cropping is often used to fit an image into a limited space or to get rid of unwanted parts of a photo. You can typically think of cropping in a rectangular, but you can also use other shapes. The process is similar but has a couple of slight differences. Let's see how you can crop a regular rectangular image into a circle.
Promote the background
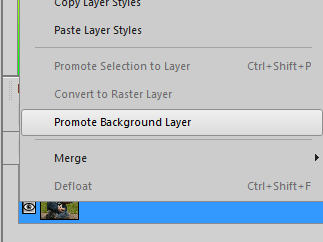
If your image is a background, it won't let you have a transparent area. It will automatically fill anything you delete, with the background color of the Materials palette. So if you have a background layer, right-click on it, and choose Promote Background layer. That is when you will see the layer's name change to Raster.
Make a selection
Activate the Selection tool (it shows as a little rectangle and is typically the third icon in the tools. If you don't see it, it might be visible by clicking the little triangle on the side.
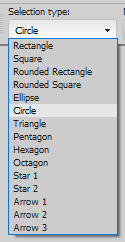
Once you have it active, go to the settings and under Selection type, choose Circle (or Ellipse)
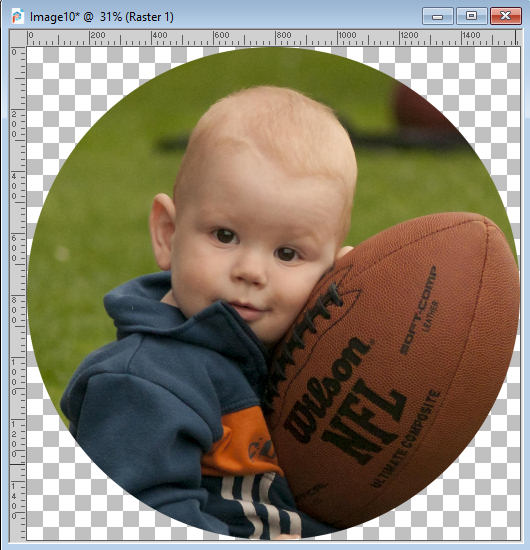
Draw your circle
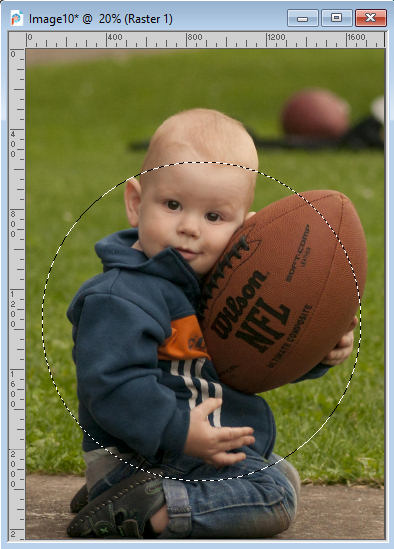
Although it might be intuitive to start your selection on a corner, you need to start the Circle selection from the center so you need to guess where the center of your subject is. If you are not exactly sure, don't worry as you can move it later. Just make sure you don't make a selection that will touch the edge. It would then show a straight line instead of a neat curve.
Adjust your circle
If you need to adjust the placement of your circle, right-click on the selection and move it where you want. You don't have to redraw it if it is off.
If you find that the circle is too large or too small, you can edit this with the Edit Selection command. You can find it either under Selection > Edit Selection, or by clicking the icon in the Layers palette. This will turn your selection to a pink area that can be manipulated just like any object, using the Pick tool. Once you are happy with the size and placement of the circle/ellipse, click on the Edit Selection again to make the familiar "marching ants" reappear.

Crop
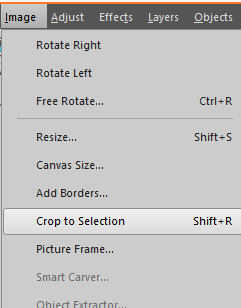
Under Image, simply selection Crop to Selection, and you are done.
Now you can save your new image as a png format, making sure that you have set it to keep the transparency.
And you can use the exact same steps to crop in another shape, whether it is a triangle, a hexagon, and others.


5 thoughts on “How to crop in a circle”
Being able to move the Selection to reposition is a useful tip and I hadn’t picked up on that from the Corel tutorials that I have looked at so far. Thank you.
Yes, that is such a tiny but useful tip!
Just tried to do it, to be able so easily to move and adjust the position, that is really cool, thanks for this “how to” 🙂
Thanks, Cassel. I hope you are safe and well. We are staying in and I have been doing some digital scrapbooking-SURPRISE!!! HaHa. Just ordered my 25th book from Shutterfly. I dearly love this hobby. It is so exciting to see all of our photos scrapbooked into something we actually look at, – and not just a box of old pictures, or worse yet, photos or just images on a phone. I consistently try to encourage my friends and family to get these pictures in books. Of course, I tell them about Corel PaintShop Pro and your wonderful teaching. I have missed your recent posts because of other things I had to get out of the way before easing into my favorite thing to do, – scrapbook. Wishing you and yours safety and sanity even though quarantining can be hard. I particularly miss seeing my mom in her retirement home 70 miles from me. Her facility is locked down to protect all the residents there. Well, back to scrapping. Stay well, my friend.
Thank you for the tip ~ I never thought to use right click to move the position, just kept repeating until position was right ~ this is going to save me a lot of time and frustration!
A great big virtual HUG!