

One major advantage of digital scrapbooking over the traditional paper scrapbooking is the time needed to start and complete a project. Of course, one can still work hours and hours on one layout but you can also stop midway and get back to it later. However, some scrapbookers feel overwhelmed when they want to do scrapbooking because they see the whole project in front of them and they know they don't have 3 hours available before dinner. Not even one straight hour.
Let's have a look at ways you can organize your projects in small tasks, and it will seem more feasible in your busy life.
Group everything
When my kids were young, I used to sew a lot of their clothes. With three young kids, I didn't have the opportunity to work for 3 hours in a row, so I would batch work, and one task was to group my stuff in big Ziploc bags based on the piece I was going to make: the fabric, the pattern, the thread, the buttons.
You can do the same thing with your scrapbooking supplies, and since they are digital, you don't need Ziploc bags.
Group your photos
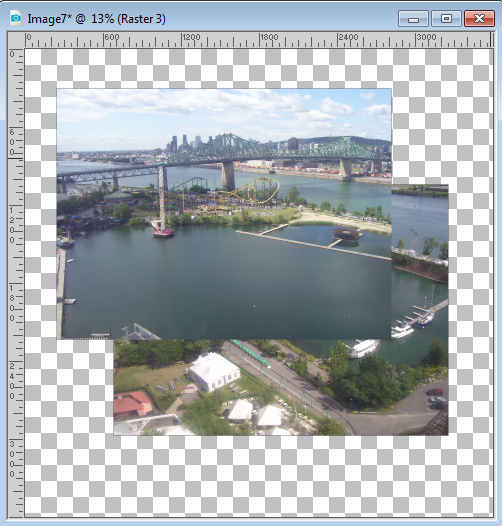
If you are planning on working on a 12x12 page project, open a 3600x3600 pixels blank image. This will be your "Ziploc bag".
Browse through your photos and decide which ones you feel you will use together. Of course, if you want to use only one, it is fine too. Add each of those photos to your blank canvas. No resizing. No editing. Even if the image is larger than your 3600 pixels canvas, it won't be cut off.
Add information
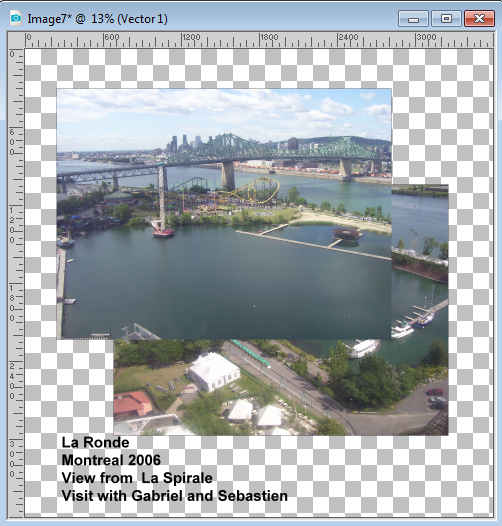
Using the Text tool, just add some details that would be pertinent for these photos: date, location, names, and if you have a particular story to tell about the photos or the event, put it in the text. This is only to be used as reference later, but at least, you won't forget those details.
Add some papers
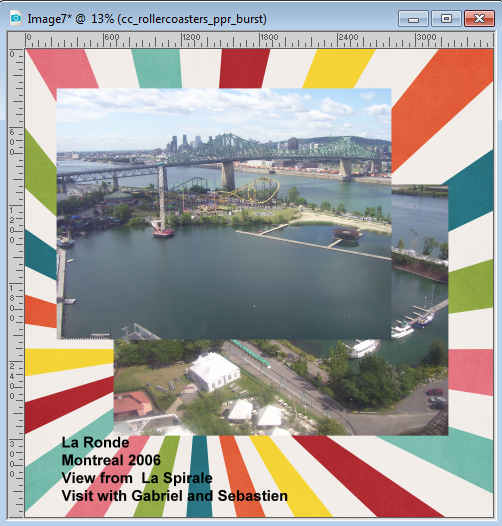
You are not going to make all the decision immediately, and you will be able to adjust your choices later. For now, just find 3-4 papers that you feel might be interesting to use with those photos. Using the Open as a Layer script, those papers will be added as new layers AND will keep their name. This will allow you to go back to the kit you used even if you only come back to your projects in a few months.
Add some elements
Using the Open as a Layer script will allow you to choose a few elements (frames, buttons, tags, etc.) that would be good for your project. It all comes down to the theme, the colors or your own preferences. Just like for the papers, it is not a final choice, but just a starting point.

Save as .pspimage
Remember that this task is NOT to make your page. No tweaking. No playing with the papers, the photos or the elements. Now, since you want to keep all those layers intact to continue your work later, along with their names, you need to save the file in a .pspimage format. There is no use to save in .jpg format yet. How will you name the file? That is up to you. For now, you can have a working title that could be the name of a person, the event, or the date or a combination of them (ex: name+date) especially if you will have more than one page about "Paris", or "2000".
How long did that take?
You can repeat the process for many photos you want to showcase and set yourself up to work more effectively when you have another short period of time.
Can I challenge you? Can you make several "Ziploc" bags for your projects?
The next step will be to Fix your photos.


2 thoughts on “10 minutes to scrap – Group it”
Yes this is the first time I’ve done this and it was very helpful.
I did take a lot if time sorting out papers etc but it made it so much easier.
Thanks Carole.
Gwen
Thank you Carole for these valuable tips, indeed, I spent a lot of time choosing photos, colors and elements during the last challenge. On the other hand, I had done the preliminary work for the templates by making the locations it was faster to make the page.