

If you are creating elements, for scrapbooking, card making or other creative projects, you will typically want to give a more realistic appearance to your element instead of the default flat looking effect of a graphics program. Where would you get those textures?
In PaintShop Pro
PaintShop Pro typically comes with a certain number of textures that you can use from the get go. If you are using a recent version of PSP, you might be wondering where those textures are, because you seem to have only a few. Don't worry, you can get more on the Home page. Follow the instructions on this article to add more to what you have by default.
Online downloads
You can also go ahead and download free textures or purchase some from various online stores. Scrapbooking stores will often have some texture overlays you could use. Even if they are promoted as Photoshop products, if they are in .jpg, .png or even .psd format, you would be able to use them in PaintShop Pro.
The Texture command
The most obvious way to add texture, would be to go through Effects > Textures Effects > Texture. On that window, you will get a drop-down list of the textures available to you. The length of the list will depend on how many textures you have collected over time.
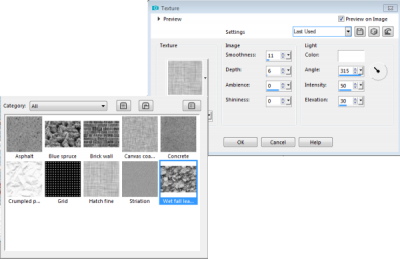
This command will add a texture that will give a 3D look, and depending on the settings you choose in the Depth and Smoothness, the end result will be different, even if you are using the same texture.
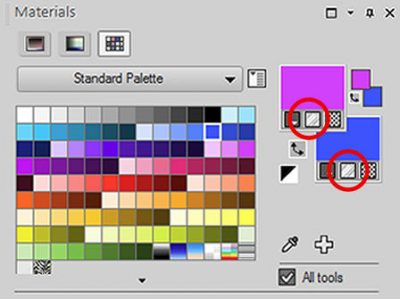
The Materials palette
Although it is not the most obvious place to go to add some texture to a flat element, the Materials palette will include a texture element, if you choose so. Notice the second icon under the swatches.
Once you click on that tiny icon, you will see that the material (whether it is a solid color, a gradient or even a pattern) will appear somewhat fainter. That is the look of that material, with the texture applied; the more black in the texture, the fainter the colors will be because wherever there is black, the color will be removed.
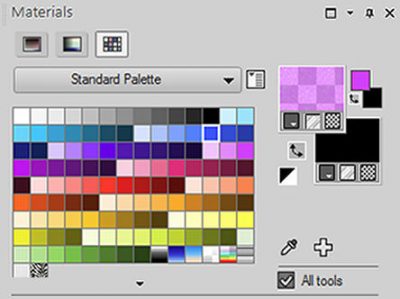
Of course, this does not give you a good view of what the texture looks like, so you need to double click on the swatch to see the full details.
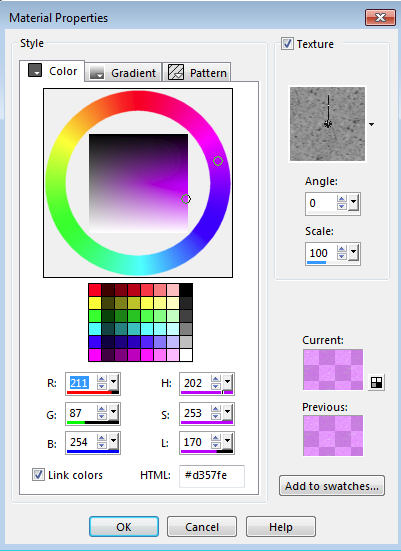
In this example, the Asphalt texture was added and the transparency of the color is modified: black will block the color, white will let it through and every shade of grey will give an intermediate level of transparency.
Notice that you also have a drop-down list of textures you can use.

Do you notice that the textures are the same as in the actual Texture command? Yes, that is right. Whenever you create or add a new texture to your supplies in the Textures folder, it will appear on both locations! Isn't that cool? Add a new Raster layer on top of the paper you want to texture to create a separate overlay and flood fill with that textured color. You will get something like this:
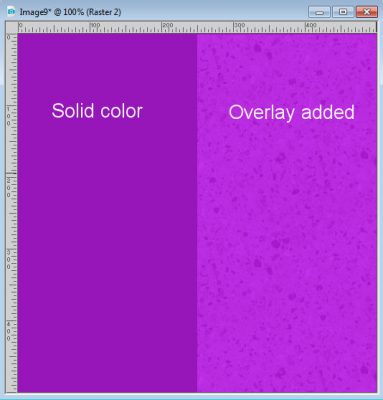
From this point, you can play with the opacity of the overlay layer, or the blend modes or both. The possibilities are endless.
The emboss command
Embossing will automatically add some texture, although it will only be in greyscale. Let's open the same texture we have been using since the beginning. I found it in the Corel supplies here:
C:\ProgramData\Corel\Corel PaintShop Pro 2019\Corel_15\Corel_15_03
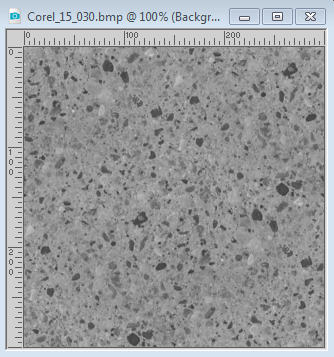
I opened it on my workspace, and now, I can use it in the Materials palette as a pattern to fill one layer on top of my flat paper. Then, I can go with Effects > Texture Effects > Emboss. That command has no option to set so you will just have to click OK. And here is what I get.
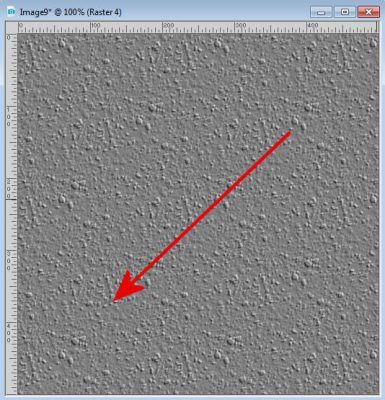
Although I can get an interesting texture, notice that the light source seems to come from the top right, and not the top left as we use as a standard. If you are ok with that angle of the light, all is good for you but since I want the light source to come from the top left, I will simply rotate my layer.
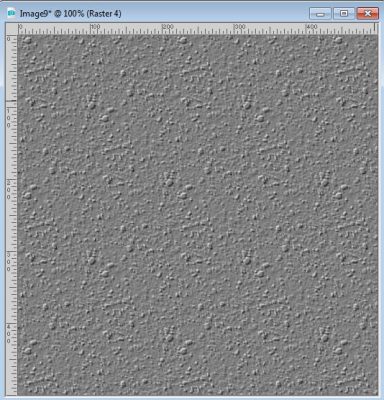
In this case, it is simple since the image is square, but if it were rectangular, I would have to first rotate 90 degrees to the right BEFORE rotating it to the left.
Since I don't want my paper to be grey, I will now adjust the Blend mode and the Opacity of that layer to get something that suits me. Here I used the Overlay mode at an Opacity of 36%.

Some settings will make the texture very obvious, others will make it subtle. It is up to you to determine what effect you want to get in the end.
Of course, we only used a single texture in this example, and it was one from Corel. You can add any other texture you want, whether you create them or download them from other sources. They will be usable in the exact same way.
Now, you have no reason to keep those flat looking papers if you wanted some dimension to them.
If you want to dig deeper into the world of texture, you can watch our full-length class, Touch It.


1 thought on “Available textures in PaintShop Pro”
Nice, thank you for instructions.