
When you work on a graphics project, you might need to adjust the size of some images. There are different ways you can resize and which way you will choose might depend on various elements.
Using the resize command
Obviously, if you want to resize an image, your first reflex will be to go for the Resize command. After all, that's what it is for, right? Once you get to that command that is under Image > Resize, you will find various settings to work with, so let's have a look at them.
At first, this is what your dialogue window will look like (starting with version X8).
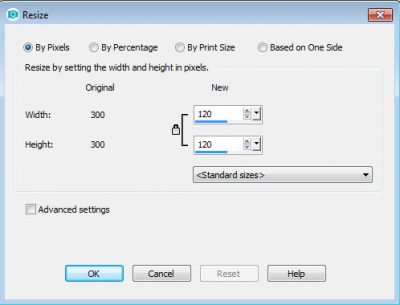
This dialogue window offers you 4 ways to resize your image: by pixels, by percentage, by print size and based on one side.
Typically, you will be using either a resize by Pixels or by Percentage. Those are pretty self-explanatory.
Resizing by Pixels
When resizing by pixels, you can determine what size you want to end up with. Beware that although you can enlarge your image, it will usually have a distortion effect to it, unless you are resizing a vector image or some text. Notice that the two pixel values are linked together because, by default, if you change the size for one side, the other side will be proportionally adjusted.
This is one reason why you might want to have your Rulers visible on your project, so you have an idea of the size you want. Of course, if you have a set value you want to aim for, it will be easy to enter those values. But if you want to resize your photo in order to match a quick page, or another project, having an idea of the size you want would be useful.
Resize by Percentage
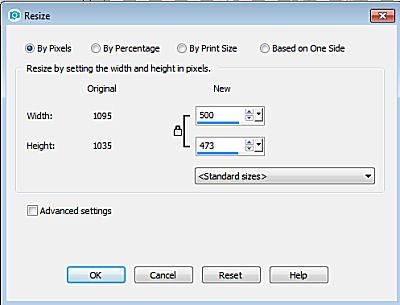
If you have only one image to resize, you can choose the resize By Pixels. If you have several elements to resize for a project, using a pixel value would make it quite inefficient since each element might be of different size or proportion. Imagine that I have a bow that I want to place on a layout and I want the matching straight ribbon to be on the same page. I might know I want to resize the bow to 500 pixels, but I cannot use the same pixel values for the ribbon. That is when using Percentage makes just more sense.
When you choose the size in Pixels value, the result might look like this:
Without clicking on the OK button, change the mode to By Percentage. And you will get this set up.
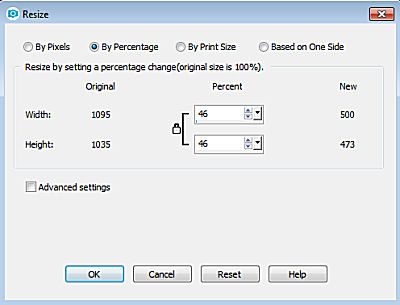
Knowing that this is resizing by 46%, you can resize other matching elements by the same value. It does not matter what the actual pixel size would be.
Resizing by Print size
If you tend to print your projects, you might need to resize the overall image to match the end result. The print size will depend on the resolution you set it. For example, 1000 pixels would look different if you were setting a resolution of 200 pixels/inch versus 300 pixels/inch.
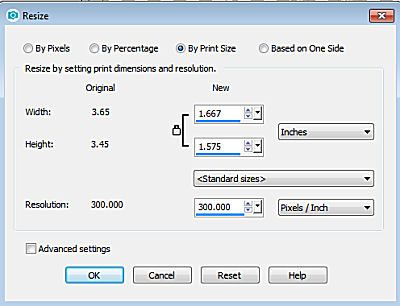
You have options to adjust the settings and changing one would lead to different values on the other fields. It all depends on what you want to achieve.
Resizing Based on One Side
This option allows you to set a specific value for either the long side or the short side. Notice this does not indicate the horizontal or vertical side, but just the long or the short one.
Advanced settings
If you check the Advanced settings box, you will get more settings to help you adjust the resizing process. Let's look at the most commonly used settings.
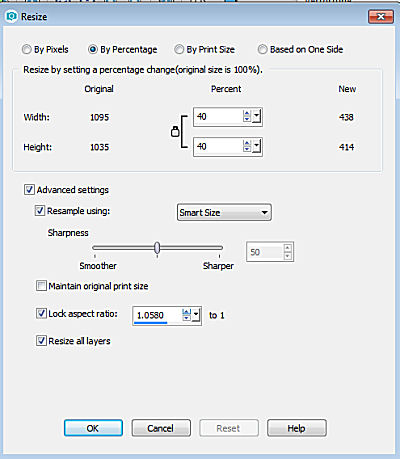
Resampling
You get several options for resampling. Using the Smart Size gives you what you need, but you can choose a different one among the five available.
Lock aspect ratio
By default, whenever you resize one value of the image, the other side will be adjusted proportionally. However, in some instances, you will want to voluntarily disregard that option because you want to change that proportion. Make sure you don't play with this option for a photo because that will distort your image! But if you want to create a Barcode, or a plaid, then changing the proportions is exactly what you need.
Resize all layers
Of course, sometimes you want to resize only one element on your project, whether it is one photo, one element, a title, etc. In that case, you need to uncheck the box for this since otherwise, it is set to resize the whole image and all the layers.
Resizing with the Pick tool
Although you might find that the Resize command would be the best and most obvious choice to resize an element on a project, the Pick tool is another option. This will work best if you are using the Scale mode so you can adjust the size of the element or the image to match something else. If you don't need an actual pixel value or a specific percentage value, resizing "by eye" can be more efficient as you can see what you get and what it looks like on the project. But make sure that the mode is set to Scale or you will definitely have some distortion.
For more information about resizing correctly, check out this article.


3 thoughts on “Resizing with Paintshop Pro”
Thanks for this Cassel. Although I am lucky enough to have Photo Zoom which does a fabulous job and I use quite a bit for resizing up mainly, its great to have another method within PSP for a quick small resize change. I have often wondered why there were a few method choices to do the same thing but now that you have explained it and it makes perfect sense, I think I shall use the percentage one from now on to keep things in proportion.
I just did a page last night and wanted to resize the Alphas by 30 percent. I didn’t know how to resize them all at once so I did each one separately. It was a long title and took quite a while to do. I know there is a way to do them all at one time. Can you give me a quick rundown on that. The title was Kindergarten Graduation. Thanks.
Hi Ann. You could possibly group the layers together, but that would end up being just as long. My go-to way is to resize one, then, use the Ctrl-Y key to repeat for each subsequent layer. And to be even faster, I place the Repeat icon on top of the Layers palette, so the flow is much faster.