
The Out-of-Bounds effect is a fun way to make part of your photo “extend” outside a frame, creating the illusion that your subject is popping out of the page. Although the steps are similar in many graphics programs, Affinity Photo offers a flexible workflow using masks and adjustment layers. Here is how you can achieve this effect.
Prepare the Base Layers
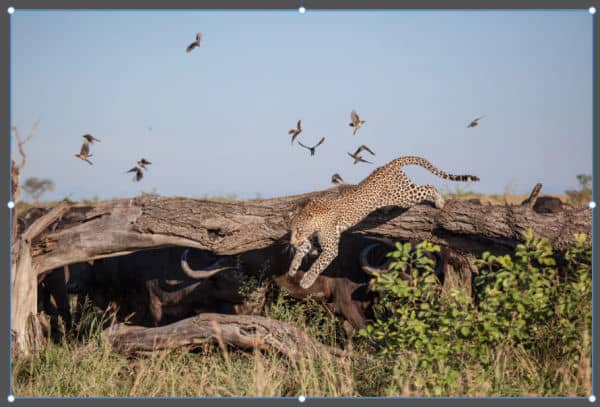
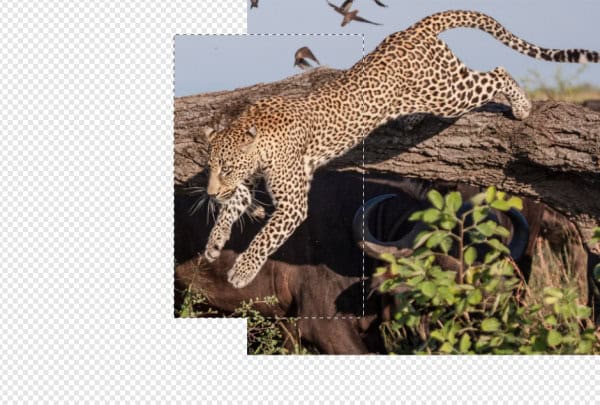
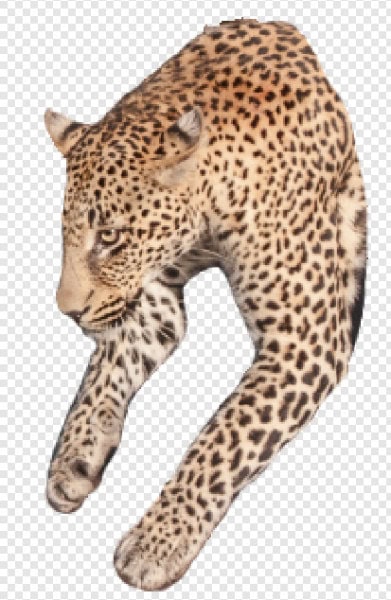
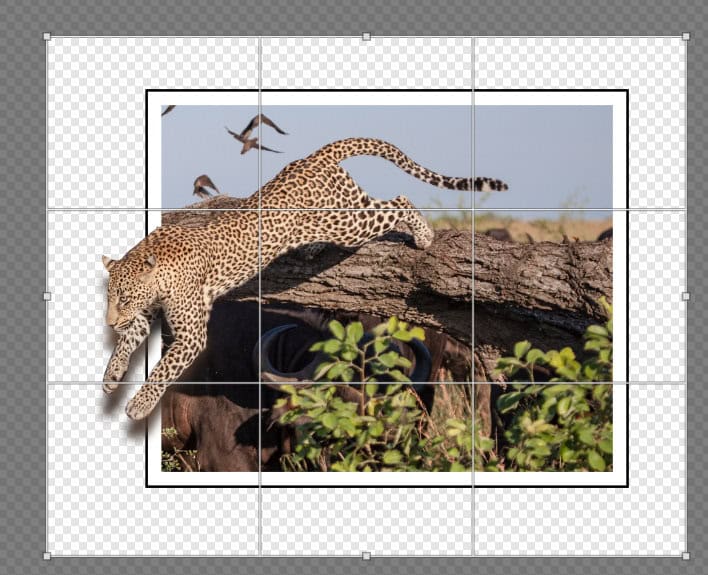
Let's use this image of a leopard that is leaping down a log.
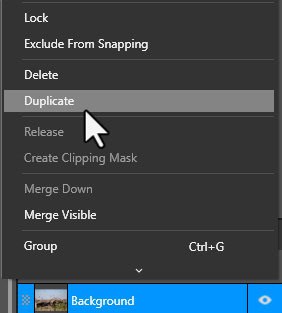
Before anything else, duplicate your photo layer. This lets you work non-destructively and gives you a copy to clip inside the frame later. You can right-click and choose Duplicate or use the keyboard shortcut Ctrl+J.
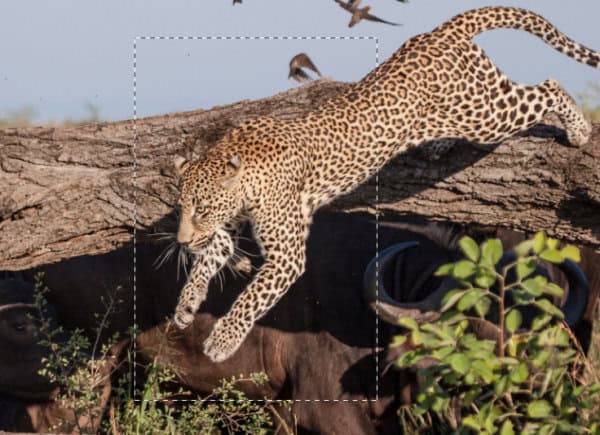
Using the Rectangle Tool (or any shape tool), draw the area you want to use as your frame. This gives you a visual boundary showing how much of your subject will appear inside and how much will pop outside. The color and stroke don't matter at this time.

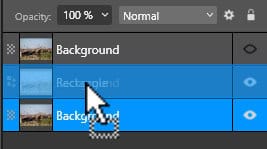
Make sure the frame shape is above your photo layer. Then clip the photo inside the shape by dragging the photo layer slightly to the right underneath the shape until you see a down-arrow indicator. This creates the “inside the frame” version of your image.
Rough Extraction
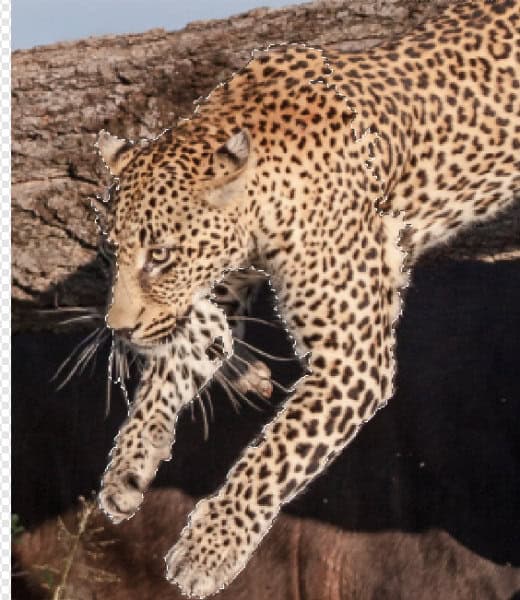
Now return to the duplicate of your photo — this will become the “out-of-bounds” part.
Create a rough selection around the part of the subject that will extend outside the frame.
This selection should be bigger than what you need, just to give yourself room to refine later.
Copy (Ctrl-C) and paste (Ctrl-V) to have only that section on its own layer. Delete the previous layer you copied from.
Precise Extraction with a Mask
This is where you choose your favorite extraction method.
In this example, the Selection Brush Tool was used, although the automatic result was far from perfect — especially around facial contours and legs.
Don’t worry; we’ll fix that with masking.
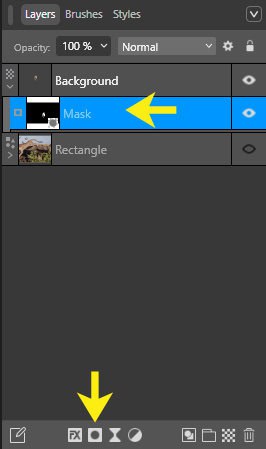
Click Mask Layer to convert your rough selection into a mask.
You’ll now see the extracted subject sitting on a transparent background.
And here is what the extraction looks like after I deselected. It is not great but we can work on that.
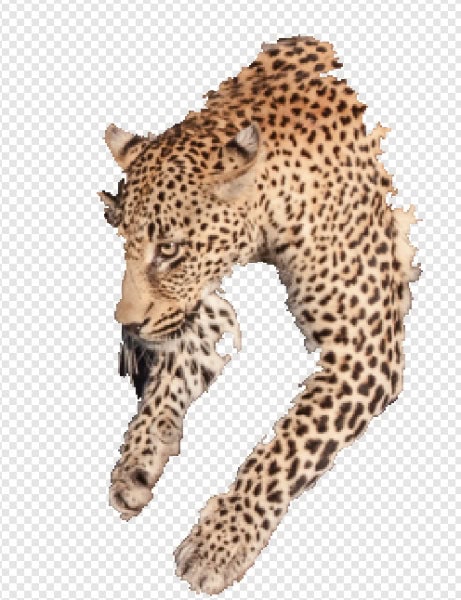
This is where the magic happens.
Remember, "Black will block" (and white is a window).
Use a small soft brush to clean up the edges. Paint black on areas that should be removed and paint white on areas you want to keep or restore
In the example, areas above the forehead and under the nose were removed, while edges around the legs and under the neck were refined and recovered.
After just a few strokes, the extraction becomes much cleaner and more natural.
Stylize the Subject
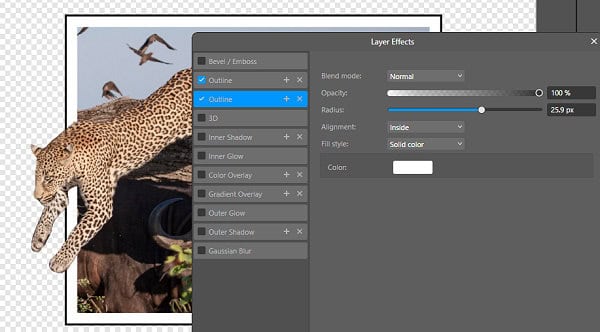
To enhance separation from the background, apply an inner outline using Layer Effects.
This creates a crisp border that emphasizes the “cut-out” look.
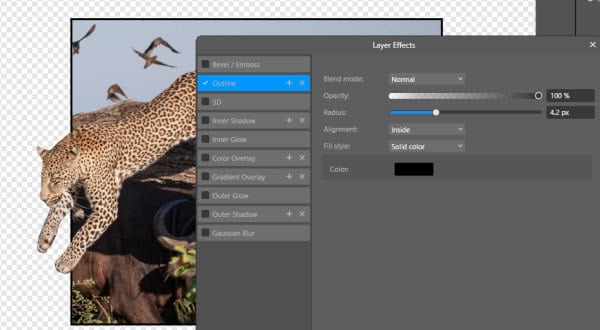
A thin white outline can create a sticker-style finish or simply improve contrast depending on the background.
Use it only if it suits your layout.
Create the Shadow
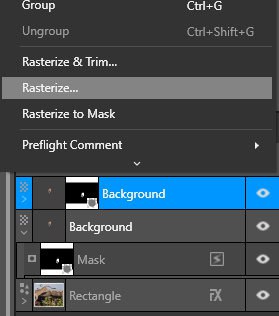
To simulate the shadow of the part sticking out of the frame you need to work on a duplicate of that masked layer. Duplicate it and then rasterize it by right-clicking and selecting Rasterize or Pixel > Rasterize.
Move it below the original masked layer.
Add an Adjustment Layer (typically Brightness/Contrast or Recolour).
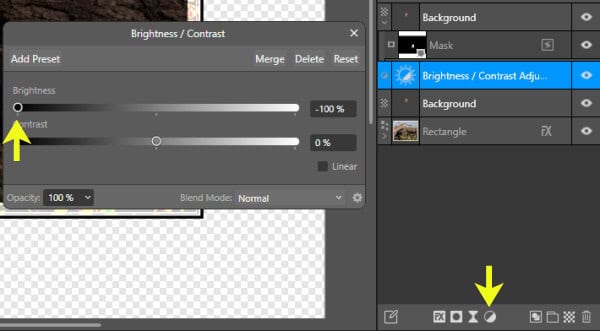
Clip the adjustment to the rasterized layer so only the shadow is affected.
Rasterize again to merge it.
This gives you a solid shape to turn into a shadow.
Move that adjustment layer as a child layer of the rasterized layer so that only that layer will benefit from that adjustment.
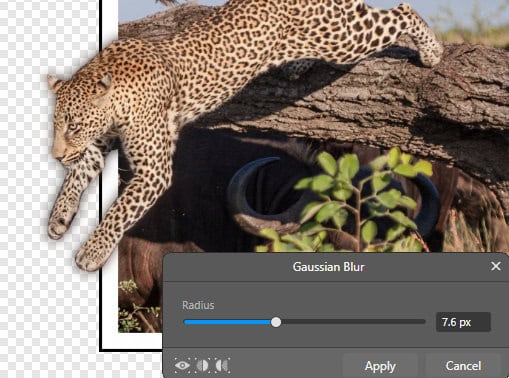
Rasterize again.
Go to Pixel > Filters > Blur > Gaussian...

Adjust the radius until the shadow looks soft but still visible.
This blurred shape becomes your realistic cast shadow.
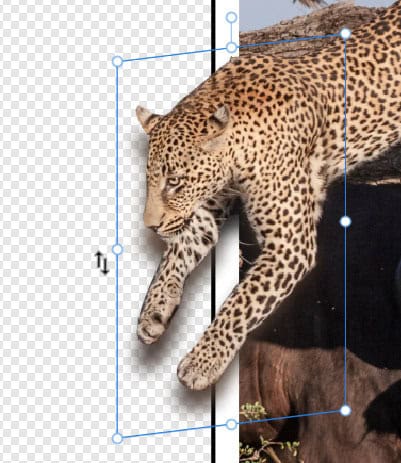
Select the shadow with the Move Tool.
Grab a side node, then hover just outside the bounding box until your cursor turns into a two-headed arrow.
Now drag to skew the shadow so it flows naturally away from the subject.
This step really enhances the 3D effect.
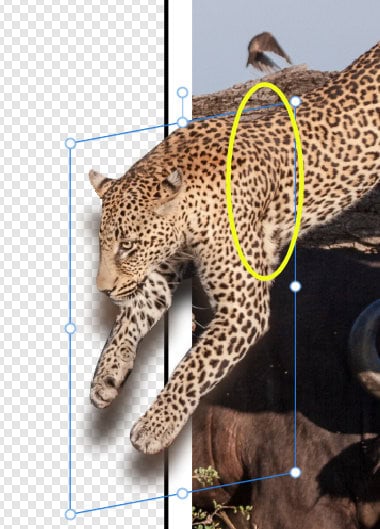
Some shadow may fall inside the frame where it does not belong.
Simply use the Eraser Tool to remove those parts.
This keeps the shadow only on the exterior “popping out” portion.
Final Cleanup
Once everything is aligned, refined, and shaded, use the Crop Tool to trim away any empty space and keep only the visible elements.
Your Out-of-Bounds composition is ready!


