
The main characteristics of a blueprint are the blue overall and the line drawings. A blueprint image with photos of buildings, landscapes, landmarks or objects will look much more realistic. This effect can be interesting to showcase places you visited or objects you encountered.
Let's get started
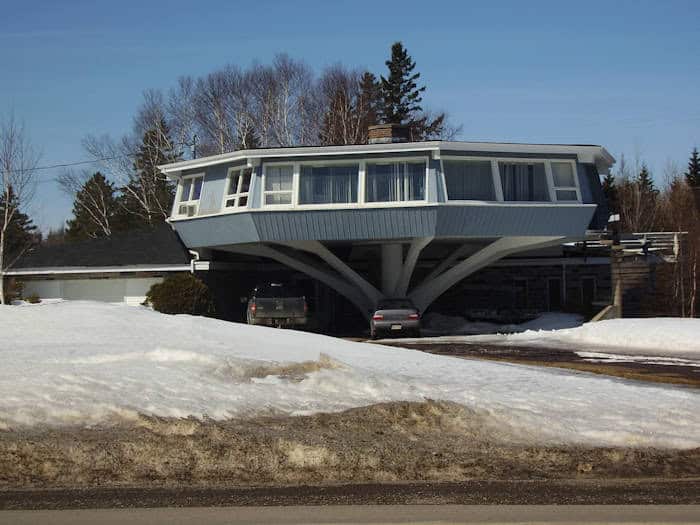
For this tutorial, I will be using this photo of an original house. It is 2200x1650 pixels in size. This is an actual house I drove by very often, and I finally took the time to snap a photo of it.
As for any other technique, duplicate your image so you will keep your original untouched. Duplicate your background layer with right-click > Duplicate. Hide the Background layer for now. You might use it later but for now, you don’t want to see it.
Turn it into a line drawing
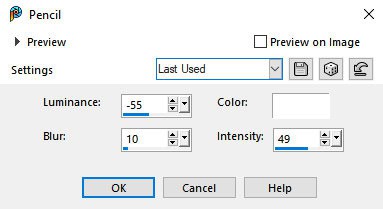
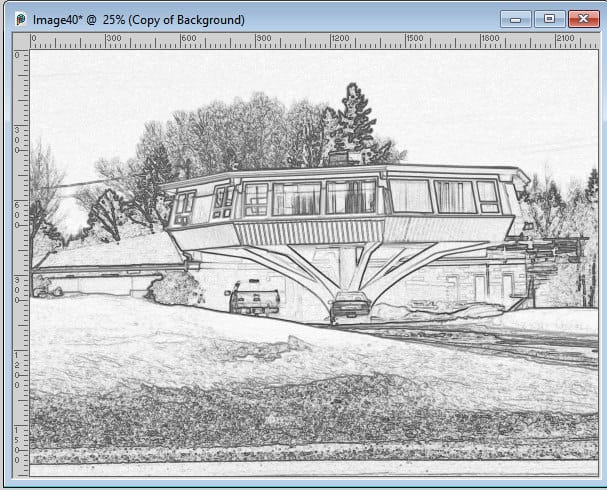
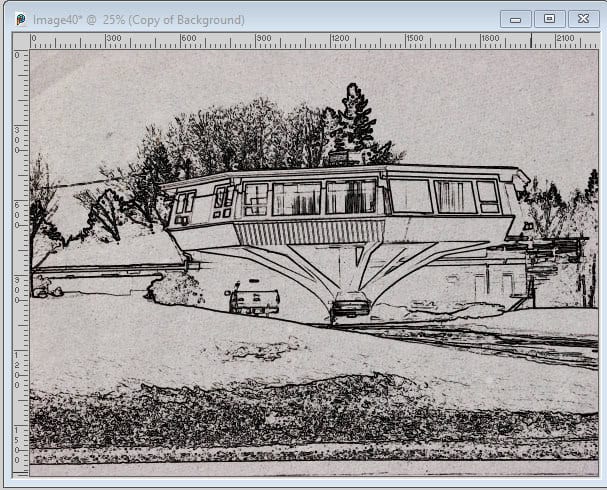
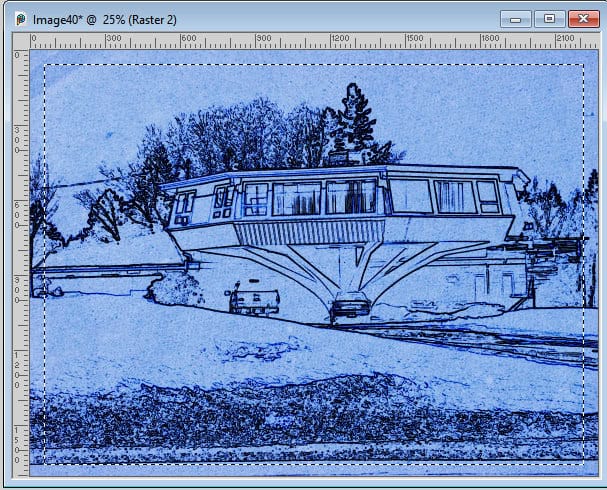
Since a blueprint is mostly made of a line drawing, we will turn our photo into such a drawing, with Effects > Art Media Effects > Pencil with settings that will give a line drawing without too much extra details. The exact settings will depend on your photo. The settings shown here are those used in the example, and match my photo.
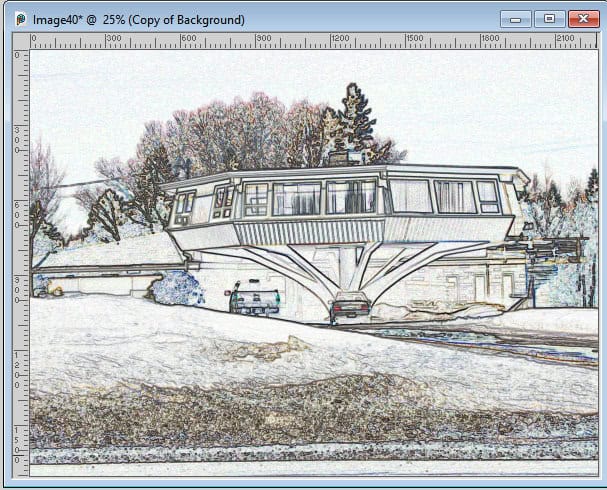
This is, more or less, what you are trying to get. Enough details to show off the element you want to emphasize on, but not too much to distract from it.
Since we don’t need all those colors, we can desaturate using Adjust > Hue/Saturation > Hue/Saturation/Lightness and simply lower the Saturation value to the minimum.
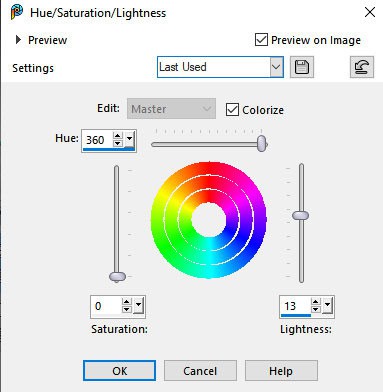
This will turn our colored image into a black and white image, which is more consistent with a blueprint drawing.
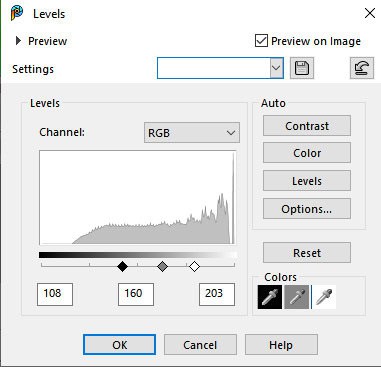
To get more defined lines, we will go with Adjust > Brightness and Contrast > Levels. These are the settings I used. Yours might differ depending on the colors and the details of your original image.
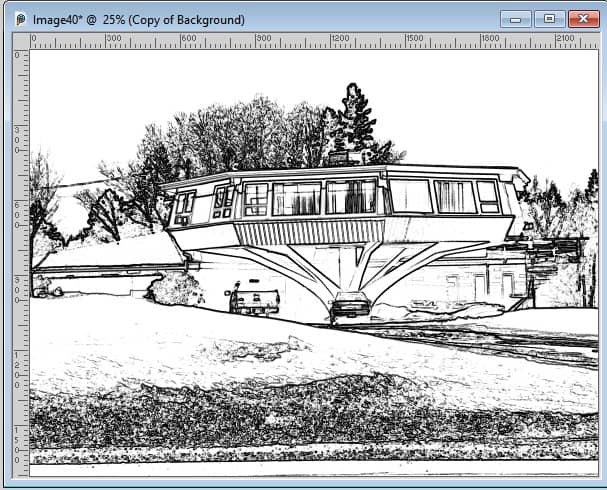
This is the resulting image after the lines have been emphasized.
Add some texture
For realism purpose, I will add a paper texture. This is optional. I found a paper texture (but I cannot remember where) that I will be using.
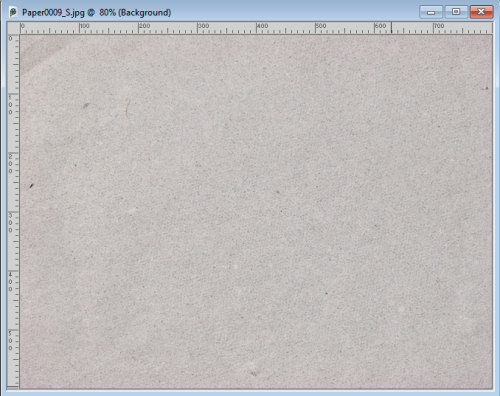
Open the paper image. Copy (ctrl-C) your paper image. Go back to the project, add a new layer, Select all (Ctrl-A) and Paste into Selection (Ctrl-Shift-L). This will copy the paper layer onto your project no matter the size of each. Unless there is a very large discrepancy between the formats of the paper and the project, the resulting distortion will not cause issues.
Deselect and move the paper layer below your drawn image layer. Optionally, you can adjust the brightness of the paper you are using.
Change the Blend mode of the drawing layer to Burn. This will make the white totally disappear and let the paper below show through as if the design was drawn directly on the paper.
Adjust the color
Add a new raster layer between the drawing and the paper layers. Fill with a bright blue (that will be a blueprint afterall).
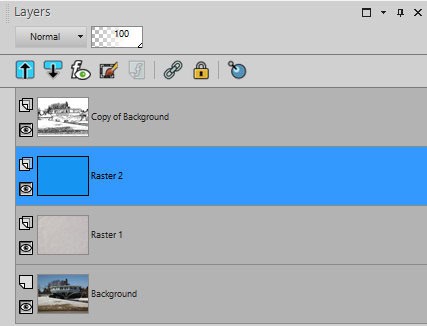
Change the Blend mode of the blue layer to Overlay. This will allow the texture of the paper below to show through that blue layer.
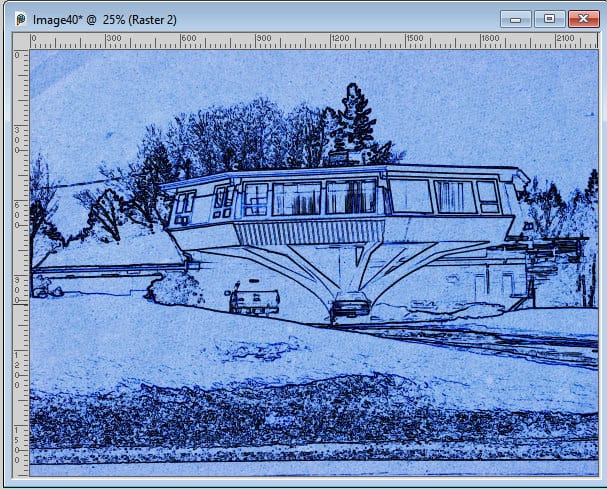
This is really starting to look like a blueprint, doesn’t it?
Add the frame
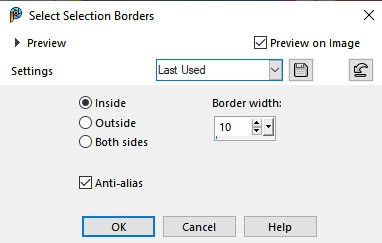
Add a new layer on top of all the layers, and with the Selection tool set to a rectangle, select an area all around, that is even on all sides.
Selection > Modify > Select Selection Borders and choose a width for the border that will match your image size. The setting for my photo will be 10 pixels.
This will give me a selection that I will need to fill. In order to get a distressed frame, I will check the Texture in my Material properties window. The more black there is in the texture, the less of the color will be shown, so you will want a texture that does not have too much black.
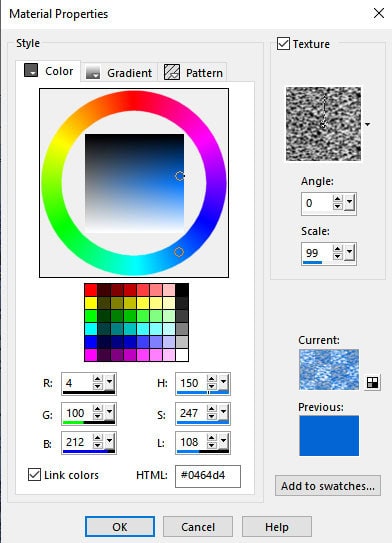
Use the same blue you picked for the blue layer, so it will be consistent. Flood fill the selection from your image.

Deselect.
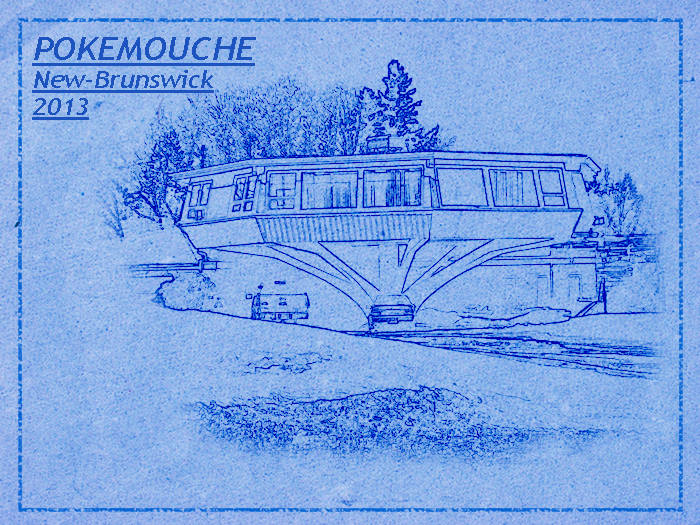
Final touches
Normally, the design will be confined within the frame so using the Pick tool (or the Raster Deform tool for earlier versions), resize the image layer so it will fit inside the frame.
Too avoid a sharp edge all around the image, use the Eraser tool set with a low Hardness setting and a lower Opacity and delete around the image. You can also remove any element that seems to be extra and might distract from the main subject.

If you find that your lines are too dark or look black, reduce the opacity of that drawing a bit. With a lower opacity, everything will turn into a more uniform blue.
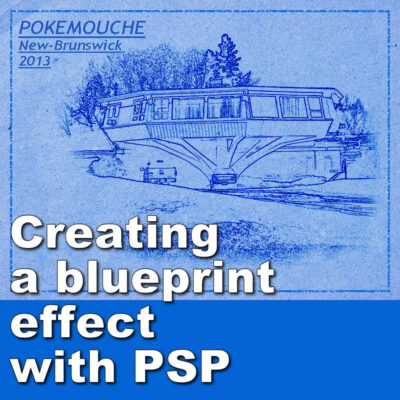
The final touch will be to add some text, as in a title, the location, a date, etc. If you find that you need more room than you have, you can always resize the image layer a bit and/or move it to one side.
And here is the end result from applying this technique.
Other examples
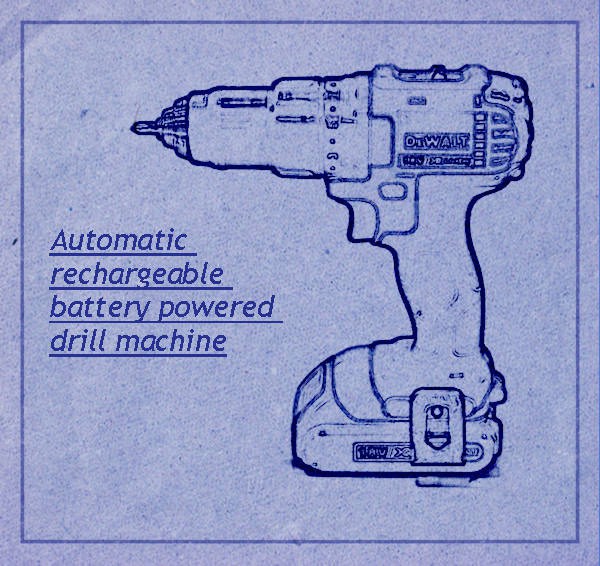
As mentioned in the beginning, this technique is particularly suitable for buildings, but you can also use objects especially for manufactured objects.
This tutorial is an excerpt from the guidebook that accompanies the Photo-Graphics 2 Master class, available inside our DIAMOND membership. Join now, and you can access more than 100 classes on various topics using PaintShop Pro.


2 thoughts on “Creating a blueprint effect with PSP”
I love this. And weirdly I was just thinking of a blueprint effect and how to do it because I saw an advertisement for a car (in an old magazine) that was an Xray. I thought since I cant actually make an Xray I could do a blue print. I’m glad you showed the power tool as well, that has given me some ideas of other things I’d like photograph for this technique. BTW, that is really cool looking house.
My only thought is I think I’d clone out the two vehicles that are tucked under the house. No architect or designer would have kept them in on an original layout.