

When you want to add some dimension to some elements, you may add some bevel. PaintShop Pro offers you both an inner bevel and an outer bevel option. Why is that? When should you use which one?
What is a bevel?
Adding a bevel will simulate raised edges of any element to show some thickness. Whether you choose the Inner Bevel or the Outer Bevel, the settings are exactly the same so the dialog window is identical.
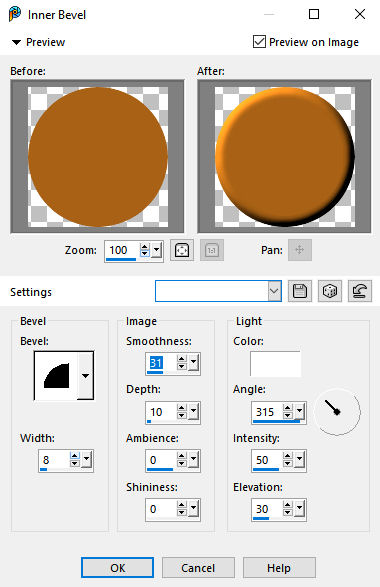
Although there are lots of settings to play with, we tend to use only a few while keeping the rest at default.
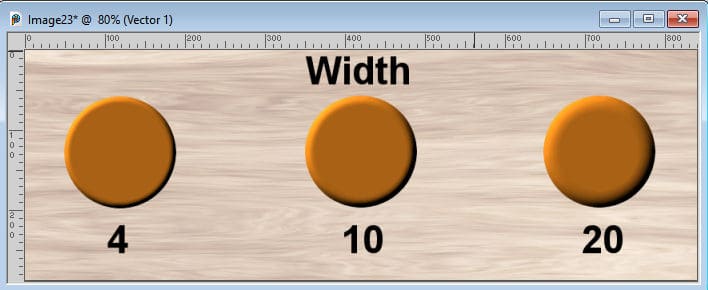
The Width will determine how far from the edge the bevel will go. Here is an illustration of the difference with different settings.
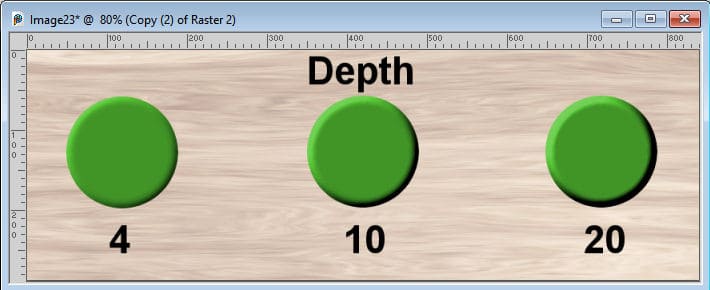
Another important setting is the Depth, which will determine how thick the element would be. You can see the difference in this illustration.
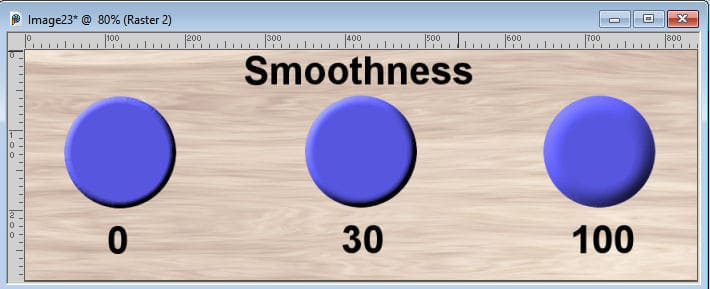
Finally, another major setting is the Smoothness that will make the edges "rounder" or not.
Of course, there are other settings you can play with but those three will give you the most effect.
Inner or Outer?
One question I often have is why the Outer Bevel seems to always be greyed out. This is what you will often see:
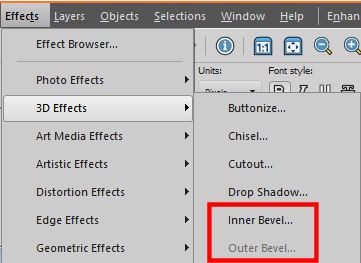
By default, any element on your canvas could have an Inner Bevel as the program will find all the edges and bevel inside them. However, for the Outer Bevel to be applied, you need a selection. Otherwise, it would be like telling the program to apply an effect in the "empty area" outside the element. You would not need that, right? However, with a selection that you create, you can identify an area AND a layer where PaintShop Pro will apply the bevel. That is called the Outer Bevel.
Applying an Inner Bevel
By default, anything on your canvas can have an inner bevel, even if it reaches the edges of your image. You can add an inner bevel to create a button, a ribbon, a leather element, a string, a wooden piece, etc. Basically, anything that has some thickness can have an inner bevel.
Applying an Outer Bevel
As mentioned before, an outer bevel can only be applied when there is a selection, and the bevel will appear OUTSIDE of the selection. With the same selection (on the left), I applied an Outer Bevel successively in the middle and the right side.

The only difference in this illustration is the Angle value, which indicate the source of the light. As you can see, opposite directions for the light give an impression of the shape being raised or depressed.
How to use the Outer Bevel
You might already be familiar with the Inner Bevel, but when would you use an Outer Bevel? Here are some examples.
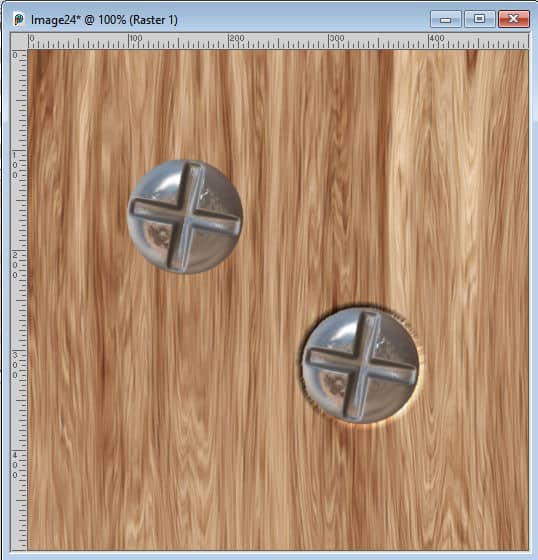
A screw that is dug in the wood compared to one that does not have any bevel in the wood. After selecting the screw itself, I applied the Outer Bevel to the base layer:
After adding an innner bevel to the stitching, I selected the stitches, and applied an Outer Bevel on the fabric layer:

How will you now use the Inner and Outer Bevels in PaintShop Pro?


3 thoughts on “Inner bevel and outer bevel”
Excellent info! THANK YOU!
Thank you, Carole, for solving the mystery of Outer Bevel. So simple, just add a selection and apply the effect to the layer underneath!
This is good information that makes the inner and outer bevel settings make more sense to me, and seeing the examples shows me how I can use them too.