One frequent project that PaintShop Pro users will create is a calendar. Although you can create them by using pre-made templates for each month, you can also make them from scratch. Let's look at how you can create the months with the dates, and then, reuse them for every page of your calendar.
Create the boxes
Typically, calendar dates will be placed in boxes. Although it is not a necessity, it is also useful to align all the dates.
Start by deciding on the size of the individual boxes based on the space you have available. Of course, you can make those boxes larger and size them down as needed. Just be also aware of the format ratio. You might want the whole month to fit in a square area, or on a very wide section. Create a blank canvas the size you would need for an individual box. Then, create the "box" itself.
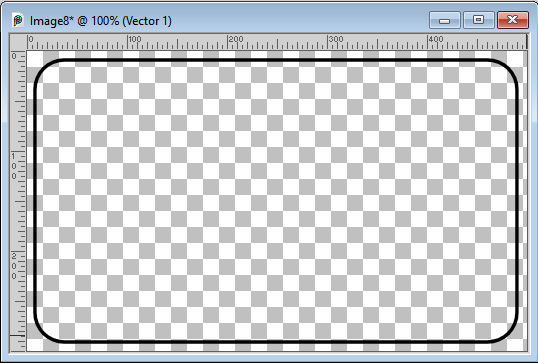
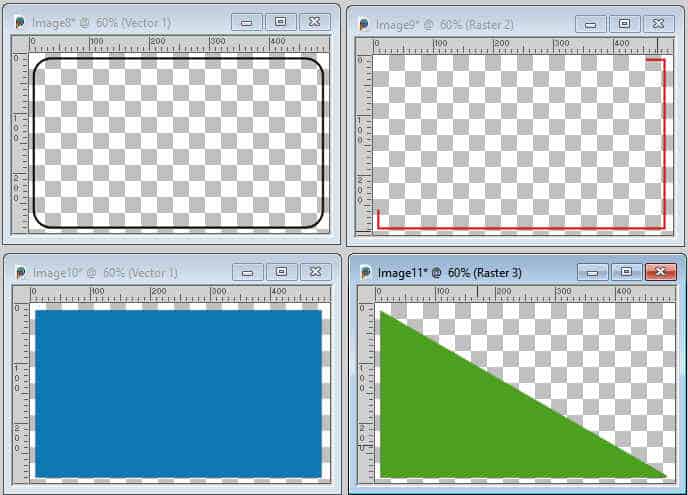
It could be a solid color or an outline only. It could be a complete or partial box. And it can also be in any color you want. Just make sure you keep a little gap on the edges.
Now, you will need to create the whole month so you have to do a little calculations. With 7 days in a week, you need a blank image that is seven times the width of your current image. In my case, 7x500 pixels = 3500 pixels. And you want the option for 5 weeks on that grid so the height will be five times what you have set for the boxes. In my case, 5x300 pixels = 1500 pixels.
Using the image for the box as a pattern, fill that blank image with it.
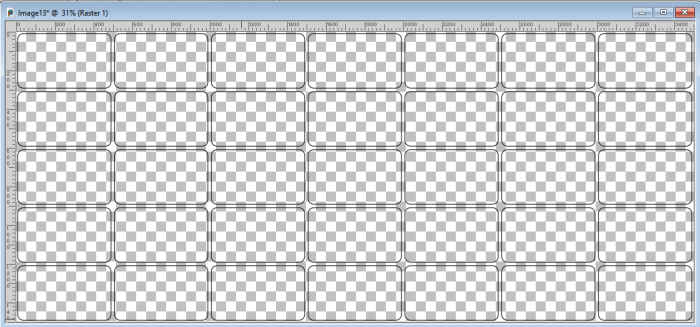
This will become the base for your calendar.
Add the dates
Athough all the months don't start with the first on the first column, we will still create the base that way.
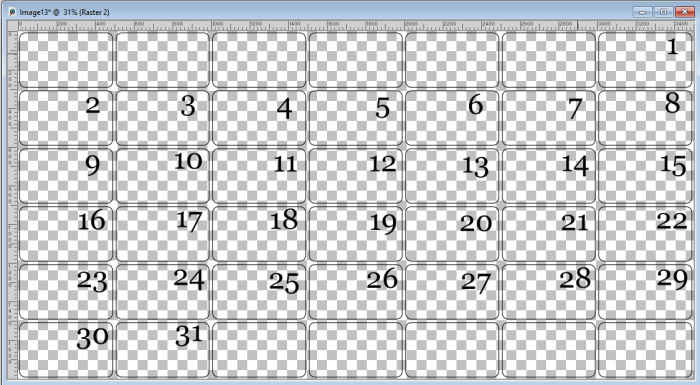
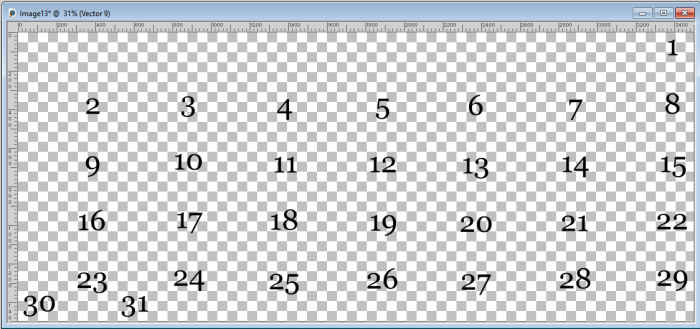
Using the Text tool, click on the CORNER of the first box. The corners will help you align all the dates correctly. Type "1" in the font, size, and color you want. Although you can change the colors later, the size and font will not change. Then, click on the corner for the next box, in the same column and type "8". Repeat with all the dates in that column with 15, 22, and 29.
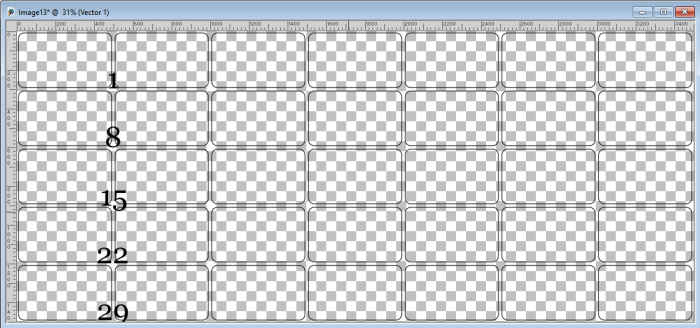
You can see, in the Layers palette, that they are also all part of a single Vector layer so you will be able to move them in place, together. They will stay aligned wherever you move them.
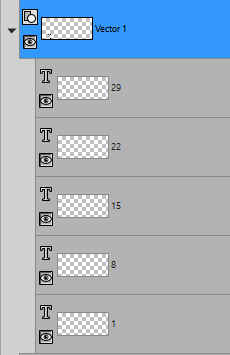
For the next column, activate a raster layer (possibly the layer that was created before you added your text). Then, add the dates for 2, 9, 16, 23, and 30. It is important to select a different layer when you start a new column so that a separate vector layer will be created. This will allow you to move the individual columns of dates separately. It will be important later.
Now, repeat for all the dates, up to 31. You should end up with 7 separate vector layer, and each one will have 4-5 dates in it.
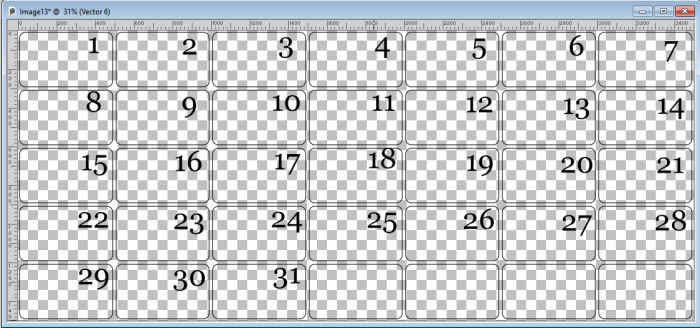
At this point, you have a template ready to use.
Align the dates as needed
Since the first day of the month might not need to be on the first column, you can now move the dates based on the correct month you create. For example, January 1st, 2025 will be on a Wednesday. For me, it means the fourth column (because my week starts with Sunday). If your calendar starts on Monday, it will be the third column. So for my calendar, I will move the first column to the fourth, then the second one to the fifth, and so on.
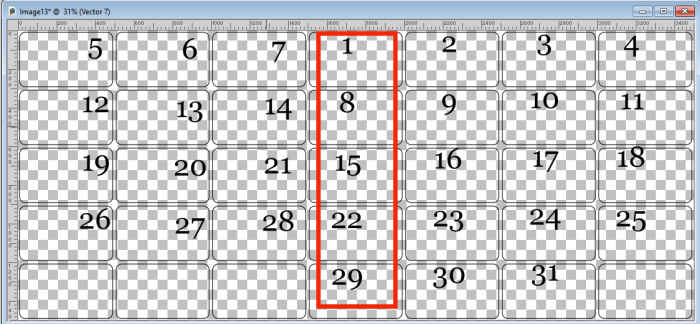
Of course, this arrangement is incorrect because once I reach the end of the first row, the next dates should be offset downward one row. That is logical, right? With dates all in a single layer per column, that is easy and your dates will stay aligned.
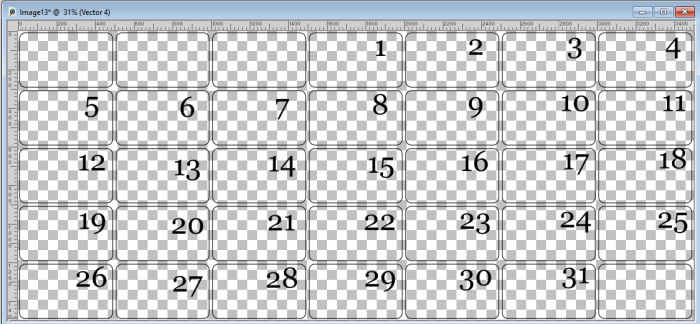
If this is what you need, you can Copy Merged (Ctrl-Shift-C) and paste it onto your page. If you plan on reusing the same month for several other calendars, you can save it in .pspimage format, identifying it with a 04 extension, meaning the month starts on the fourth column. That way, when you create calendars for other months, starting on a different column, you will easily be able to grab the one you need. In the end, you will only have to save 7 of them.
Final tweaks
Although the dates are correct and in the right columns, not all months have 31 days. If you are working on a month that has only 30 days, you can go in the Layers palette, in the vector layer that has the 31, and just hide it. You can then Copy Merged and paste onto your project. And if you are working on February, you will do the same with the 30, and the 29 if needed.
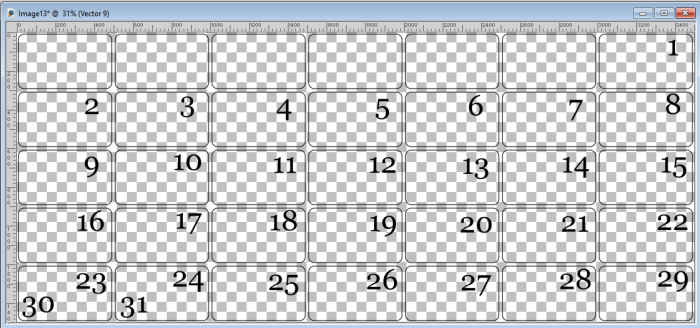
What if you have a month that starts on the last column? This will end up with the 30th and the 31st placed completely below the calendar. You have two options:
- make whole calendar with an additional row for those occasional months
- ignore the extra day, and with the Text tool (remember to start on a Raster layer), create a 30 or 31, and place them in the same box as the 23 and 24, but in the opposite corner
Do you need the days?
At this point, you have the all the dates ready to use, but you might want to add the days of the week. You can use the same box design and fill a blank image that would be the same width as the calendar, but only one row high. And then, you can fill those boxes with either the full names of the days, initials only, or abreviations. This allows you to customize your calendar for any language, and any start of the week.

And you can Copy Merge the two layers and paste it onto your project, above the dates.
Some variations
Since you used a single box as a pattern, you can also use the same image, and replace the box you already made with something new. Since it is the same size, you can use it as a pattern on your existing calendar and all the dates will still be aligned.
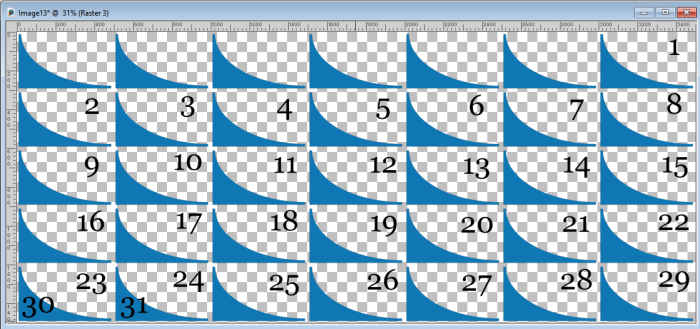
In any calendar month you will create, some boxes will be unused. You can keep them there, but you can also select those boxes and delete them.
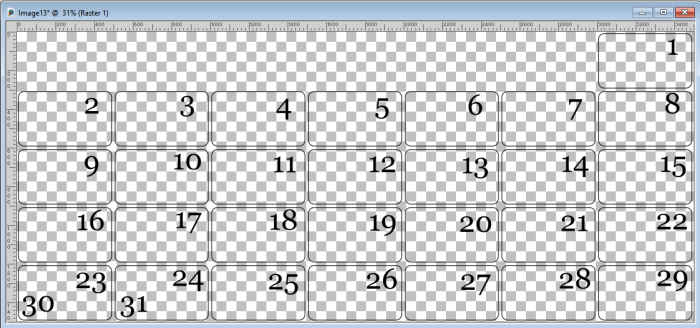
If you want or need a calendar without any box, it will still be important to create some so that you can use them to align the dates. However, when you are ready to add the calendar to your project, you can simply hide the layer with the boxes, and you will get perfectly aligned dates.
Additional resource
If you want to create custom calendars faster, you can always use the Custom Calendar script available in the store. It will allow you to choose any type of box, and will do all the calculations and alignment for you.



1 thought on “How to create your own calendar”
After making my date boxes by hand for 2 years I decided to spare me some time and use the Custom Calendar script and I’m very happy with that. It allowed me this year to use a mushroom for my dates and everything was aligned neatly.