Several years ago, we had a blog post about converting your handwriting into a font. Two sites were listed but over time, both sites were purchased/merged into a different one called Calligraphr. Let's see the process of converting one's handwriting to create an actual font.
Where is it?
You can access the site Calligraphr HERE. You can have a free account to create a font, but a paid plan gives you more options.
How does it work?
The basic principle is that you will download a template, print it, write/draw the letters in each cell, scan that page and upload it to their site. Then, the program will do all the work from those drawn characters.
Because of the way the process goes, creating a script font (with continuous stroke) is quite difficult so I would strongly recommend that you use a writing style that involves "separate" characters.
Get started
You will first, need to create an account. As said before, you can start with a free account, which is what I did. If you want to try the paid account, it is actually not very expensive, even if you only want to try it for one month only.
Once you get to the main page, you can get a lot of options on the left to get different templates, whether you want English characters or another language. You can also choose between typical characters, digits, mathematical symbols, or even dingbats.
Click on TEMPLATES on the top to see all the possible options.
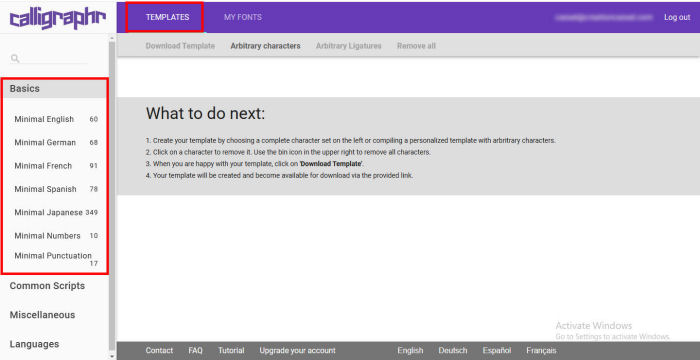
In the Miscellaneous, there is even a template for ligatures. I am sure you would love those but they are exclusive to the paid plan. Here, I chose the Basics > Minimal English. This is what I will have, as characters.
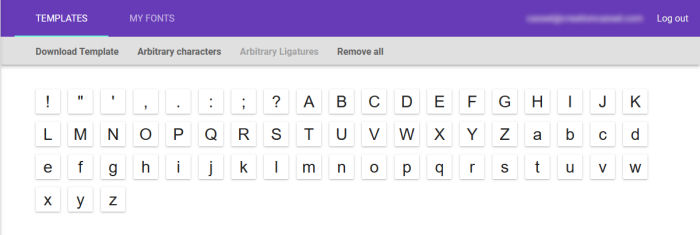
One thing to notice is that if you subsequently click on another template, just to see what they include, the program will add all those characters to the list so you can end up with hundreds of characters. So, as a tip, if you just want to view the templates, one after the other, click on Remove all.

This will allow you to focus only on the characters in a specific template.
Get the template
Once you have decided what characters you want (letters, digits, punctuation, etc.), you need to download the template.

You can choose either a PDF or PNG format. I chose the PDF format and it opened immediately on my computer. It was then a matter of printing the pages I needed.
Fill the template
This is where you can be as "natural" or creative as you want. The template will include a baseline where the characters will sit along with other lines to help you draw your characters in the same height. You can use any pen or marker. I used a caligraphy marker that allowed for thicker/thinner lines, but I could have used anything.
Here are some of the characters that I drew on the printed page.
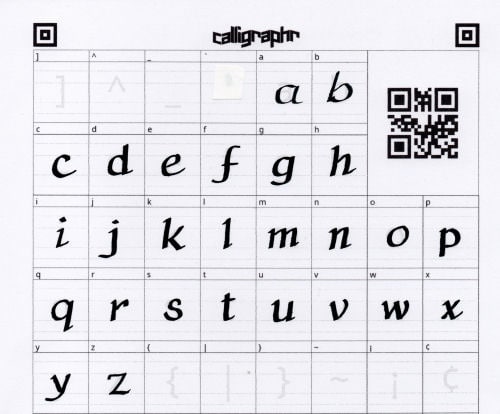
I have to say that it is not that easy to have natural movement when drawing those letters.
Upload it back
Once you have drawn all the characters, you need to bring back the template to the program. You can either scan the filled out pages, or take a good photo of them. As long as you have the QR code and the four corner markers are included in the photo/scan, you are going to get a good result.
Go to MY FONTS, and click Upload Template.

You will get this popup window.
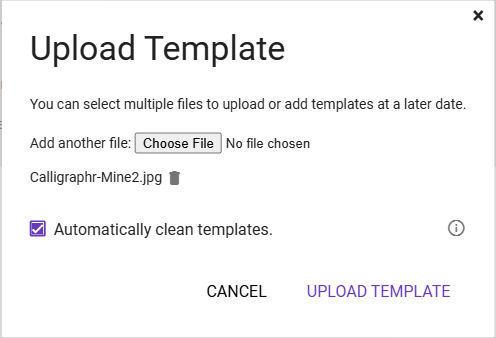
Choose the file or files that include your filled out template, and click UPLOAD TEMPLATE.
Build your font
Once the files are uploaded, you will see your characters appear on the screen.
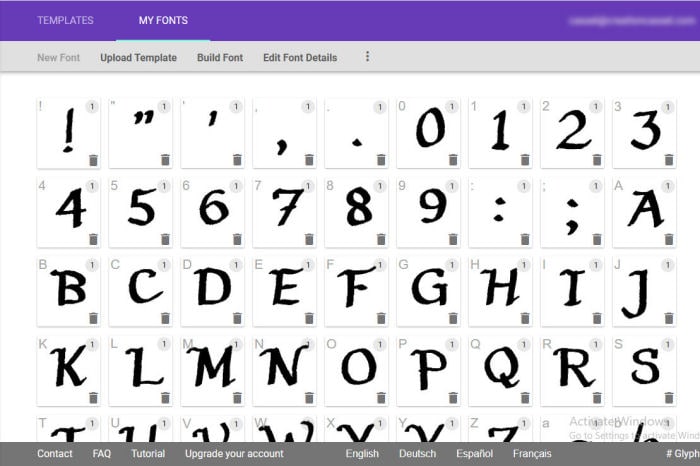
If you have more characters to add, click on Upload Template again and repeat the process. Once you are happy with the characters you see and they are all uploaded, it is time to do the conversion. Click on Build Font.

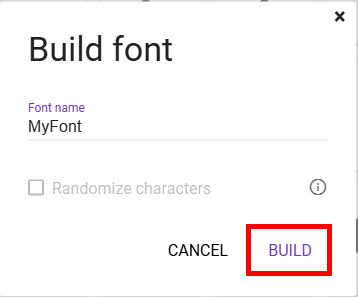
This will open a popup where you can change the name of the font before building it. Once done, click BUILD.
Once that is done, you will see all your characters appear with an option to download your font in .ttf or .otf format.
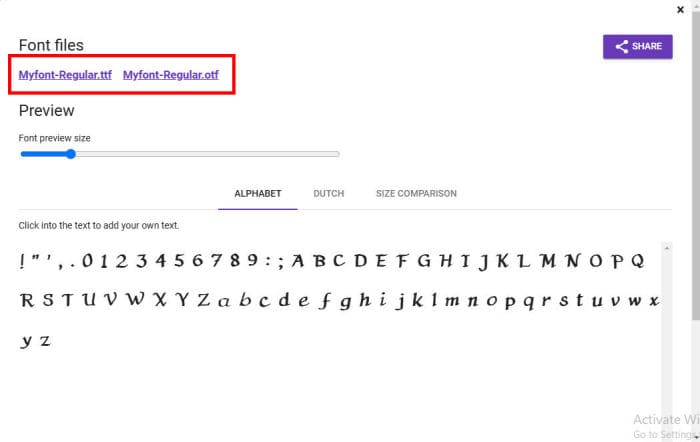
Either one is fine and if you have just a simple font without ligatures, the .ttf format is fine. You would need the .otf format if you had those extra ligatures.
Use that new font
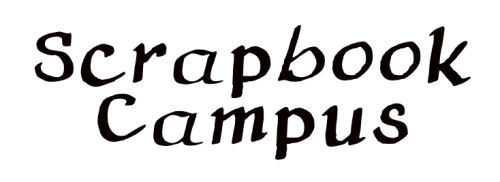
If you downloaded the .otf format, you would have to install the font on your computer to use it. If you chose the .ttf format instead, you can use it without installing it; you can use a font viewer to access it. I use TheFontThing but NexusFont works well too.
Creating a script version
As mentioned before, script fonts are very difficult to do with this type of app. It is already hard when using a full font creating program, but I feel that it is almost impossible to do when you have to handdraw the individual characters. First off, you need to have the "start" and the "end" of each character to arrive exactly at the same point so they can touch each other. That is quite hard to draw manually since you cannot tweak the lines afterward. In addition, some letters like "b", "o", and "v" would end higher than a "c" or a "p", so how do you make it in a way that every letter compositions are possible and look natural? Here is my try with a script version.
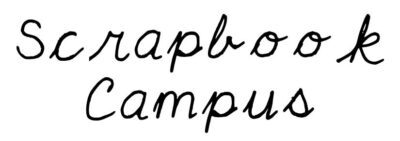
Notice how spaced out all the characters are. I might use the Kerning and INDIVIDUALLY move the letters, but again, it is not great.
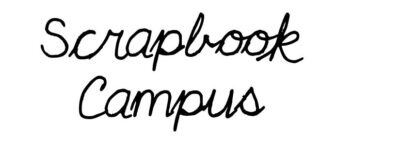
Although I managed to match the end of the "c" and the start of the "p", the connection is not as great between the "a" and the "p". It is even worse between the "o"'s and the "k".
Using the paid version
If you choose the free version, you have fewer options. For example, you can create some ligatures for common groups of letters. You can also create your own, so it MIGHT solve the issue of some letter combinations, right? Here is a partial section of one page where I drew some of them.
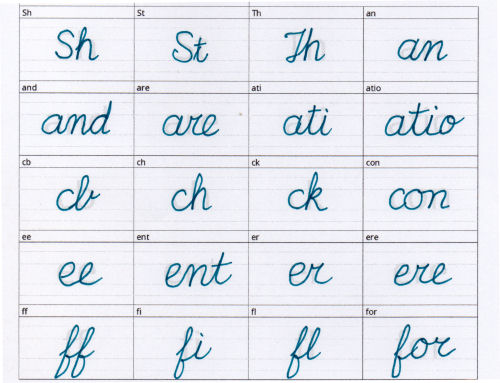
That might be interesting, especially if you want some "non-standard" groups. However, there is a little problem with those: they cannot be used in PaintShop Pro. Even if I was to write "Coffee", it would just use the individual characters that I created for the basic alphabet. It might be available in other programs, but I don't have details of which program and how to use them.
Conclusion
I think that this is a great tool to create a font from handwriting, and if you are using detached letters, it might be a fun way to create fonts from the whole family. Maybe you can ask your kids to fill out these templates every year, in September, and see their handwriting evolve. You can then use those fonts to create unique momentos or projects for your family. And if you like your own handwriting, you might be able to use it in your scrapbooking journaling.
Have fun!


