
Often, a PaintShop Pro user would want to use a vector path. Although some simple shapes are easy enough to draw with the existing tools in PaintShop Pro, sometimes, you need a custom shape. LeviFiction has come up with a script that can convert a selection into a path. This opens up so many possibilities. Having a path available allows you to run some staple scripts, namely, the VectorTube, VectorPaint, and VectorStroke scripts.
Where to get it?
You can download this script on LeviFiction's site. The script itself needs another program, Potrace, to run correctly. You can either download the two together, or separately.
Installing the files
Potrace is already an open source program so you can just download it on your own, or extract it from the zip file if you downloaded the "everything" zip file. Save it inside your Trusted Scripts folder.
The script file itself, the .pspscript file, also needs to be saved in the Trusted Scripts folder.
Using the script
The SelectiontoPath script will obviously work on a selection only. You can create the selection in various ways.
- if you have a clipart with solid colors, you can use the Magic Wand to select one section
- you can draw the selection using the Freehand, point-to-point selection tool
- you can also use the Edit Selection, brush an area in white, and toggle the Edit Selection
- depending on the shape you need to select, you can also use the Smart Selection Brush
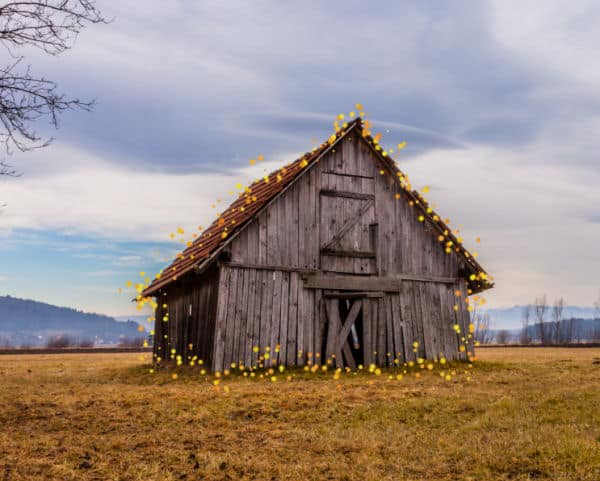
Let's make a selection around this barn.
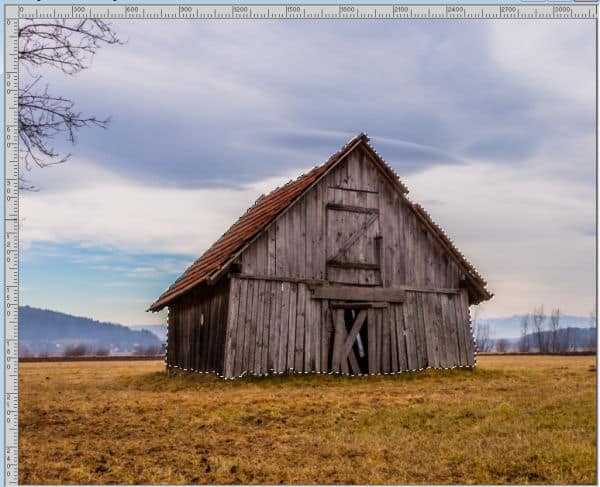
Make sure you have the Scripts toolbar open. If it is not, you can open it with View > Toolbars > Scripts.
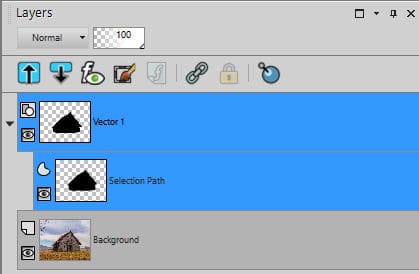
Find the SelectiontoPath script and run it. It will only take seconds and you will get a vector object in the Layers palette.
What to do?
Now that we have a vector path, we can use it however we want. We can export this shape as a Preset Shape and use it later. But you can also use it to write some text.
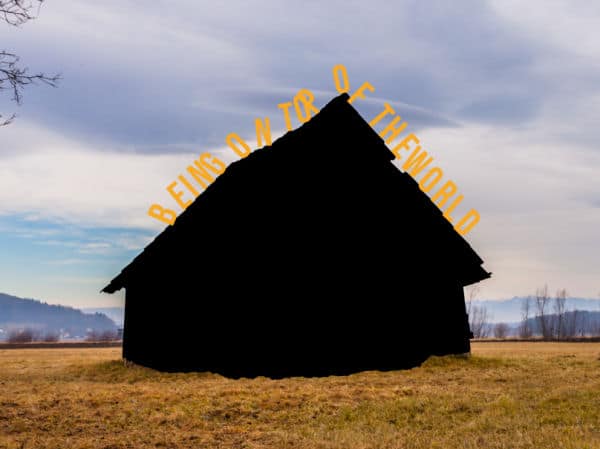
Notice that the text is not smooth. That is just because the path in this example has lots of nodes and changes in direction. The text will follow all those nooks and crannies. If your shape is smoother, your text will also look smoother.
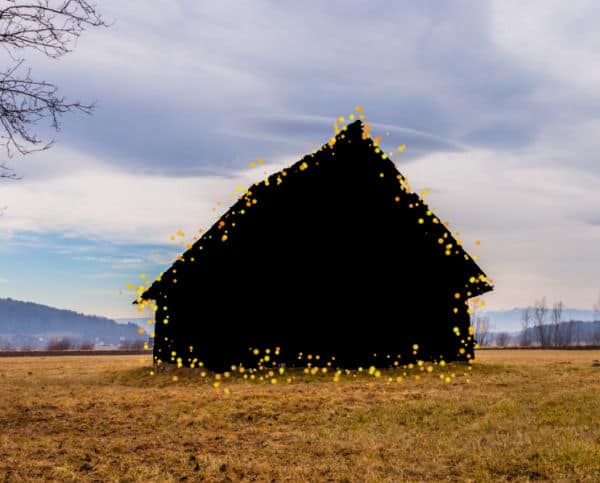
We can also use one of the Vector scripts (VectorTube, VectorPaint, or VectorStroke) to apply an effect following that path.
In this example, I might want to use the VectorPaint script to add some sparkles around this shape.
And let's just hide the shape and this is what we have.
On the other hand, we can use the VectorTube script to add various picture tubes. I have some tubes of flammes, and once I have selected the size I want them, I just run the script and get this:
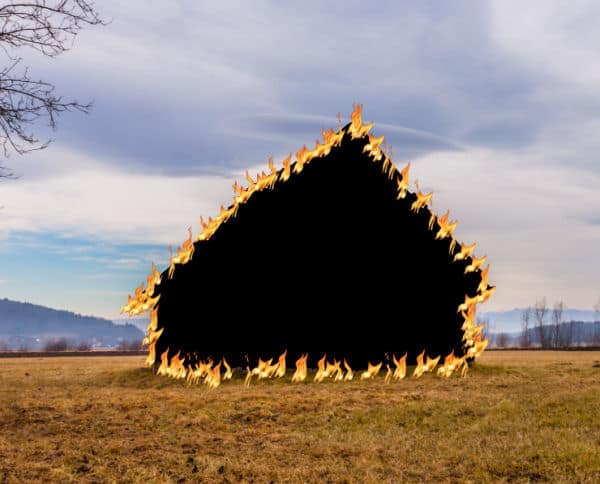
And once the vector shape is hidden, I have this:

What else?
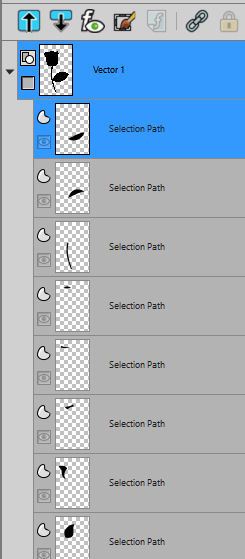
Although the example above used a single shape, you can repeat the process for different sections. If you have a clipart with distinct colors, you can select each of those colors, one at a time, and run the SelectiontoPath script to end up with individual vector objects. Then, you can use these separate objects with the Vector script of your choice. Let's look at this flower.

Selecting each color, one at a time, I get a series of objects in the Layers palette.
With one object at a time, I ran the VectorTube script with some bead chain picture tubes.
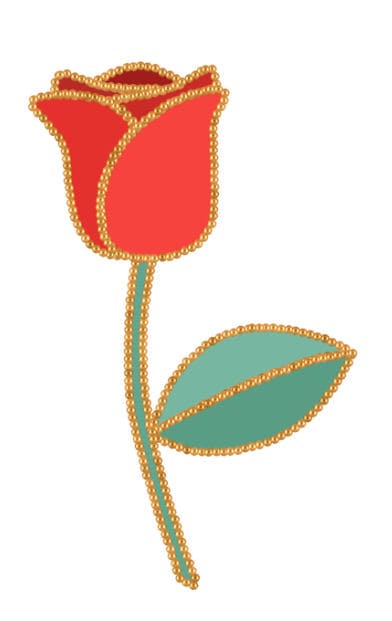
Although I could stop here, I chose to add a drop shadow to each of those stroked objects and hid the original colors.

And that is how you can use this SelectiontoPath script, to create new and original elements.
How will you use this script?


4 thoughts on “Featured Resource – Selection to Path”
LeviFiction seems to be very interesting webpage. Thank you for information about it:)
Thank you! Just like Corrie, I’m going to explore what I could do with it, it’s always fun to try new things 🙂
Excellent tutorial. Thank you. This does have wonderful possibilities.
I don’t know yet how I will use this script but it sure offers a lot of new possibilities to explore!