

Whether you want to create a scrapbook page or a greeting card for the holiday, a snow globe is a traditional decorative element. You can create them as baubles, or maybe place them on a stand. Their versatility is infinite since you can use any kind of element inside the globe.
Let's start with the globe
Open a blank image in any size you prefer. It’s always a good idea to start with a large canvas so you have more pixels to work with. You can simply shrink it down later as needed. We have here a 1000x1000 pixels image.
Flood Fill your canvas with any color for visibility from the Materials palette.
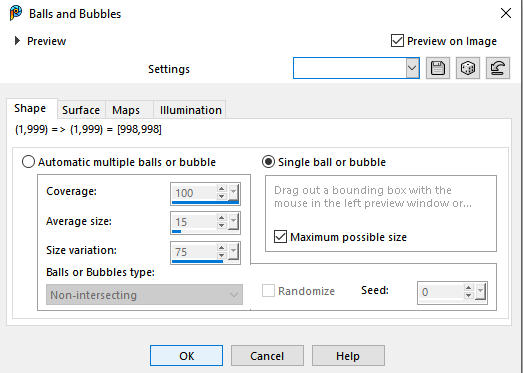
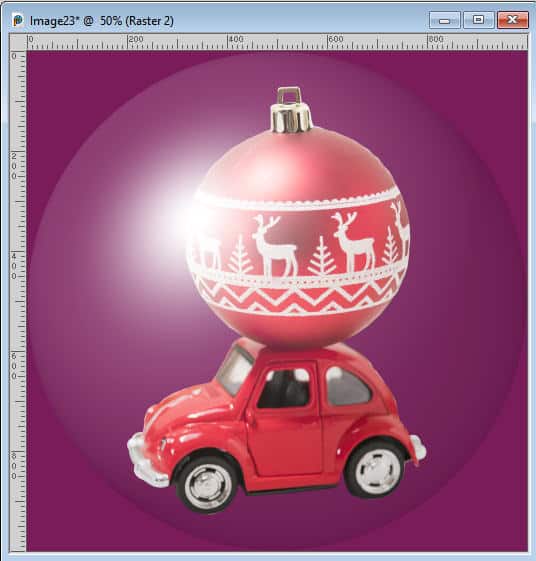
Add a new raster layer and create a bubble with Effects > Artistic Effects > Balls and Bubbles. Choose to create a single bubble and check the Maximum possible size to create a large bubble.
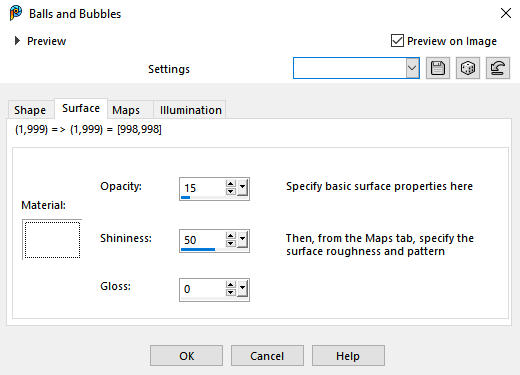
In case it is not set to default, make sure that, under the Surface tab, you have settings similar to these:
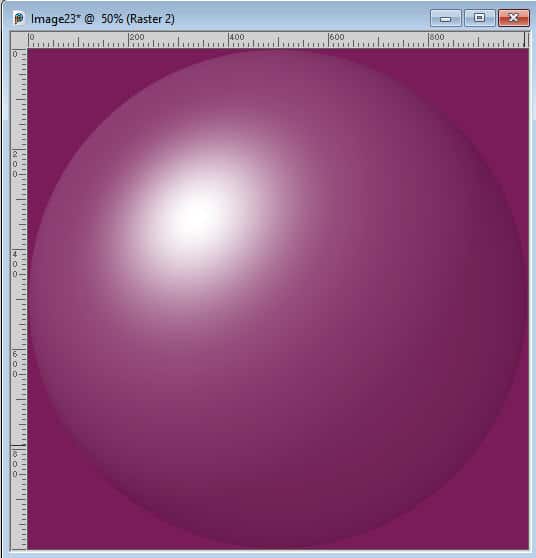
And this will give you the base globe.
The inside
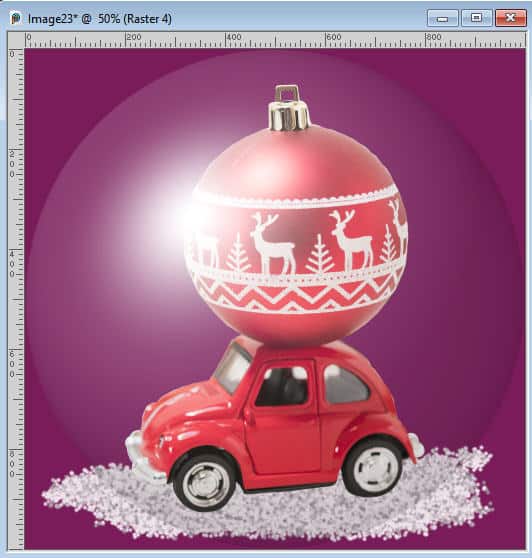
Now, it is time to open the image for the element you want to insert in the globe. Make sure it is in png format. It could be a little house, a snowman, or a vehicle. Resize it to be a bit smaller than the total height of the bubble (1000 pixels in our example). Add the element in the middle of the image.
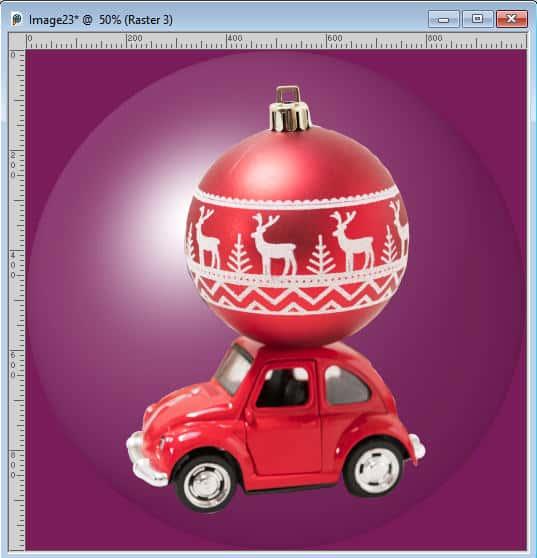
In the Layers palette, move the element below the bubble layer. This will allow the gloss to show up.
Let's add snow
For the snow, you can create it by using the Brush Variance palette. Activate the Brush tool, and set it to a basic circle shape with a size of 10. Then, open the Brush Variance palette with F11, and use the settings below:
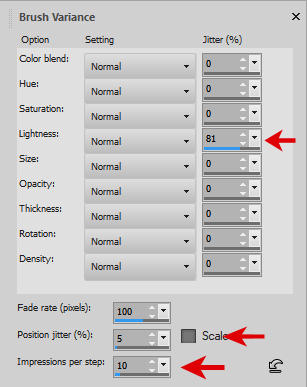
If you have a version older than PSPX6, you can set the Position jitter to something like 500. With those settings, on a new raster layer, brush a base at the bottom of the globe.
Move this layer below the decorative element.
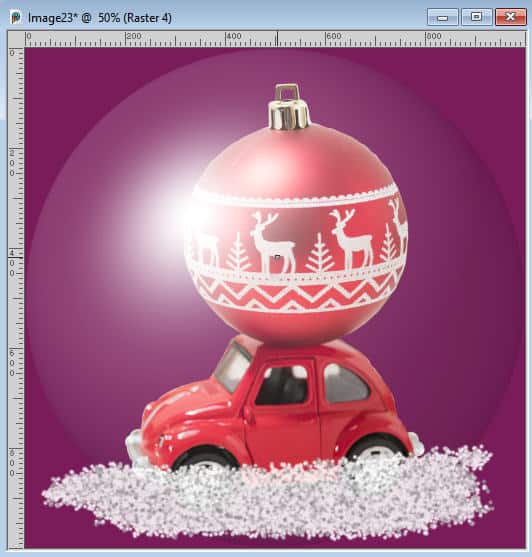
On a new layer, brush some snow just barely over the bottom edge of your element.

Now, you can add some falling snowflakes on a new raster layer. In the Brush Variance palette, change the Position jitter to 100%. Instead of brushing on the surface with the Brush tool, you will just click a bit all over the place.
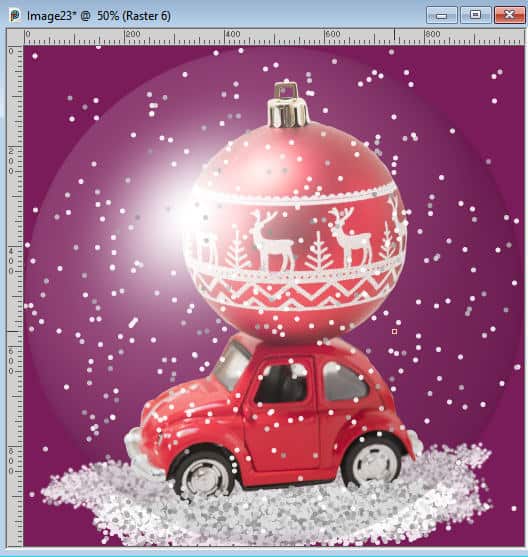
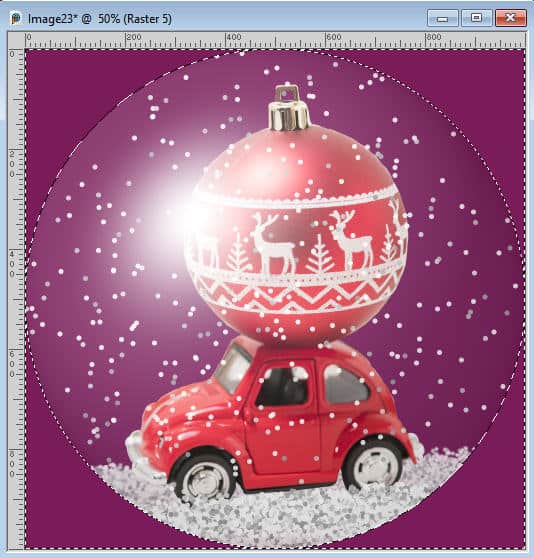
Move this layer under the globe layer but above the element layer. Activate the globe layer, choose the Magic Wand, set to Opacity for the mode. Click outside of the globe. Activate all three snow layers, successively, and hit the Delete key to remove the excess snow.
Finishing touch
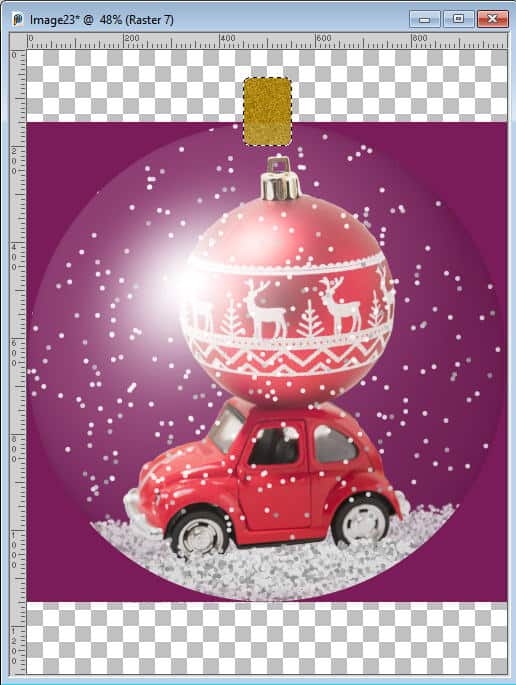
From this globe, you can choose to hang it like a bauble. Resize the canvas to add some space on top of the globe. You can do that with Image > Canvas size... and add some space on top, based on the dimension of your current image.
Select a rounded rectangle on the top, on a new layer. Fill with the color you want, and add some Noise to it.
Deselect. Make a rectangular selection on the right side of the attachment, and feather. Reduce the Brightness to create a darker area.

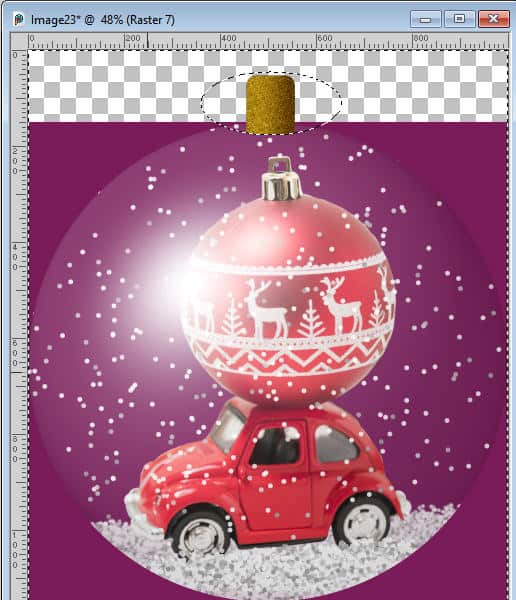
Deselect. To make the shape of the attachment more realistic, select an ellipse shape that will encompass the whole top of the golden section while leaving a tiny piece not selected on the bottom.

Invert the selection and delete that tiny section at the bottom.
Now you can use it
Once you have deselected the last selection, hide the background layer, and you can merge the visible layers. Make sure you save your work in PNG format to maintain transparency and use it on your next project.
Possible variations
Starting with the basic tutorial for a snow globe, you can replace the snow with confetti for a different holiday or occasion. You can also change the white color of the globe (in the Balls and Bubbles settings) to a different color. In addition, you can darken the edges around the globe for more contrast.
For more holiday projects you can do with PaintShop Pro, check out our series of Christmas classes:
PaintShop Christmas, PaintShop Christmas 2, PaintShop Christmas 3, PaintShop Christmas 4, PaintShop Christmas 5, PaintShop Christmas 6, PaintShop Christmas 7


3 thoughts on “Create a snow globe with PaintShop Pro”
I have some white on my element. I was thinking that maybe adding something around the white “snowflakes” could help. But drop shadow would not do the entire item. Any suggestions?
You have to remember that drop shadows have to be “logical” and it should be cast on a surface. If snowflakes are “floating”, they should not have shadows as there is no surface. Other than that, I would have to see what your composition looks like to give additional suggestions.
Love this!