
Whether you want to use your graphic project as a book cover, a billboard, or a T-shirt, you don't always have to start from scratch. Various sites are available for you to download templates. They will make the process easier since everything is already measured for you and sometimes, they even include some overlays. Let's have a look at the process to create a mockup using a template.
Where to find mockup templates?
There are various sites to find mockup templates. Some are free, and some are paid. Mockup World has a lot of options, ranging from books, boxes, packages, apparel, and more. Creative Fabrica also has some mockups although the range is much smaller. Even Freepik has some free templates you can download.
Depending on the site you use, the choices will vary. You will likely search for the type of template you want, whether it is for a business card, a box, a shirt, or a poster. Once you have selected the template you want, follow the process for that particular site, to download it. It will likely be a zip file that you will save, and then unzip.
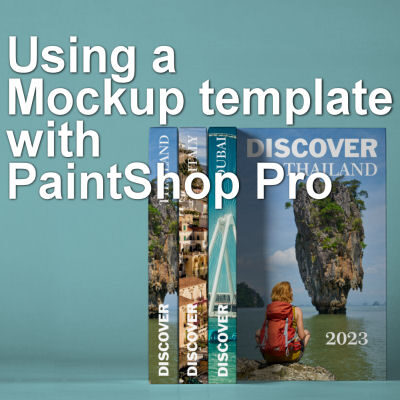
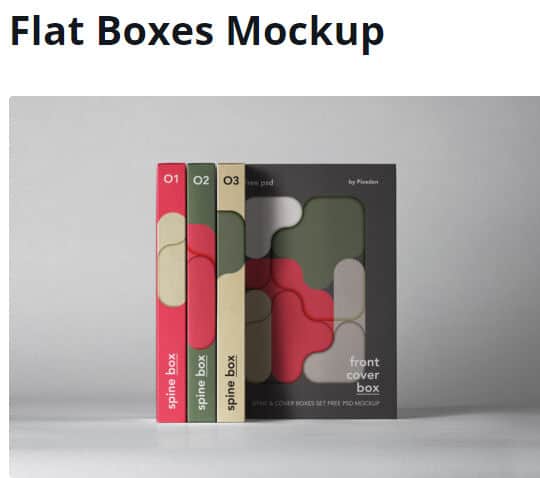
Let's use this particular template available HERE:
Opening that PSD file
Yes, you will almost always get a PSD template. Lucky for you, PaintShop Pro can open those PSD files. Even though some features are not available in PaintShop Pro, the files should still open. If anything, you might get a warning popup similar to this when you open the file.
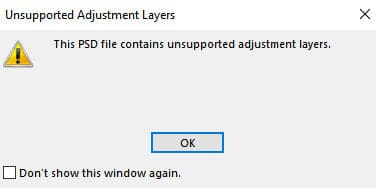
The error will depend on the type of layers included in the template that PaintShop Pro won't support. Sometimes, it is an adjustment layer, sometimes it is a vector layer. Just click OK and the file will open in your workspace. And here is what you get.
What are those layers?
Since you downloaded a template, there will be lots of layers and groups. Those were created in Photoshop so they will use the layer structure of Photoshop. Luckily, it is fairly similar to PaintShop Pro. Something else that is really neat is that the designer for the templates will tend to rename the layers so it will be easy for you. With those names, you can determine which layers or groups you need, and which ones you don't. Remember that some layers will be specific to Photoshop and you won't have any use for them in PaintShop Pro.
This is the top part of the Layers palette, once I have opened the template.
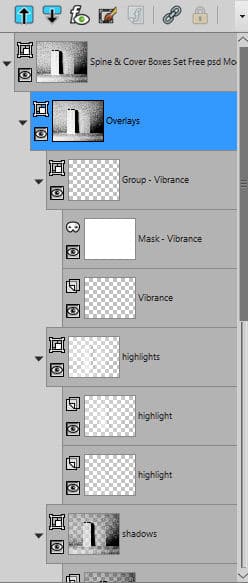
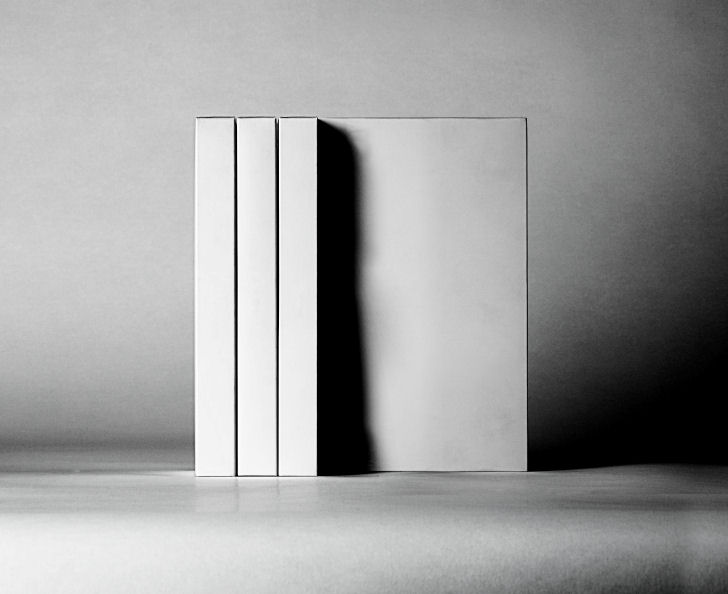
You can see one group called Overlays includes more sub-groups for Vibrance, Highlights, and Shadows. When I hide the Vibrance or the Highlights groups, not much happens. However, when I hide the Shadows group, the image changes considerably. This is what it would look like without the shadows.

That tells me that this group will be important, while the others might not be. It will depend on the particular template you download.
Let's prepare the template
Since all the layers can make for a pretty long palette, let's collapse the groups. It is now just easier to see and navigate to the different sections.
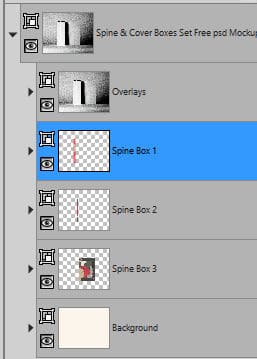
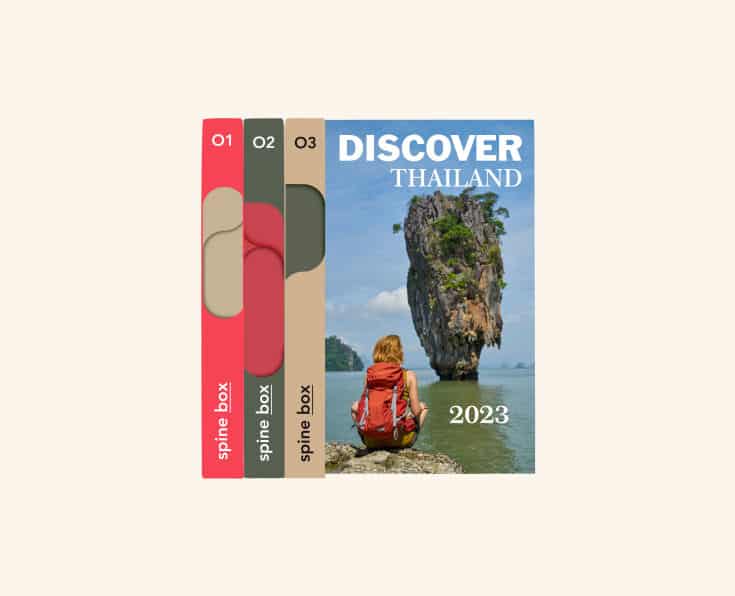
Now we can see that this template has separate sections for the three spines. Let's open one of the spine groups:
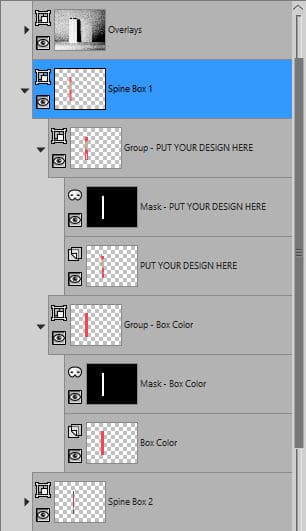
Do you see something familiar? Yes, you see masks. They will behave just the same as any mask you create or use in PaintShop Pro. And the layers are named clearly. Now that I know where I will place my images, let's start.
Let's add the main image
I will be using one main image on the "spine box 3", which includes not only the spine but also a facing image. This is the composition I will use.

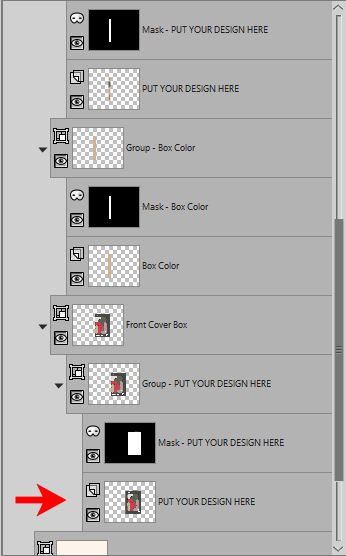
I will open the "spine 3" group. You can see there is a clear indication of where to add my image.
This is what I will do. Then, using the Pick tool, I will center the image inside that mask. If needed, I could have resized the image too.

I have hidden all the layers in the Overlays group. This allows me to see exactly what my image looks like in the composition.
Isn't it looking good so far?
Let's add the spines
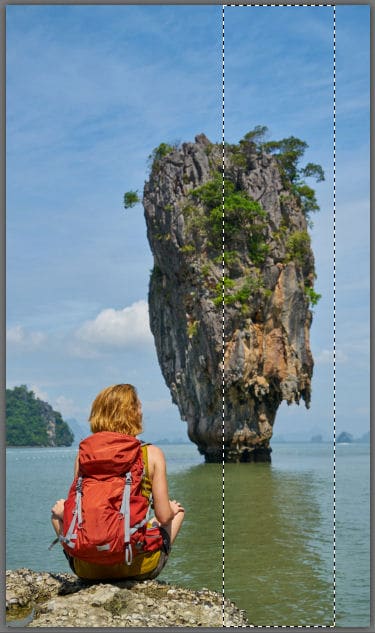
This particular template includes three spines. Let's assume that each book is about a different country in the "DISCOVER" series. Depending on your preference, you could use a part of the photo for the spine or a solid color. Let's use part of this photo for Spine 1. I'll make a vertical selection on the original photo (so I don't catch any of the text).
Then, I will copy and paste it inside the Spine 1 group, under the appropriate mask. Using the Pick tool, I moved the partial image to the correct position.
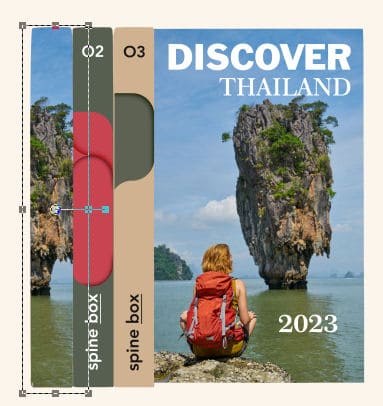
I will now add images for the other two spines.

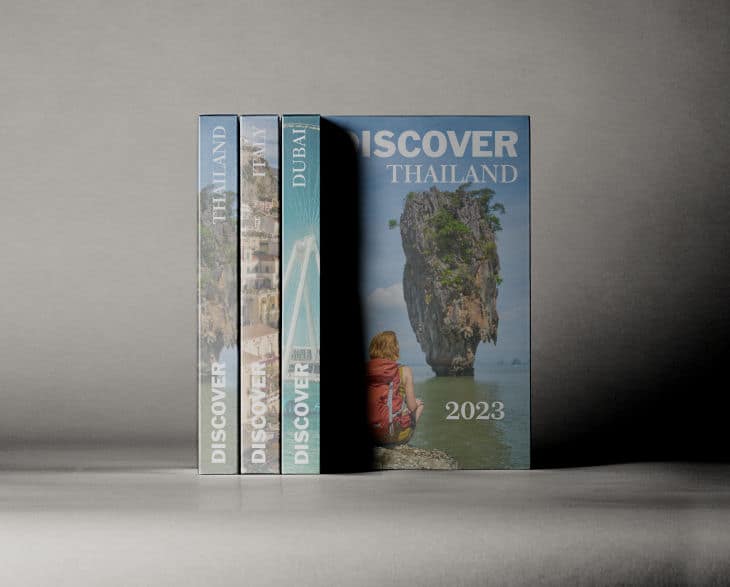
Let's add the details
Although I could keep everything as is, in this particular composition, it would make sense to add some text on the spines. I will then add a title for each of them, using the same font and size for a consistent look.

There are many ways to customize this template as I could have added some colored overlays on each spine. I could cover part of the spine with a solid color that matches the photo. Or I could also use a single color for all the spines too. The options are endless.
Let's tweak those layers
Depending on the template you will be using, you might have some adjustment layers or not. In this case, there were some (which is why we got the warning in the beginning). However, since they are not compatible with PaintShop Pro, you might need to see how they impact the end result. At that point, you can either hide them or use them differently.
After adding all the images, I unhid the "Shadow" group. It gives more of a 3D effect, but my composition looked quite faded.
Looking at the various layers in the Overlays group, I see one called "Balance". Let's hide it and see the result.
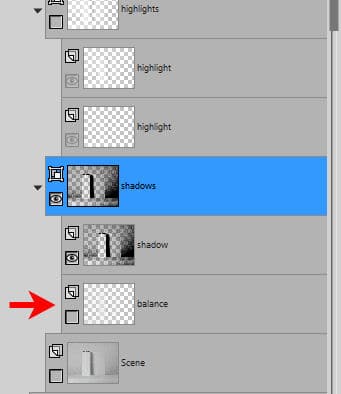
And this is what I get.

I can tweak further by lowering the opacity of the Shadows group so I can see a bit more of the image on the cover.

And finally, we can add some color to the Background layer.

The mockup template chosen in this tutorial was using simple straight photos. What if it were something different? We'll look at those in a future article. Stay tuned.


2 thoughts on “Using a Mockup template with PaintShop Pro”
Carol, I think you are reading my mind. This is exactly what I needed to see in the newsletter today. I have been fighting with PSD mug & tumbler mockups but couldn’t understand the layer groups. Thank you ever so much.
This is very cool. I had being thinking how to you make a box that you see the dimensions (3/4 angle to the box looking at it from an upper angled down view). I wanted to make a box for my pretend color game. What a surprise to see this blog at this time. It does look complicated but I will give it a try.