
Although you can use any paper to create straight and flat washi tape, you might want to add some creases and textures to it. The simplest method would be to use real tape, take pictures, and extra them with PaintShop Pro. But you probably don't have the tape in the exact color or pattern you want. But you can use templates for that.
What template?
You can use a variety of premade tapes that are already in greyscale, or turn them to greyscale yourself. However, it would be best to use something that is simple and plain. Avoid patterns or heavy textures so you can really match the tape to your actual papers.
You can get some templates at DigitalScrapbook.com. I also found some varied tapes on DealJumbo. The very straight ones will be the easiest to use but the folded and creased ones will add variety.
The simplest way - Colorizing
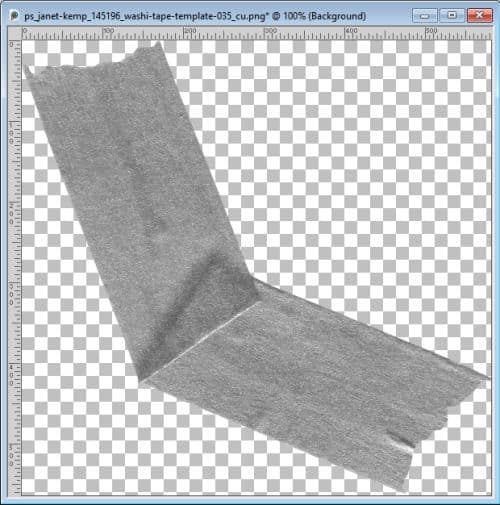
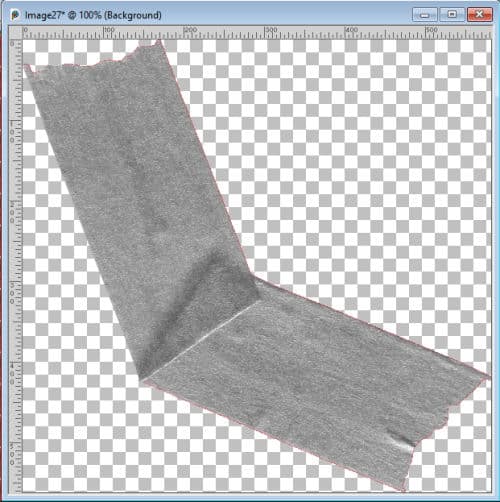
If you have a greyscale tape, the simplest method to match it to your project is to colorize it. Let's start with this tape (from Janet Kemp).
Working on a duplicate, you can use the simple Colorize command where you can select the Hue and Saturation.

The other tool is the Hue/Saturation/Lightness command which also gives you the option to adjust the lightness, unlike the Colorize command.
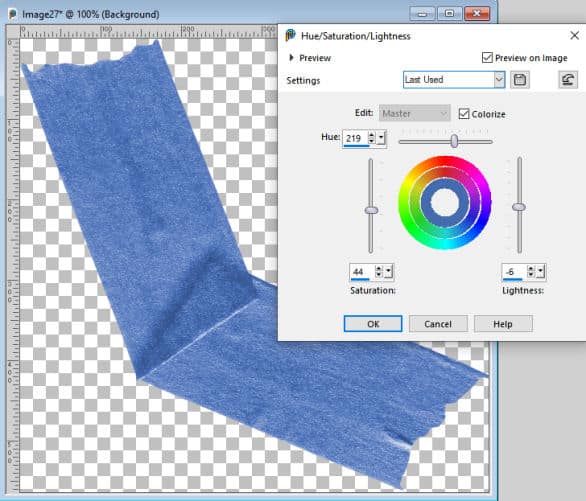
If you only one a single color on your washi tape, that is the simplest way.
Using a patterned paper - Aligning
If you want to match the washi tape to an existing paper you have, the process is a bit longer. However, the result can be much more interesting. Let's use the same starting tape as above. Luckily, the edges are pretty straight, which is going to save some time. I want to use this patterned paper as "tape".

Since the pattern might be a bit large for the tape, I will resize the paper to 1800 pixels. I will then select a long strip of that paper and copy it onto the duplicate copy of the tape. I estimated that the width of the tape was about 200 pixels, so I made my selection based on that.

I will move that tape below the greyscale tape. To have more room to work, I will also expand my canvas to about twice its current size.
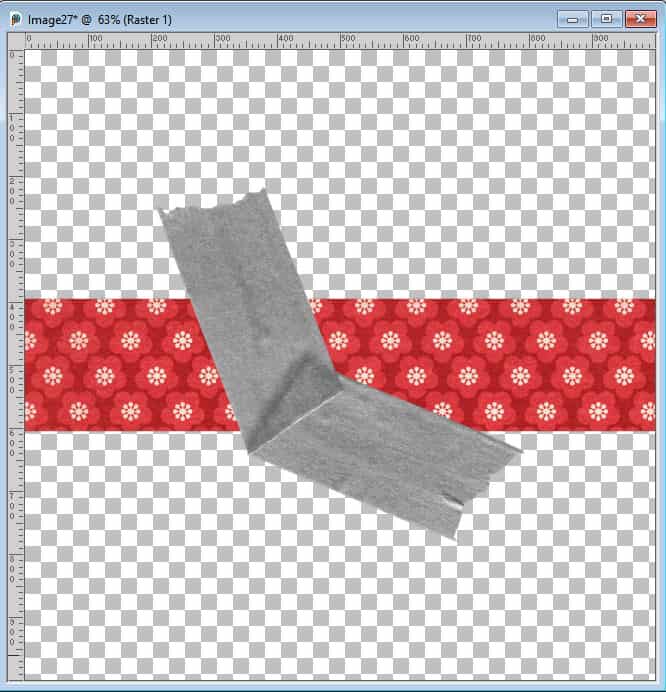
Let's use the Pick tool to rotate the red paper to match the edges of the tape. We can start with the top section as it will be all visible.
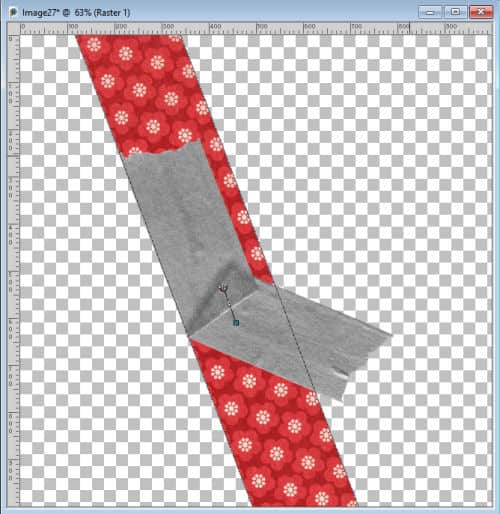
Using the Selection tool with the Point to point mode, select around the top section, making sure the selection goes up to the edge of the fold.

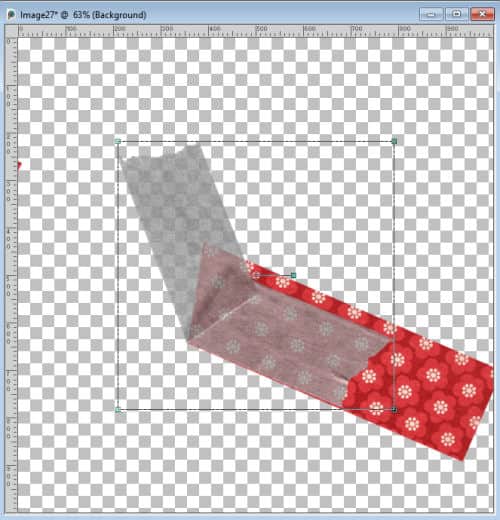
Promote that selection to a layer and delete it from the initial layer. That will give you two layers: one with a rough section to match the top, and the "leftover" on the original section.

Now that the piece for the top is cut from the initial layer, you can rotate that "leftover" piece to align with the bottom section. The reason we cut the piece is to help you get a better alignment on the little corner created by the fold. This can become important with some designs. You can reduce the opacity of the template to see better and even hide the top piece that you created just before.
If you plan on using the tape with some transparency on your project, you will want to cut the piece to match the fold that we can see through the texture. If you will use it as an opaque tape, you can skip that part.
Unhide the top piece and make sure the layers are aligned in the same way as the template. Depending on the fold, the top piece MIGHT need to be moved below the other. In this example, the alignment is correct: the top piece is on top and the bottom one is below it. Let's merge the two layers together. Now, with the Selection tool set to Opacity mode, select the area of the template itself.
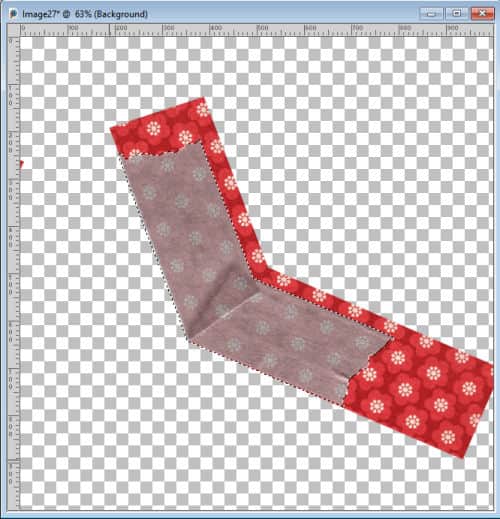
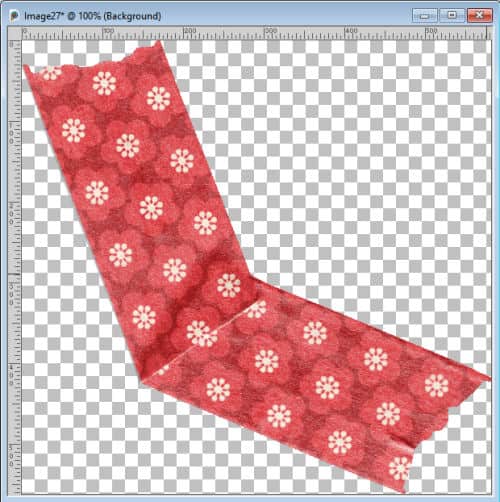
Crop to that selection. See how all the extra is deleted.
Using a patterned paper - Texturing
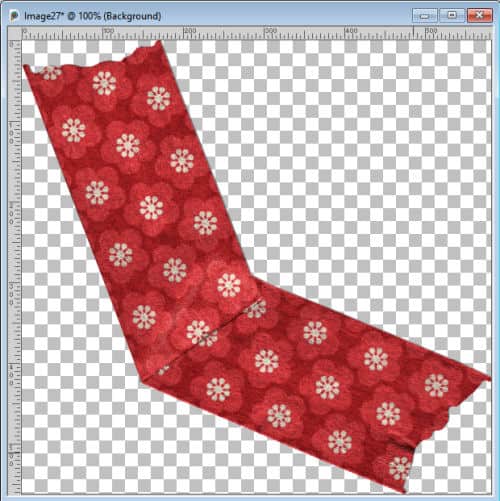
At this time, you simply have to play with the Blend mode and the Opacity of the initial template. The actual settings will depend on the colors of your paper and the brightness of the template. You might also want a specific effect. For my particular example, I used the Hard Light mode and reduced the opacity to 80%. I wanted to be able to see some of the shadings of the template on my tape.
Once you are happy, merge the two layers together and save it as a PNG file. You can now use it on any project you want.
Another tweak
Depending on the designer, sometimes, the lighting and shading will be different than what you are used to. Also, you might want to use the resulting tape in a different orientation, which will affect the shading.
For example, in the tape we used above, the fold seems to be lit from the bottom right. If you create a project where the light comes from the top left, you can either rotate the tape before replacing it with the paper or turn it to negative image. In that case, the light area becomes dark and will give you a different result. Here is my tape after I have applied the Negative image command to the template.
Do you see how the fold seems more obvious? So have a closer look at the template you are using, but also plan for how you will be placing it on your project. And if you are unsure, save two copies. You can always use it somewhere else! Check this article about mistakes in digital scrapbooking to see what else you should keep an eye on.


1 thought on “How to create custom washi tape”
Thank you so much for this good idea!