If you use PaintShop Pro for a while, you will surely have created various presets, whether it is to have the same Drop shadow, the same Brushstroke, or a specific Mesh Warp setting. Presets will be very convenient for consistency and speed, but over time, you might need to organize them or clean them up.
What is a preset?
A Preset is a combination of settings for a particular tool or command that is stored and you can retitrieve whenever you need it. That way, you get the same settings, every time you choose one. For more information about Preset, check out this article.
Where are the presets?
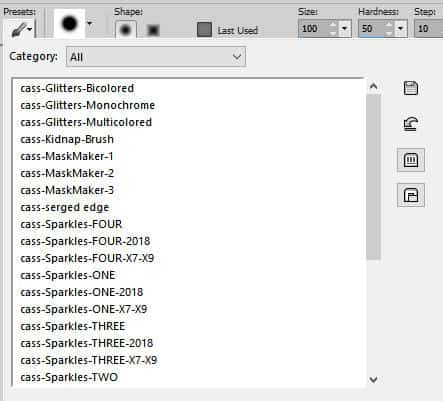
Depending on what you are looking at, the presets will show in different locations. If you are looking at a tool preset, like a Brush preset or a Shape preset, you will find it in the tool options palette.
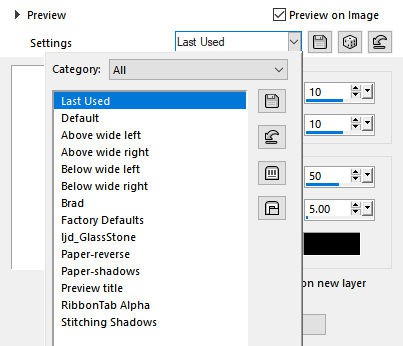
If you are looking for the Presets for a command, like the Drop Shadow, you will find them inside the dialog window itself, likely above the preview panes.
How do you manage Presets?
Sometimes, you might have created Presets for a specific goal that is temporary. For example, when creating a script that will involve the Mesh Warp, I will create a Preset that I will tweak during the scripting process. However, once the script is completed, those Presets are no longer needed, so I need to delete them to keep my list clean.
On the side of each of those Presets drop-downs, you will see the Resources Manager icon.
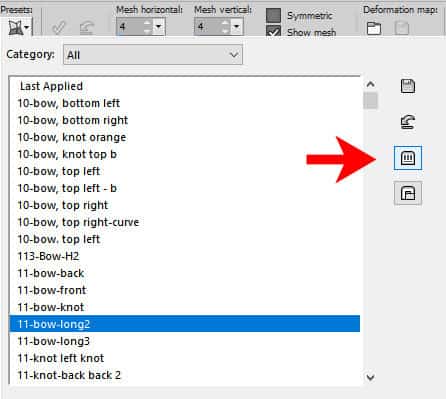
Click on it and you will get another dialog window with different icons on the side:
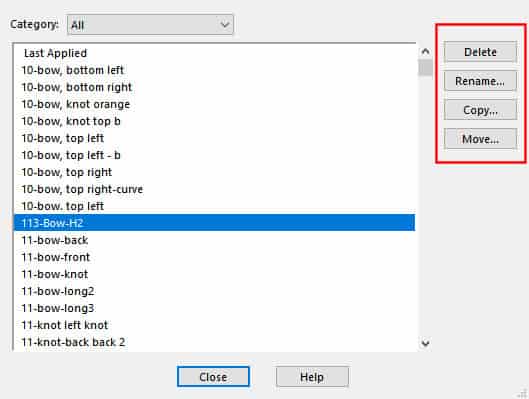
After highlighting one preset, you can delete it by clicking the Delete button. That is obvious, right?
If I need to rename a particular preset to make it clearer or to correct a typo, I will click on the Rename... button. This will bring up another popup dialog window where you can enter the new name for your Preset.
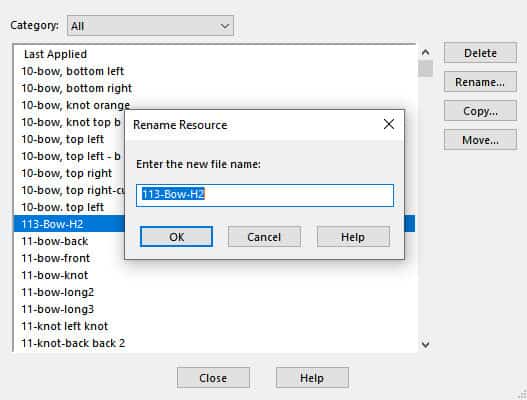
If you need to copy a specific Preset to a different location, click the Copy... button. It will open the traditional Save as... window so you can save this preset to another folder.
Finally, if you need to move a preset to a different location, maybe because you are changing version, click the Move... button. The difference between the Copy... and the Move... buttons is that in the first case, the original Preset will stay in its current location.
Now that you know how to manage your Presets, it might be time for you to review them and get organized.



1 thought on “How to manage your presets in PSP?”
Thanks for this…..very helpful!