
PaintShop Pro has a variety of Selection tools, and even more were added in version X6 with the Selection Brush and the Auto-Selection tool. Although selecting a specific area is simple, sometimes we would like the selection in a different area. That is possible with PaintShop Pro.
Why move a selection?
When you make a selection based on a color on an image, you are not likely to want it anywhere else, but if you are making a selection from a shape, sometimes, you will want to tweak it, instead of redoing it. For example, making a round selection can be less than precise, and you might end up with your subject not aligned where you want it inside the selection.
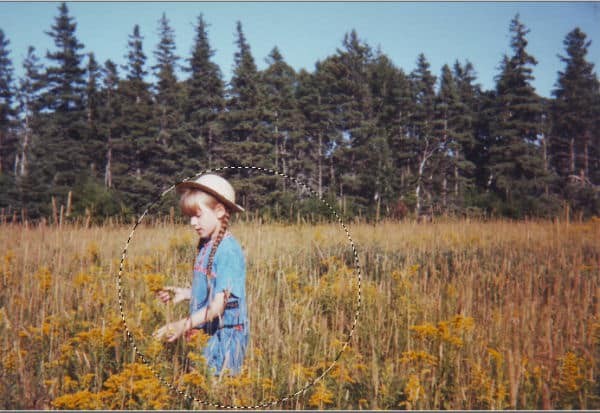
Maybe I want the selection a little bit more on the left, so that the child is a little off-center on the right, giving some space in front of her.
Use the Move tool
Yes, it is as simple as using the Move tool. Once you activate the Move tool, and hover over your selection, use the right-click to "grab" and move the selection where you want it.
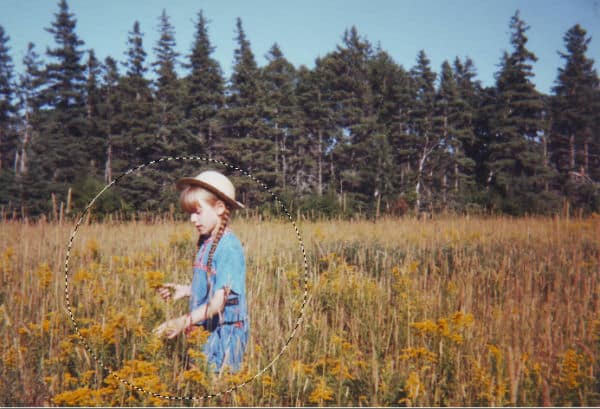
Be careful to use the right-click, otherwise, it will move the content of the selection, instead of the selection itself, and you will end up with something like this:

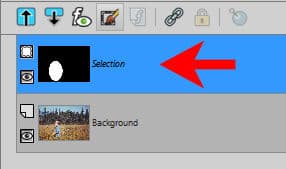
Edit Selection
Another option is available to move a selection. Although it is a little bit longer, it could be ideal in other situations: when you want to adjust the size of that selection. The command is available in the Selections menu, as Selections > Edit Selection, or also on top of the Layers palette.
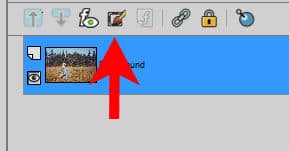
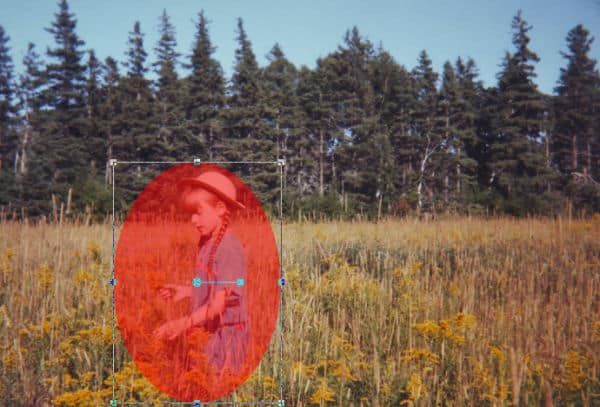
When you click on this icon (or the command), the selection on your image will turn to a reddish color.

And if you look in the Layers palette, you now have a temporary layer called Selection.
Since it is a separate layer, it will behave much like any other raster layer: you can move it with the Move tool, but you can also apply other effects. This means that you can activate the Pick tool and you will get the nodes that would allow you to resize, transform or rotate your selection. Of course, rotating a round selection won't show much but it would be useful if you want to turn a square selection into a diamond shape.
Once you are happy with the placement and the shape of your selection, click on the Edit Selection icon (or the Selections > Edit Selection command) to toggle it off. You will see the Selection layer disappear from the Layers palette, and the selection will be back to the typical marquee (or the "marching ants").
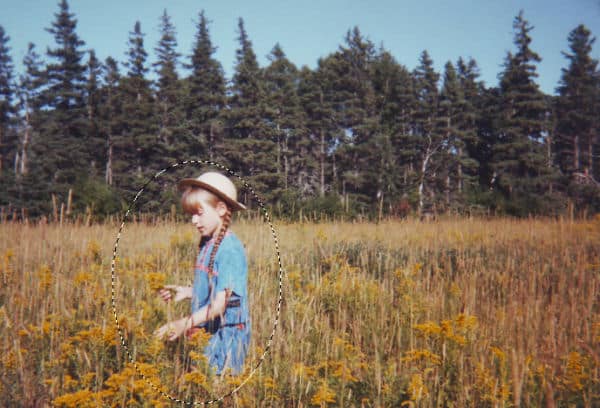
And it is that easy for you to move (and edit) a selection.
Why do I need to move a selection?
As mentioned above, you might want to move a selection because you didn't align it correctly in the first place. Of course, you can try again, but sometimes, it can be more frustrating.
Maybe you want to use multiple selections on a single image to create various elements. For example, if you have an alphabet on a single image and you want to cut out all the letters one by one, you might want to make one selection, copy/paste it as a new image, move the selection to the next letter, copy/paste, and so on.
Or maybe you want random elements of the same size and shape, but from different sections of your patterned paper. Maybe you want to create petals for a flower, or make different stars on a wreath from the same paper. By moving the selection (with or without rotation/resizing), each piece won't look like a single copied and pasted element.
Can you think of more reasons you might need to move a selection?
If you want to add to or remove from the selection, you can also do that. Read about it in this blog post.


