With PaintShop Pro 2019, Corel released an add-on program called Pic-to-Painting. It was separate from PaintShop Pro and could add some unique effects to photos. With PaintShop Pro 2020, a new workspace was added, called Photography, and it included some instant effects that a user could apply to their photos for a different look. With PaintShop Pro 2021, however, Corel decided to include the effects from Pic-to-Painting along with the Instant effects in the Photography workspace, giving the users even more options, right inside the program.
The Photography workspace
With PaintShop Pro 2018, came a new workspace called "Essential", meant to include fewer tools and commands for newcomers. It worked very similarly to the familiar workspace (now called "Complete") as it did for all the previous versions. With PaintShop Pro 2020, Corel added a brand new workspace, specifically designed for photo editing and adjustments. This new workspace was appropriately called "Photography". In the next version, another workspace called "Sea-to-sky" was added, with more functionalities aimed at aerial and underwater photography.
So, where do we find all those workspaces? Once you launch your PaintShop Pro for the first time, the program will show the Welcome screen, and this is where you will see the 2, 3, or 4 workspaces available (depending on your version).

If you are already in another workspace, it is possible to go directly to this one with File > Workspace, and there you can choose the Photography one.

AI Style Transfer
Once in the Photography workspace, you will be greeted with this page:
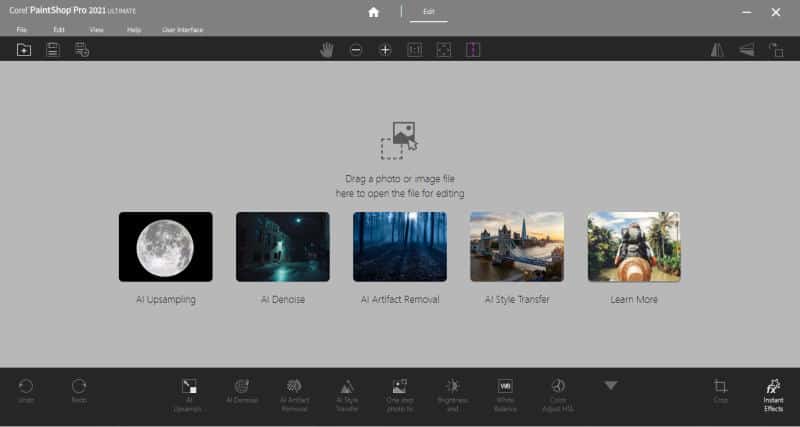
And at the bottom, you can see various editing options, that will become available once you have an image to work with, so let's open an image with the Open icon.

Now, with an open image, we can see all those options available, including the AI Style Transfer.
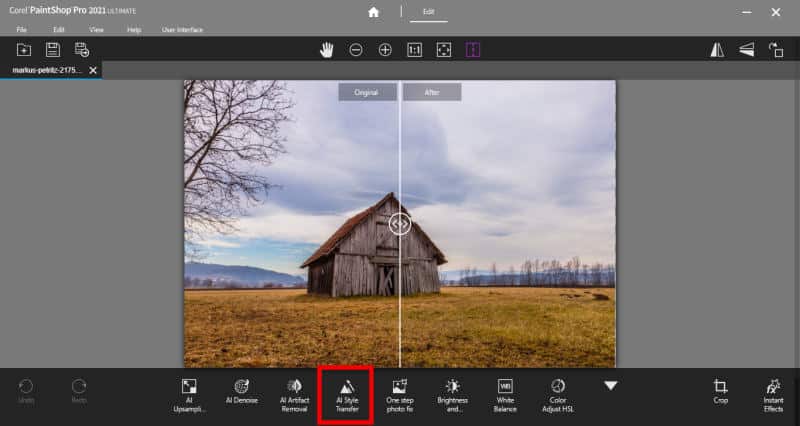
Let's click on it and we'll see the Instant Effects palette pop up.
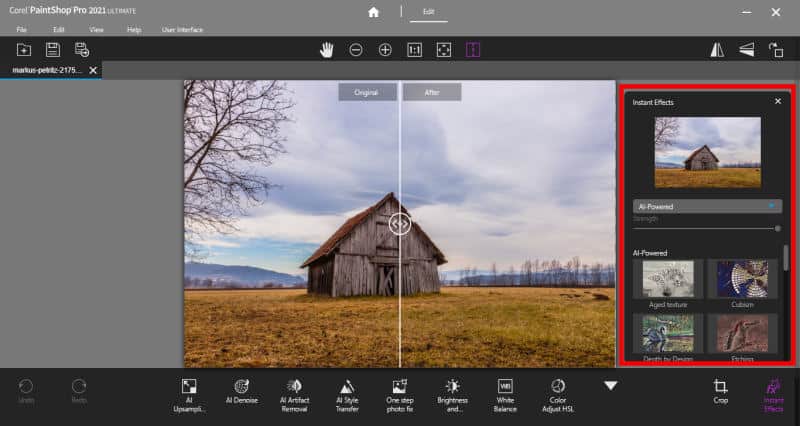
In the Instant Effects palette, you will see a drop-down list of different types of effects. Most of them are from the Instant effects from the previous PaintShop Pro version. But you will also see the addition of AI-Powered. These are the effects that are similar to the Pic-to-Painting.
Choosing any of the thumbnails at the bottom will display a preview. It will not preview directly on your large image.


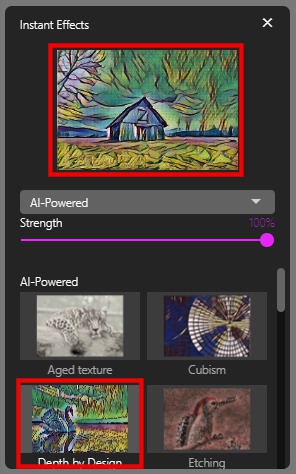
The strength slider will change the "opacity" of the effect on your photo. With the maximum strength, you will get maximum effect and your initial photo won't be visible. In this example, the colors also seem to be more saturated with the maximum strength applied.
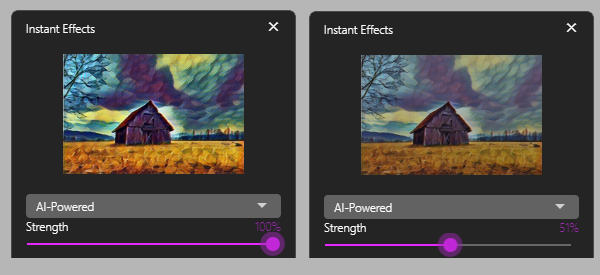
Once you are happy with your choice and adjustment of the strength, simply double-click on the thumbnail and you will see an interesting "wait" design.

And once the program is finished with all the "thinking", you will see your photo on the right half of the pane. It is up to you to move that center divider to see more of your photo with the effect you applied.

At this point, you can save your image. Beware that if you just use the Save button, it will save over your current image. So if you want to be safer, use the Save as...

Something to remember
While you are browsing the various effects you can apply to your image, the sample will show in the Instant effects palette. If you apply it to your image and then want to change the effect, it will be applied to the already edited image, so the effects will be compounded, so to speak. This might not be what you are expecting, but it might be something interesting to explore.
As an example, I applied the Depth by design effect three times, on the same image. You can see the effect changing from the first to the third. Notice the effect on the sky area.
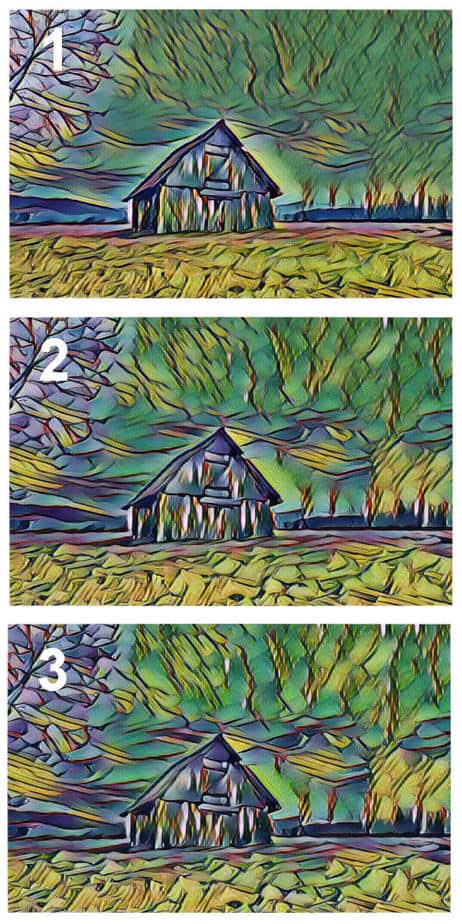
You can experiment with combining several effects successively to see if you like any of the results.
Other Instant Effects
Of course, the Style Transfer has more than the AI-Powered effects. You can choose other "traditional" instant effects on your image. Those didn't change since the previous version of PaintShop Pro when the Photography workspace and the Instant effects were introduced.
From your regular workspace
Although this tutorial is great to apply to the Photography workspace, because you can compare with that central line slider, you can also access those Instant Effects in the Complete workspace. Simply go to View > Palette > Instant Effects, or Shift-F2. Now, you can apply those fun effects on the fly, without having to change workspace.



3 thoughts on “AI Style Transfer in PaintShop Pro”
“Once you are happy with your choice and adjustment of the strength, simply double-click on the thumbnail and you will see an interesting “wait” design.”
I double-clicked the thumbnail after selecting the effect. The thumbnail changes to the effect but I never get the “wait” when double-clicking the thumbnail to get the effect on the image being edited. The image I’m editing never changes. The image is a JPEG. I opened a JPG and clicked on the same effect I wanted. The image changed to the effect after the “wait” period finished. The thumbnail was added also with the effect. I opened another JPEG and it all worked. I’m not getting the same results even though the same steps are repeated. When it works, it works as it is supposed to even if I select different effects
Sometimes the thumbnail is replaced with the new image opened. Sometimes not. I’ve chosen different images. Different results occasionally. Sometimes it works just fine for several images in a row. Works fine with more than one image open and thumbnail changes when I select any image tab. I guess you can’t close the old thumbnail should it not change when opening a new image.
Not sure if the problem is me or the app. Usually, the problem is found to be between the chair and the monitor.
I was trying this out in 2023. When I view the palette in the complete workspace, it shows me all the AI items, and I can amend the strength, colour and smoothness. But when I double click on the thumbnail, nothing happens. I then went into the photography workspace, and I can double click on the AI item and it applies, but I cannot amend the strength, colour or smoothness. They are greyed out. Is there some setting I need to change in order to make this work in either space? Thanks.
Thank you for this interesting blog.
However, as Pic-to-Painting does not work for me (according to Corel due to the capacity of my PC’s processor), this roundabout does not work either.