
When creating digital scrapbook pages with PaintShop Pro, you don't need to use any fasteners since everything is flat and digital, but if you want to replicate the traditional paper scrapbooking, you might want to use paperclips. Although they come in many forms, there are some basic steps to go through in order to make them realistic.
Check the lights and placement
I am using papers and a paperclip from Rachel Martin (you can download the paperclip HERE). I have layered my elements here.

The first thing I need to do is determine WHERE I want to place my paperclip and HOW I want it angled. Although you can always change the location of the paperclip afterward, you won't be able to change the angle. Looking at this paperclip, the first thing I notice is that the light source seems to come from the top right. Since my projects always assume the light coming from the top left, I will need to mirror my paperclip.
I also want to have it angled a bit so I will use my Pick tool to rotate it, and then place it where I want. Make sure that the paperclip extends above all the papers or elements you want to hold together.

Add the shadows
Generally, I prefer to add shadows near the completion of my pages, but for this, it would be much harder to do afterward, so it is better to do it now. Make sure you add the shadow on a separate layer so you will get more room to work.
The old way
I have seen various tutorials showing how to use paperclips where you would be instructed to just erase the parts that would show behind the paper. Although this could work, it immediately locks you into not moving the paperclip nor the papers. Using the Eraser tool also tends to add some rough edges where you don't want any. If you insist on using the Eraser tool, you can do it, but why not read further for a simpler, more effective method?
Make a selection
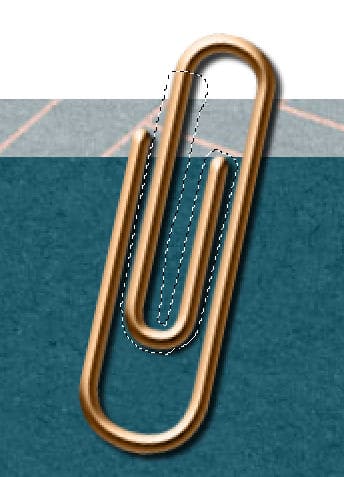
You can use the Selection tool, set to point-to-point to select the area you want to "hide" behind the paper. I prefer to use the Edit Selection, which can be found either on the Layers palette itself or under Selections > Edit Selection. In both cases, you will get a black "layer" and using the Brush tool, and white color, you brush over the part that you want to go behind the paper. Extend a bit further than the edge of the paper too. Just make sure you don't touch any other part of the paperclip.

Toggle the Edit Selection again and the reddish area will now turn to an actual selection.
Right-click on that layer in the Layers palette and choose Promote Selection to a layer.

Now, that little portion of the paperclip is on its own layer. Now, activate the original layer for the paperclip and hit the DELETE key on your keyboard. This will allow you to make that part "disappear" from the view. Now you can deselect (Ctrl-D).
And the shadow
Since you added the shadow on a separate layer, you can now repeat the same steps with that layer. Hide the top layers with the paperclip to help with visibility. Edit Selection, paint with the Brush tool on the section that will be behind the paper, Edit Selection again, right-click, Promote selection to a layer, back to the original layer, DELETE and deselect. Just make sure you don't select any higher than what you did for the paperclip itself or you might end up with tiny pieces of leftover shadows.
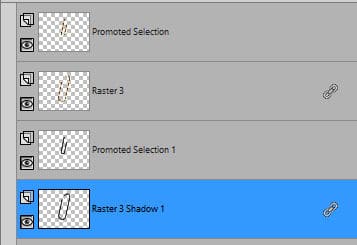
In the Layers palette, you should now have four layers related to your paperclip: one small promoted part of the paperclip, one for the rest of the paperclip, one small promoted part of the shadow, and one for the rest of the shadow.
Before we go any further, we want to link all those layers so that nothing will accidentally get misaligned. Select all those four layers, while holding the Ctrl key. Then, click the Link icon on top of the Layers palette.

For older versions of PSP, there is a column on the right pane of the Layers palette, where you see a link icon; you can see a number or None. Click on that until all four layers have the same number.
Re-arrange the layers
Now that you have all the pieces cut as you need, it is time to re-arrange the layers. Click on the layer for the small promoted selection of the paperclip and move it below the lowest paper/element it is attaching.

Depending on your project, it is possible that you will have to move those pieces down many layers. It is ok. Just make sure the shadow one is below the paperclip one. Since you have linked all the layers, you now have the option to move your paperclip slightly up, down, left or right, and everything will follow.

Oops!
If you end up with an extra piece of "shadow" on your paperclip, it might be because the selected part of the shadow was a little lower than the part of the paperclip that you cut. Once the small piece of paperclip is moved lower, it ends up UNDER the shadow you had left.
You can fix that in two ways.
- you can just use the Eraser tool and erase that part from the "top shadow"
- you can select that area of the shadow, and promote it as we did initially, move it with the bottom shadow, and merge it with the previously cut out shadow
Other paperclips
Although this technique is perfect for straight traditional paperclips, you can also use the same steps for other types of paperclips. You just have to be careful in selecting the one you will use as some of them will be more difficult.
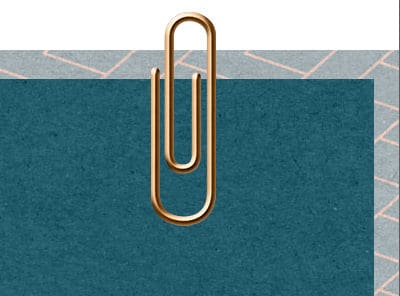
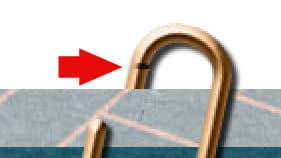
This is an example of a paperclip that will require a much more precise cutting for two reasons: the edges are touching so it will be hard to select them separately and then you will have a real challenge with the shadows.

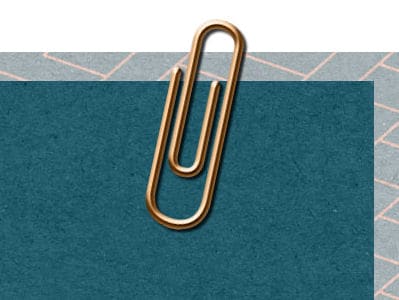
This one is also challenging because you have overlaps. It is still feasible, but you will need to be very precise in making your selection so that the part that is left on the top of the paper will not be distorted by the selection. one good thing is that you don't have to guess what parts of on top and what parts are under the papers.

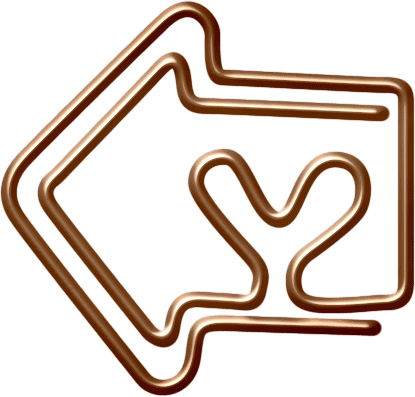
Finally, you can find other shapes of paperclips and the best and easiest ones to use will be those with clearly separate pieces that give you a clear view of where to make your selection.


4 thoughts on “How to use a paperclip”
This is a good way to do paper clips. I’ll be playing with this for awhile.
Thanks
Hello Carole
the problem with downloading the PDF files has been solved
Good work, thanks,
Jacques
Great tutorial. Nice to know there is more than one way to clip a paperclip.
I’ve wondered how one can achieve the look of the paper with a paperclip attached, to make it look even more realistic. The distortion the clip does to the paper. Same for a staple in a paper. Do you have a tutorial for that?
I don’t have a tutorial about that “distortion” but it would likely be a matter of lights and shadows. Something I can definitely consider, for later.