A lot of people know that I am specializing in scripts, but others are even more knowledgeable than I am among them, is LeviFiction. You might have seen him in the Corel user-to-user forum helping out other members, but also posting various advanced scripts for anyone to use. One of those is a script to create a vector spiral. I wish I had the ability to create such spirals in the past, as it could help complete so many projects.
Download the script
This script is available on his blog HERE. Once you downloaded and unzipped the file, place the .PspScript file in the Trusted Scripts folder. Although there is a mention that it was tested up to version X9, I have tested it also in version 2019, so you are good to go.
Running the script
Open a blank image and run the script. You will immediately see a dialog window like this:
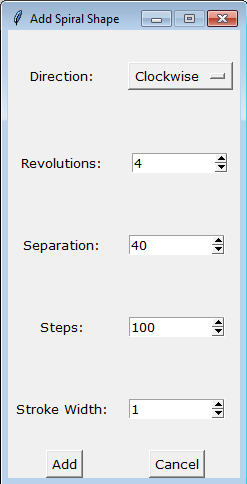
Each setting is quite self-explanatory but we'll have a look anyway.
The Direction can be selected as Clockwise or Counterclockwise.
The Revolution determines how many times the spiral will go around the center.
The Separation will determine how much space there will be between the lines of the spiral. Note that if you select a value about 70, it won't change in the spiral.
The Steps means the distance between points on the spiral. If you select a very low number (like 10), you will have a spiral that is very "pointy". If you want a smoother line, you can set a larger number.
The Stroke Width is the same as you would have in any vector shape. I would recommend that you start by adjusting this value from the start. It is set to 1 by default and that makes the spiral hard to visualize while you are changing the other settings.
Once you have set your different options, you can click Add and it will create that spiral for you.
Tweak the spiral
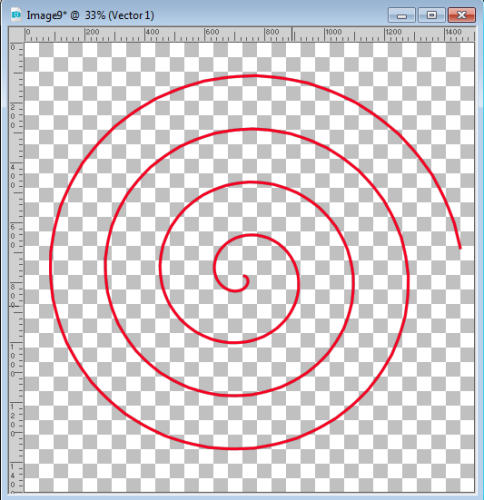
Since this spiral is a vector, you can resize it as much as you want. You can overcome rhe limitation of the Separation value by simply resizing that spiral using the Pick tool.
Also, just like any vector object, you can adjust the stroke width and the color and even the line style as much as you want.
Adding text
Have you ever thought of adding text in a spiral shape? This is the perfect tool to do so. By default, the path will go from the center toward the outside of the spiral. Click on a point close to the center (not too close or you won't be able to read very well), and start typing.

If your spiral was going counterclockwise, the text will appear on the "inside" of the spiral line.

If you want to have your text on the other side of the line (whether you are using a clockwise or counterclockwise spiral), you would need to right-click on the stroke and Reverse the path first.
And as for any text on path, if you want the text to appear without the path, you will have to HIDE the path object instead of deleting it, because removing the path will simply turn your text as a regular straight text.

Adding Picture Tubes
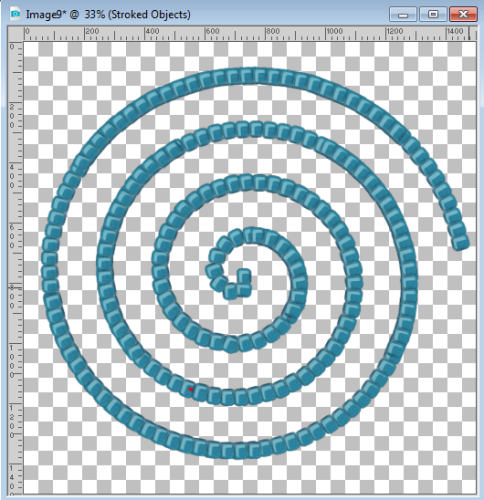
You can add any picture tube along that vector spiral using the VectorTube script. You can add pearls, chain links, pipe cleaners and so many more others you might have.
Here is the spiral covered with some seed beads (these seed beads are available HERE).
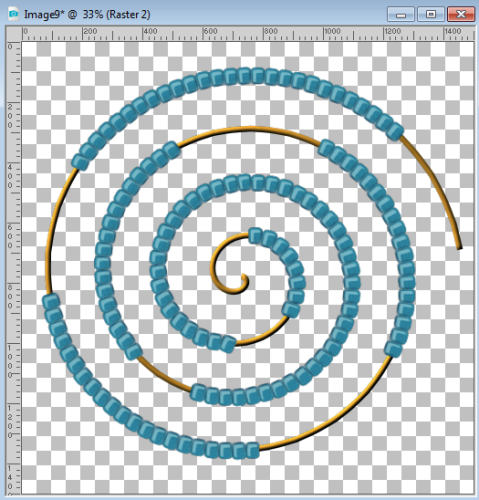
But we can do something even more fun. Let's duplicate that vector layer (the whole layer and object, not just the spiral itself). Hide the initial spiral for now, and activate the Pen tool, set to Knife mode. Cut the spiral into smaller sections and delete some of them.
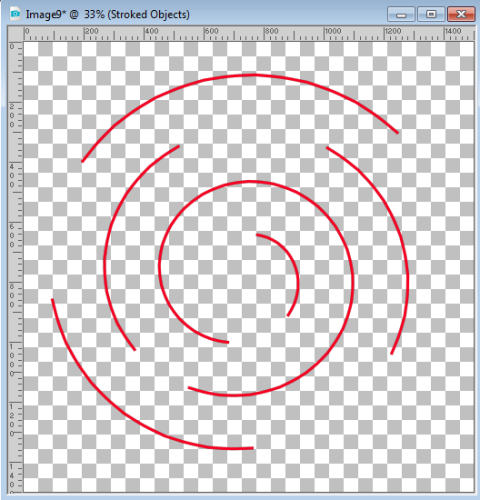
Now, run the VectorTube script on that "intermittent" spiral.

But that would not look best on its own. Let's add some gold wire. Hide the spiral object that was used as a base for these beads. Unhide the initial spiral that is complete and convert it to a raster layer. Using the Sculpture command, apply some gold (or other metal if you want) and you will see that support appear through the beads.
What will you do with this fun Vector Spiral script from LeviFiction?


3 thoughts on “Featured Resource – Vector Spiral script”
Thank you for this Cassel. Love scripts and how easy they make things.
Fantastic script. Wanted it mostly for the spiral text use. Also, free was a great incentive to download it. 😀
Bonjour Cassel,
Ce script est génial. Merci de l’avoir partagé. Bonne journée.