Since version X4, PaintShop Pro has added a few new Photo effects. Those effects can be applied with just a few clicks and several options to choose from. One of them is the Vignette effect. It will add a focus on part of the photo while adding a combination of blur and brightness change elsewhere. The subject will get more prominent. Let's have a look at that particular feature.
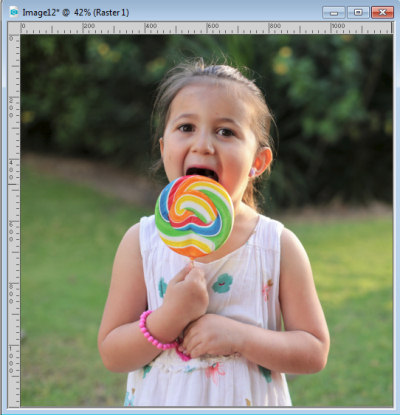
We will go through the whole process of applying a Vignette effect to this cute photo. Although the background is already blurred to showcase the little girl, we can still add that vignette effect.
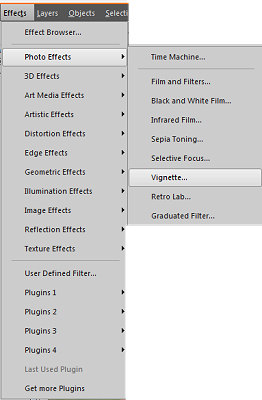
You can find the Vignette effect under Effects > Photo Effects > Vignette. That is a whole new section of effects that you get since version X4.
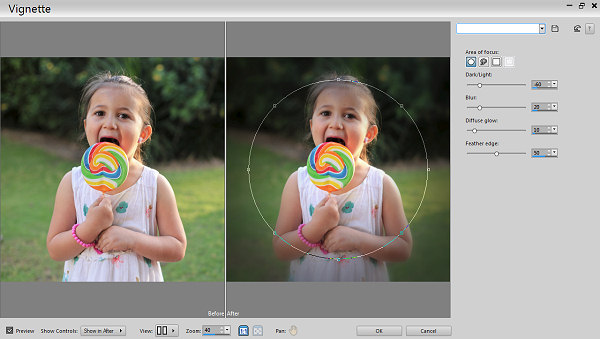
Once you click on that command, you will see this window showing the before and after photo. You also get a series of settings, on the right, to adjust the effect to get the look you want. This is the default result when you first activate that command. On the right, there are 4 sliders to adjust the following settings: Brightness, Blur, Diffuse glow and Feathered Edge. Let's see how they modify the photo.
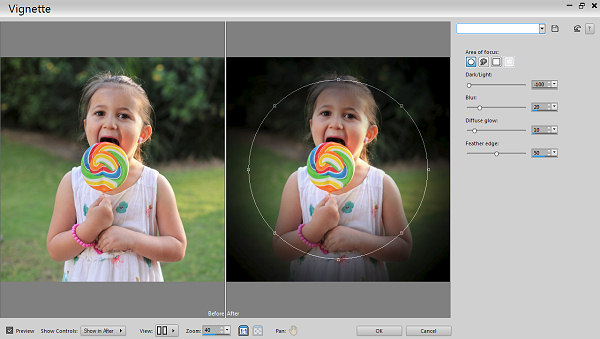
If you move the Brightness slider all the way down to 0, you will get the outside of the "selection" turn to black. This can give a very dramatic effect to a photo.
On the other hand, if you move the slider to the maximum value of 255, the black outer edge will turn white; a completely different effect, yet, very pretty.
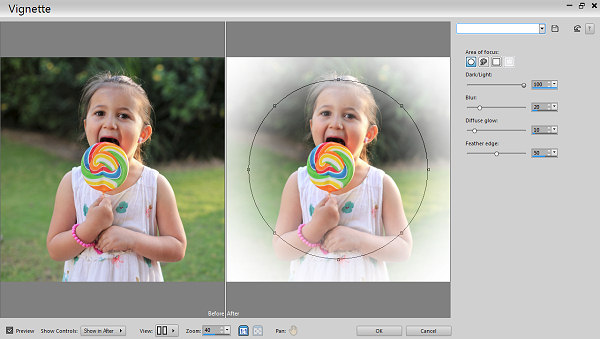
Let's bring the Brightness back to the default value of 20, and let's change the Blur value. Increasing it to the maximum, you might see the blur of the trees in the background. It might not be the most obvious with this specific photo since the background was already somewhat blurred, but you can definitely emphasize that.
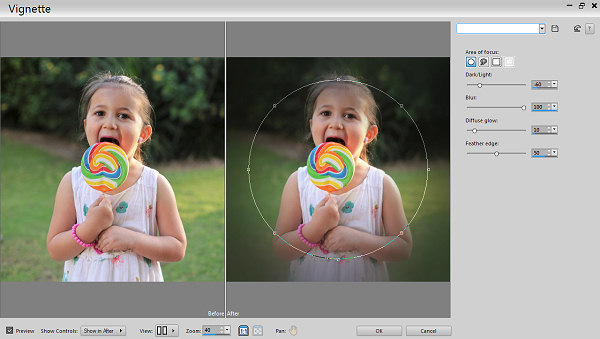
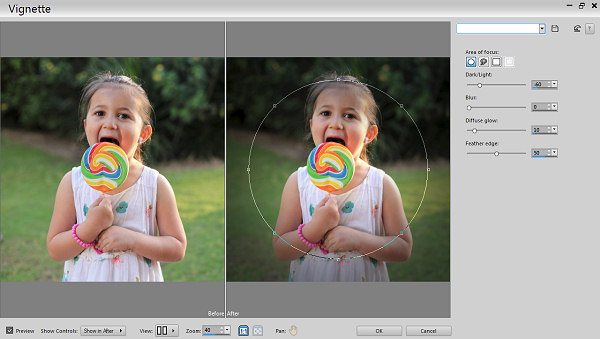
And if you reduce the amount of blur to 0, it will just leave the photo as it was initially, whether it has some blur (like this one) or not.
How about the Diffuse Glow? That will increase the contrast of the focused element. It could be a good effect to add, but depending on your goal, you might want to be careful not to overdo it.
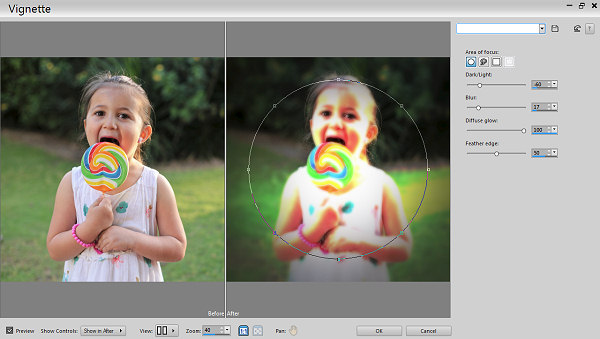
And if that setting is down to 0, nothing will be enhanced on the selected area.
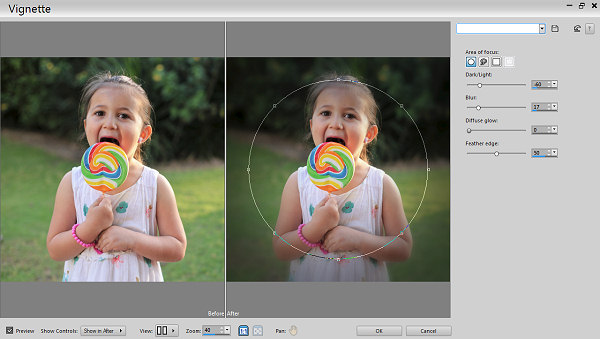
The last setting is for the Feathered Edge. Notice how the focused area and the dark outer edge seems to blend in gradually? That is due to the Feathered Edge. Increasing it to the maximum will create a VERY gradual change, almost to the point of not really focussing very much on the subject.
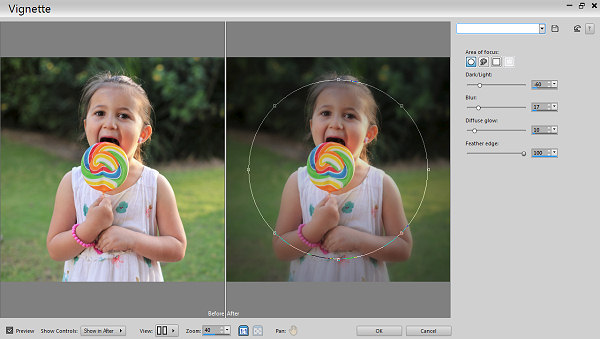
But if you reduce that value to zero, it will remove all the feathering and the edge between the subject and the outside will be sharp. There is nothing wrong with this effect if it is the look you want to achieve.
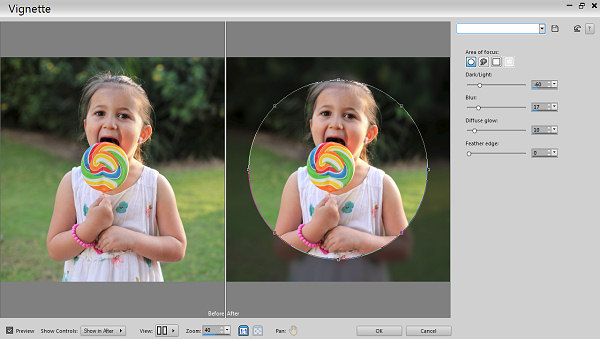
Having looked at the various sliders available, we can also tweak other elements for this effect. First, you can move the placement of the area with your cursor. By default, the focused area will be in the very center. If your subject is not in the middle, you can always move it to where you want and all the effect adjustments will follow.
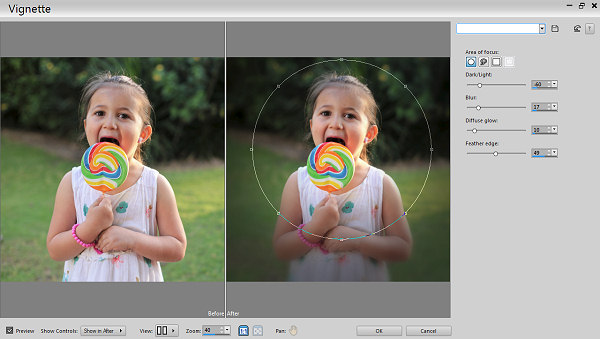
Above the different sliders, are 4 options for the shape of the area. By default, the circle option is active, but you can also create a selection that is rectangular, which might be appropriate for some photos.
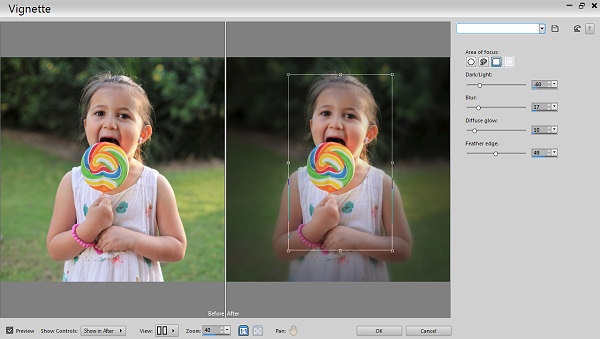
Or, you can use the freehand selection option to select around a specific shape that would be better than a circle or a rectangle. Again, all the settings will apply to that freehand shape.
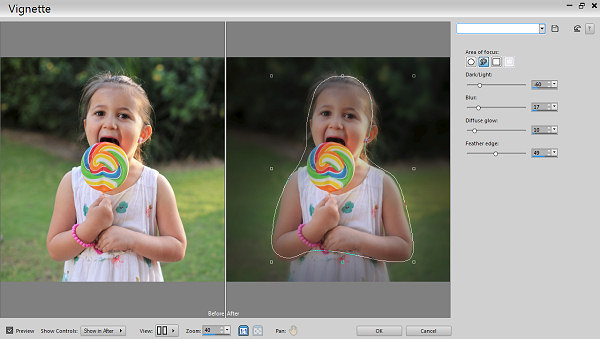
As you might see, there is no option for an oval shape vignette which might be expected or wanted on a rectangular photo. How would you do that? That is where the fourth Area of focus, which is to use the Raster Selection.
In order to use a different shape than the standard Areas of focus available inside the Vignette command, you have to start back on the actual photo where you can create any selection you want, whether it is an ellipse or another shape.
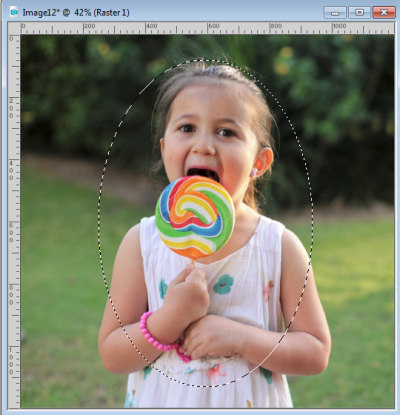
Once you have created your selection around the area you want to focus on, go back to the Vignette command where you will see that fourth option activated already. At this point, you can tweak the various settings just like illustrated above, to achieve the look you want.
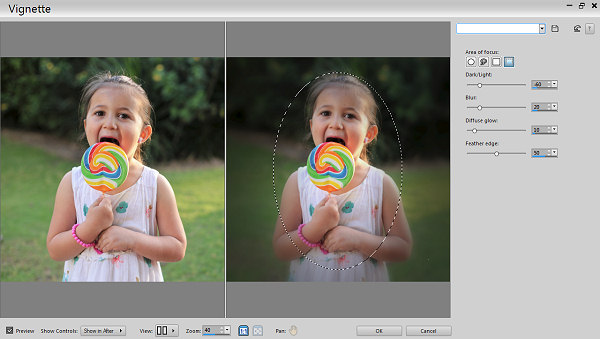
And here is the result, using an oval selection and simply the default settings of the Vignette effect.
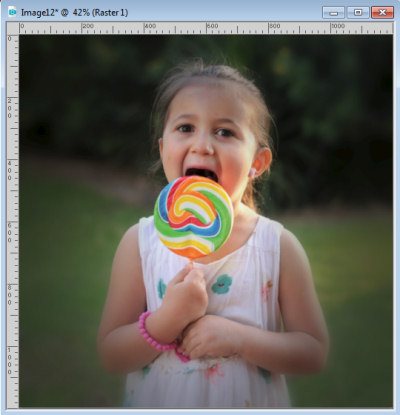
A vignette effect can be used on so many photos to give a more interesting look, whether fun or dramatic. Show us some photos where you applied the Vignette effect.



2 thoughts on “Creating a vignette effect with Paintshop Pro”
Great little tut. I have always steered clear of the Vignette effect because I didn’t know much about it but have now discovered that it is another great option of psp. Yipee!
Trying this is on my to-do list for tonight!! Will make some of my photos for scrapbook look so much better!