
Whatever project you want to create, sometimes a perfectly even background paper would look "fake" so you might want to add some unevenness to it in order to give a more realistic look. There are different ways to create such variations. Whatever approach you use might depend on your supplies and your own preferences.
Using ready-made overlays
There are different overlays available on the net, whether you purchase them or download them as freebies. Here is an example of a textured overlay.
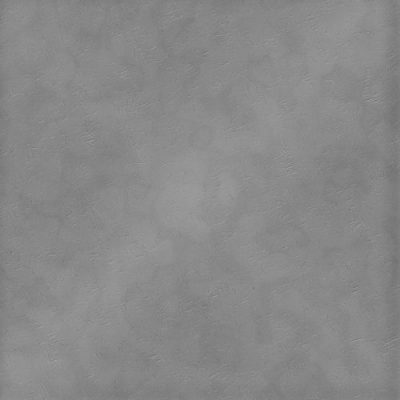
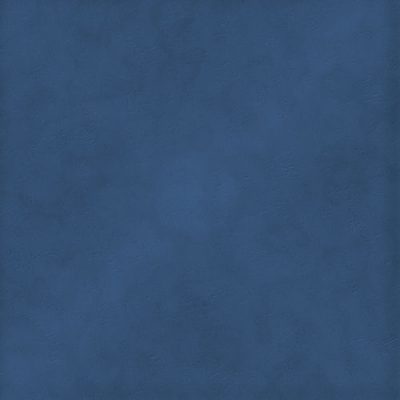
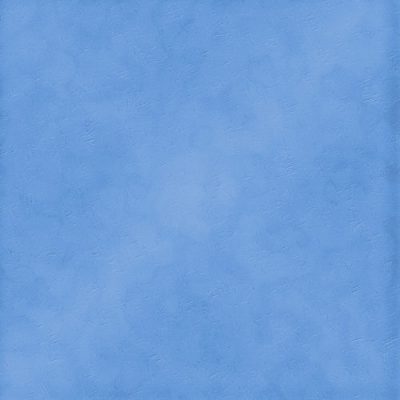
Adding a layer of solid color, on top or on the bottom, you can then change the blend mode of the top layer to get a different result. In the examples below, the overlay was placed above the same blue layer but its blend mode was changed. Notice how you can get completely different results.

Use third-party plugins
If you don't have ready-made overlays, you can create them using a third party plugin. MuraMeister and Filter Forge are two plugins that can create such "uneven" overlays that you can add to your Layers palette and then adjust the blend mode as illustrated above.
Create your overlay with PSP
Although third-party plugins would be easy to use, you can also create your own using the basic tools of Paintshop Pro. Here is how.
- Open a blank image as large as you need
- Activate the Brush tool with the basic round brushtip, set to the size you want, but a Hardness of 50 and an Opacity of about 75%
- Choose black as a color or a dark grey (you can use a brown too if you want)
- Place a random number of brush impressions all over your layer. You can overlap some "dots" if you want.
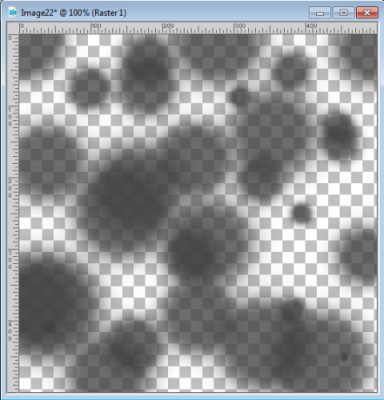
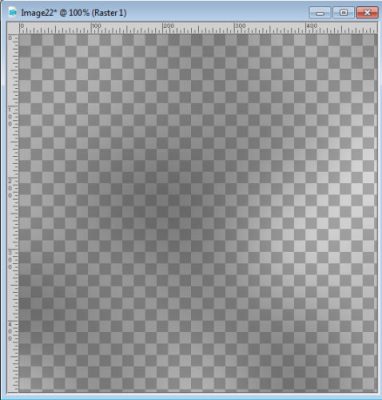
- Once you are done with the dots, add an important Gaussian blur (here, a setting of 70 was used):
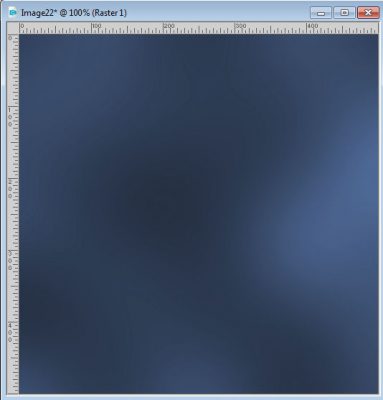
- Then, add this overlay on top of a solid color layer and adjust the Blend mode to whatever you like.
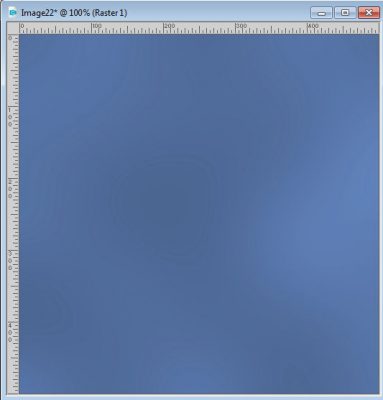
- And if you want to adjust the opacity of the overlay layer, you can a more subtle result.
With the use of such an overlay, your paper will look more natural if that is the effect you want to achieve. Although the examples above are applied to a solid paper, the same technique can be used on patterned papers or even on photos to give them a less "digital" appearance.
Give this technique a try on your next project.


1 thought on “Adding texture to papers”
I never thought to make my own overlays. I just got a very interesting result using Dissolve blend mode. The possibilities are endless. Time to practice.