A few weeks ago, another post was explaining how to use PSP templates as they are available in recent versions of PaintShop Pro. However, digital scrapbookers have a wide array of possible layered templates available in various online stores. Let's have a look at how they are used with PaintShop Pro.
PSD templates
Typically, layered templates are distributed in .psd format. This might be a Photoshop format, but since PaintShop Pro can open those files, it allows designers to reach a wider range of digital scrapbookers, and allow PSP users to have more options.
Layout templates contain various layers to represent papers, photos, and elements. Some of them are there simply as placeholders to suggest where to place various elements, others will offer an area to cut papers (or photos) to shape.
Although the vast majority of layered templates are in .psd format, you might occasionally find some .pspimage templates or you might have created your own. The process to use them is identical.
Cut papers to shape
Let's have a look at this template where we will replace the grey mat by a green paper.
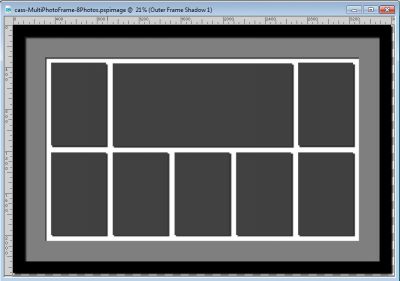
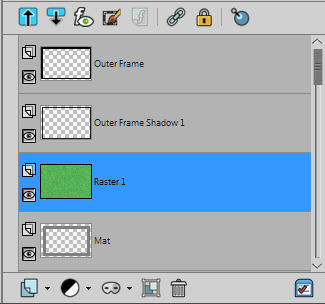
In the Layers palette, activate the layer of the shape you want to use as a pattern, and add your paper as a layer just above it.
Activate the shape layer, and with the Magic Wand, select the area OUTSIDE of the shape (make sure the Contiguous is UNchecked), and reactivate the layer of the paper you added.
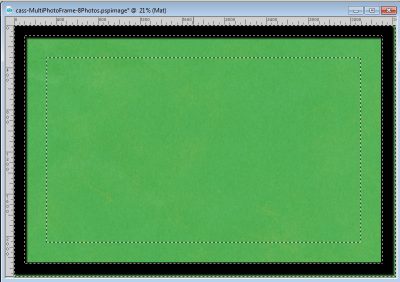
Hit the DELETE key on your keyboard to remove everything but the area of the shape you wanted to keep.
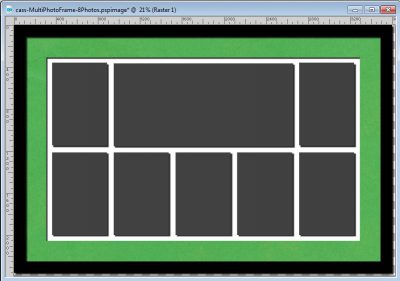
In the Layer palette, you can either remove the initial layer with the shape, merge the paper with it, or leave it there. It has no more use anyways as you already have your new mat in the color/paper you wanted.
Cut photos to shape
Let's replace the photo spots by your photos, one at the time. We'll start with the top left spot. Just like for the paper layer, add your photo just above the layer that suggests the shape in question. Adjust the size if needed to focus on your subject. To make sure how to align your photo, reduce the opacity of the photo layer.
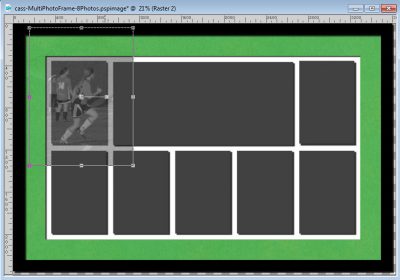
Repeat the same steps as for the papers, which is to select OUTSIDE the shape on its own layer, activate the photo layer and DELETE. Readjust the opacity to see your photo.
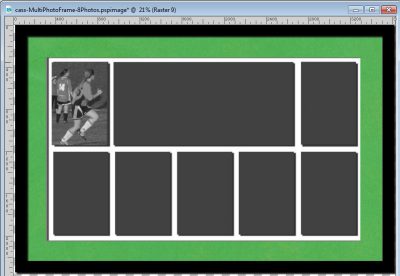
Repeat for each photo you want to add to your template.
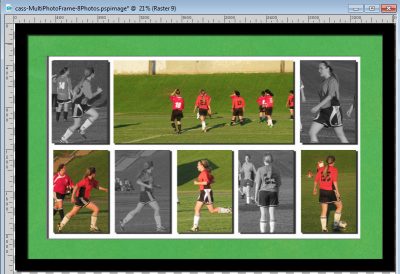
Add elements
If your template includes element shapes, you can replace them by whatever element you want to use, whether they are flowers, buttons, ribbons, tags, strings, etc. That is where you can be as creative as you want with the elements you have on hand, in your stash or that you can create yourself using your PaintShop pro.
You can use those templates as guides but the elements can be larger or smaller. You can add more than what is on the template, or you might want to use fewer.
Are you looking for layered templates to create your next project? Check out the Resources section of the Campus for suggestions.


4 thoughts on “How to use scrapbooking templates”
Hello Carole
As you know I have taken Bootcamp about 4 times since 2019 and now just finished the Basic Scrap Course, which I purchase at least a year ago but did not seriously work with it till now. I thank you for your patient and very good instructions and guidance. When I first started I knew nothing about the functions and tools available in PSP. I have learned a lot and yet realize there is so much more to learn. My wife sees the nice things that can be done with pictures and now asks me, when is this old man (turned 86 years young yesterday) going to start putting into practice what I have learned. So, I have 1,000’s of old pics and slides to make presentable in digital scrapbooking. I am sure I will come for help and ideas as I focus on the task ahead. Thanks again.
Yes templates will be a time-saver for you!!! And double pages will help too!
YOU are the Awesomest Person, YOU ROCK. Your the most Sharing Person. I was so Lucky when I found You. I am on this also lesson 1 now 2< you make everything look so easy. Thank you for helping me.
Thanks Cassel for this help with Templates. I am going to try it for sure.