In a previous blog post, we looked at a few basic settings you might want to apply when you first start working with Paintshop Pro. I hope you found them useful. If you are using PSP often, you will find that there are more ways to speed up your workflow or make it easier with other settings. Let's look at them.
Binding scripts
If you are using some scripts regularly in your workflow, you can turn the process into a one click one. In the View > Customize, go to the Scripts tab. There, pull down the list of scripts you have already installed and pick the one you want to bind to an icon.
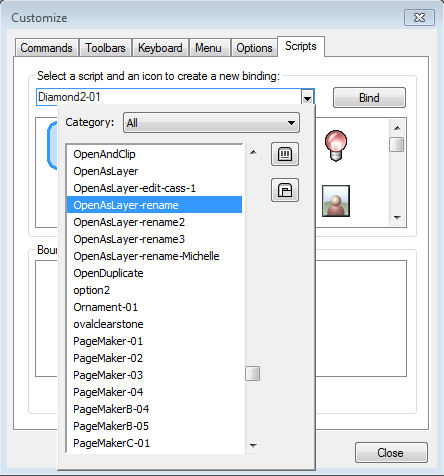
Then, select one of the available icons in the list and click Bind. This will make your script appear at the bottom with a new icon.
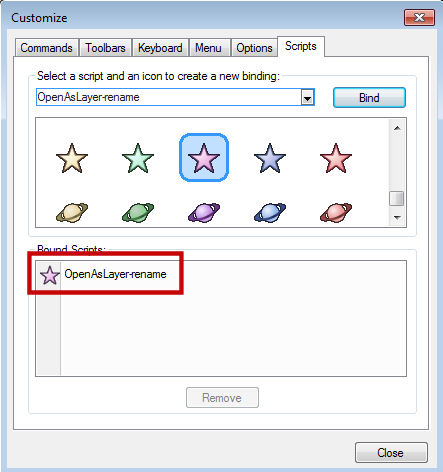
And from there, you can simply drag and drop that new icon to your menu bar or your layer palette or any custom menu you have created.
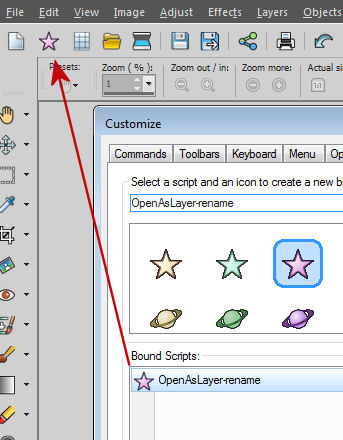
Now, this command is available to you in a single click.
Auto-actions
Some actions you want to perform will generate a prompt window warning you that the action you want to perform requires another step or is not possible in the current state of the program. Such a warning would be similar to this one (when I tried to add a drop shadow on a vector layer):
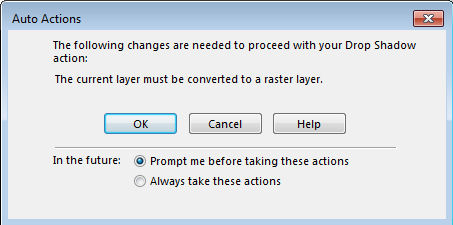
This is likely to warn users who might not be aware that the action cannot be completed as is, however, if you are already comfortable with your PSP and familiar with those required actions, maybe you don't need to be reminded every time. If that is the case, you can click the radio button beside the Always take these actions and next time the same situation arises, the program will automatically perform the required step to complete the action you wanted.
You can wait for this dialogue window to pop up when you try to perform some actions, or you can go ahead and change the settings before this comes up. You can go to File > Preferences > General Program preferences and go to the Auto-Action tab.
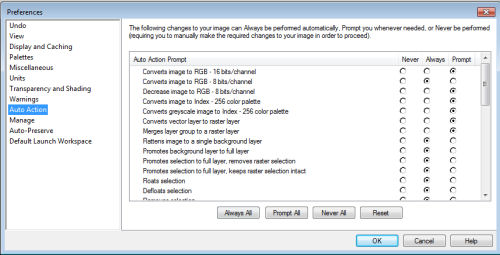
You get a lot of such dialogues that can come up and you choose if you want the program to do it for you, or ask you every time. Some of the most common ones you might want to get done automatically are Finish the Mesh Warp tool and Finish the Warp Brush tool. This little setting will just make your workflow faster, instead of always asking you for something that you wanted to do anyways (and just forgot to do manually).
Autosave
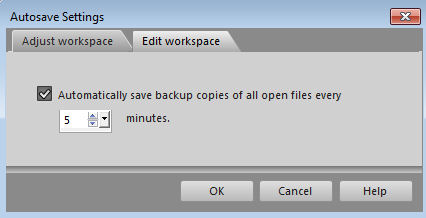
Have you ever been working on a project for hours only to have your program crash, or have a power failure? that can mean hours of lost work. But you can set PSP to save your work. Go to File > Preferences > Autosave settings. There, you will find two tabs: one for the Adjust Workspace and one for the Edit Workspace. I never use the Adjust tab so i would leave it alone. But on the Edit Workspace, i will check the option and set it to save every 5 minutes. What it will do is save, not only the image you are working on but ALL the images that are open on your workspace. This means that if you have lots of images, the autosaving process might take longer than if you take the habit of closing the images you are not using.
Units
If you create scrapbook projects or other projects that need to be printed, you will often want to use a resolution of 300 ppi, however, Paintshop Pro comes with a default of 200 ppi. Of course, you can adjust this setting when you open a new image, in the New Image dialogue box, but you can also set it, once and forget it.
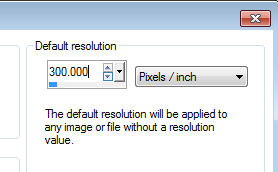
You can do that in File > Preferences > General Program Preferences and under the Units tab, change the setting on the right to 300 ppi (or 118 if you are using cm). If you need to work with a different resolution than 300 ppi, it is ok to set it to whatever you need. At least, you won't have to set it manually for each new image you open. Note that the resolution will have no effect on the actual work in your PSP; it will only matter when it is sent to the printer.
Material Palette
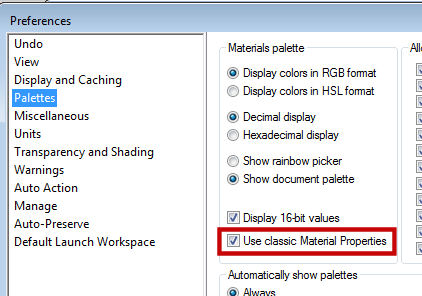
Since version X7, Paintshop Pro has a new Material Properties dialogue window with great tools but some users just don't need those, and prefer the old format for that window. In version X8, you regained the option to use that "classic" window instead of the new one. Personally, I didn't really like the new one simply because the way I was using it, it required more clicks than before. I am sure that some other users love it, so it is a matter of preferences.
If you prefer the "classic" Material Properties dialogue window, you can get it back in File > Preferences > General Program Preferences and go to the Palette tab and check the Use classic Material Properties.
There is so much more that you can set and customize with Paintshop Pro. Browse through the various preferences, and the Customize dialogue and you might find some settings that would really suit your workflow. Don't hesitate. Give them a try. You can't break your PSP with those. And if you don't like the changes, you can always reset them.
You can download a pdf version of this article by clicking the pdf icon on top of it. You just have to be logged in first.


3 thoughts on “Some advanced settings for your PSP”
Hi, Cassel! Why on PSP 2021, I can’t get a self-save time of less than 15 minutes? This is very bad … Can you change that? Thank you!
That is a good question. However, it has been set at 15 minutes for several versions now. I am not aware of a way to go shorter than that.
I learned in the Customization area there is a tab called toolbars. I have made my own toolbar by clicking on the new button and naming it “mytoolbar” I then add anything that I want from the commands area. I think it is so helpful to have that! I don’t know if I can show you on here or not, but I would like to let you all know about that! 😀 Happy Holidays!