
You take fantastic photos, you create great montage, you design memorable scrapbook pages. You deserve the credit, or at least the safety of knowing nobody will take your work and claim it as their own. In the world of internet, it is so easy to grab a photo without permission, so how can you protect your work? With watermarking. Although watermarking is often used to protect the work from being used elsewhere, it can also be used simply as a signature too.
There are various methods to add a watermark to your work. Choose which one suits you the best.
Overlay
This is something you will often see on image previews from stock photo sites. Search on Google and you might see some great photos. Yet, looking closer, you will see their branding is all over the image, making the photo unusable from there. The only way to get the image without the watermark is to buy it from their site.
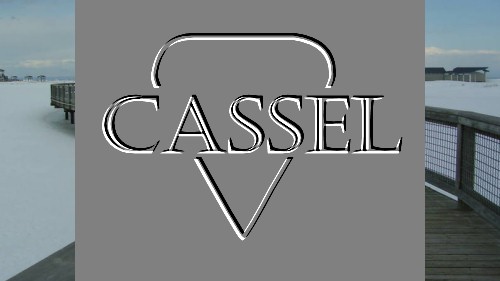
You can create your own overlay, often in white, with cross hatch or just a repeating pattern you can use as a flood fill on a separate layer. Here is an example of a possible overlay pattern (the black is only for better visibility in here):

And once this overlay is created, save it as a png image to be reused later. Save it in your Patterns folder so it will always be at your fingertip, in your Material Palette. Here is an image, with and without the watermark. The opacity has been reduced to 25%, and the pattern itself was scaled down to 30% (because of the initial size of the overlay design and the size of the image).

Picture tube
Picture tubes are somewhat like "stamps" and you can create them in any way you want, any size you want. Although you might not have a picture tube that will cover the whole photo, you can still use it as a signature for your work. You can also place the tube in various strategic places on your work. It all depends on your preferences. Although you could create the image in any color, not every image will look good on your photo, so in order to not distract too much from the actual valuable photo you want to share, you can create an embossed design. Here is how:
1- Create your design in white and black only (it could be black on white or white on black).

2- Apply the Emboss effect with Effects > Texture > Emboss.

3- Export this image as a Picture tube with File > Export > Picture tube. Of course, you can always save it as a jpg somewhere else, but saving it as a tube will keep it at your fingertip and you will not have to retrieve the image, open it, copy it, paste it every time you want to use it. You would just activate the Picture tube tool and select your watermark, then click on your image. Voilà!
4- Add the watermark image/tube to your photo.
5- Change the blend mode to Overlay, Hard Light or Soft Light, in the Layer Palette. If needed, you can reduce the opacity of this layer.

The blend mode you choose will depend on the color of the photo where you are applying it.
Batch process
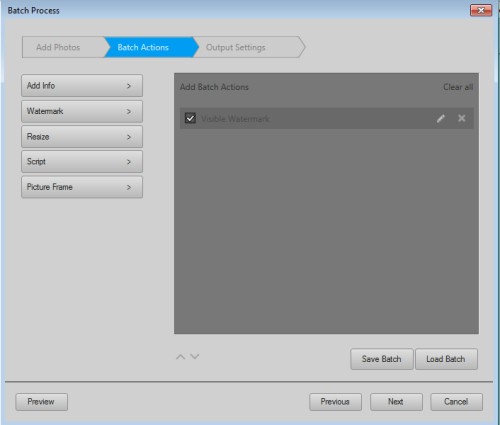
If you have only a handful of images to watermark, you can easily do it manually, but what if you have hundreds of them? This could become absolutely tedious. That is where the Batch Process can help you tremendously. Starting with PSPX8, the Batch Process function has been made very intuitive (compared to the previous versions!).
If you go to File > Batch Process, the first step you will see is to pick your photos. Select as many as you want.

Then, the second step is to select the action you want to perform, and on the left you can see the option for Watermark. Once you click on it, the action will appear on the right pane. Hovering over it, you will see an "Edit" icon.
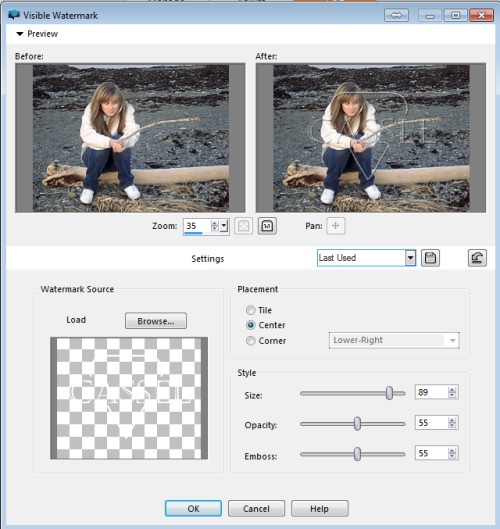
This will bring up the window where you can select various options for your watermark: which image you want, if you want it embossed or not, what opacity level, what size, what position. Every photo you have selected in the previous step will get their watermarked placed in the same way.
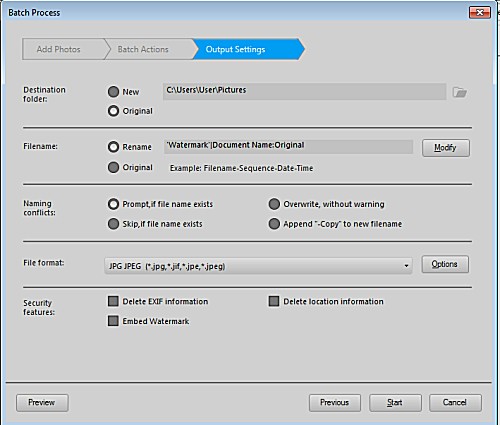
Then, you get the options to select various settings for the saving of your new images. Do you want them saved in the same folder or a different one? Do you want to rename the watermarked images so it won't overwrite the original (that is definitely recommended since you don't want to loose your original), and more.
And when you click on the Start button, the whole process will start and will be completed in a fraction of the time you would have needed, if you were to go through this process manually. You can watermark thousands of pictures in just a few minutes!
Will you protect your photos? Your scrapbook pages? Your previews? Make sure they are safe and branded to you, since YOU did the work. Are you using these methods to watermark your projects? Do you use a different method? Share in the comments below.


1 thought on “How to add watermarks to your images”
excellent tutorial 🙂