
During the Creative Christmas Bundle 2015, there were 12 complete sets of cards and matching envelopes. They are in a jpg format (sketch) and in psd format as layered templates. Using templates with PaintShop Pro is a great time saver. It allows to create fun cards that you can customize the way you want, with the supplies you have, and surprise everyone.
Open the PSD file
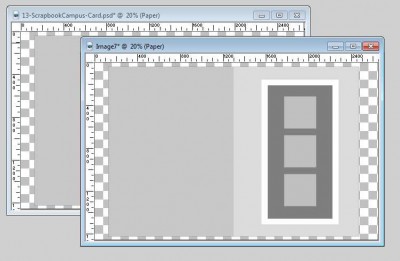
The first step, once you have downloaded and unzipped the files, is to open it. Even though PSD is a Photoshop format, PaintShop Pro can open it too. All the templates in the 12 Cards for Christmas are in that format. They only include basic layer types so you won't get any warning when you open them. Since you will probably want to use that template more than once, Duplicate it with Shift-D. You can close the original if you want.
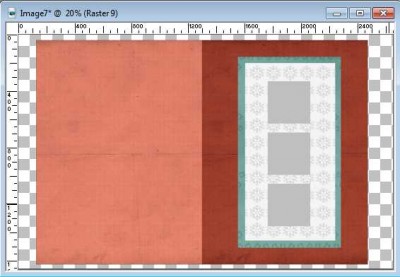
Pick your layer
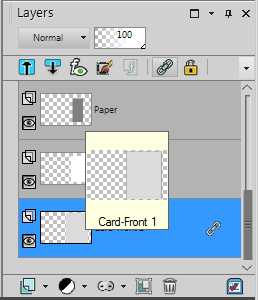
Each element of the card is on a separate layer: the base, the paper shapes, or the elements. Since you likely don't want to use a grey card, you will want to replace each of those shapes with something more suitable. Activate the layer you want to work on.
Pick a paper
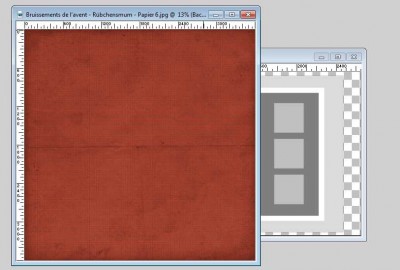
Since you want to replace that grey shape with something much better (it is easy to find something better than solid grey, right?), choose and open the paper you want to use, from your stash.
Resize if you want
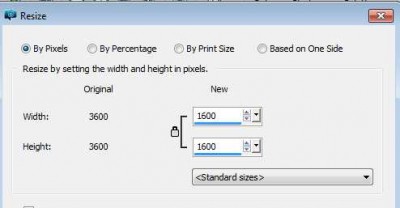
Some papers are very large and the shape of the card is much smaller. You can still use the paper at its original size, but if you want the pattern or the texture to be reasonable, you might want to size it down somewhat. You can then use the Image > Resize, to size it to about 1600 pixels, which is the maximum width of the base rectangle for the card.
Copy and paste
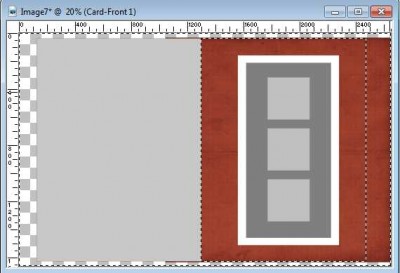
Copy the paper you have resized (Ctrl-C) and on the card template, Paste it as a new layer (Ctrl-L). Move it, roughly over the shape you want to replace if it didn't paste exactly on it. For just a moment, hide the new layer by clicking on the eye icon on the left of the layer in the Layer palette.

Use the Magic Wand, set to RGB mode, and click on the shape you want to replace. Since you want to KEEP that section, let's Invert the selection (Ctrl-Shift-i). Unhide the new paper layer, activate it.
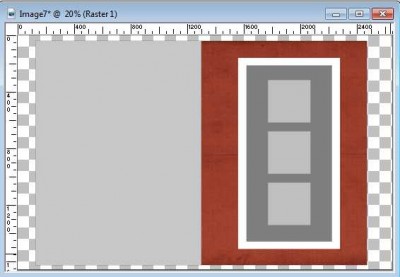
Hit the DELETE key on your keyboard so it will delete everything that is outside the shape you wanted to keep. Deselect (Ctrl-D) to remove those marching ants.
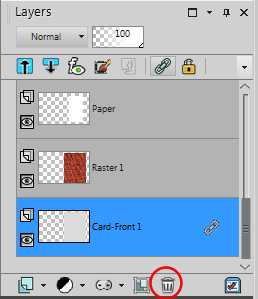
Remove the template layer
Since you have already created a shape with suitable paper, you don't need the template layer anymore, so you can delete it.
Continue with all the papers
You can now repeat the same steps to replace all the shapes with the papers you want. You can use similar papers or different ones. The choice is yours.
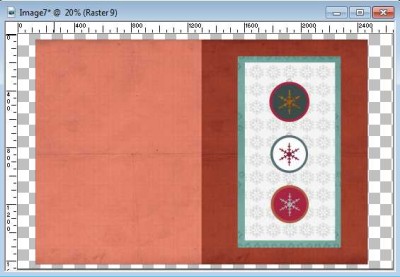
Add elements
Some shapes are not only meant to be replaced by papers (although you can if you want) but to use decorative elements, like buttons, stickers, bows, etc. Since you are working digitally, you can always resize elements from your stash that are too big! Just open the element, copy and paste them onto your template, and remove the template layer once you have aligned your element. Continue for each element you want to add.
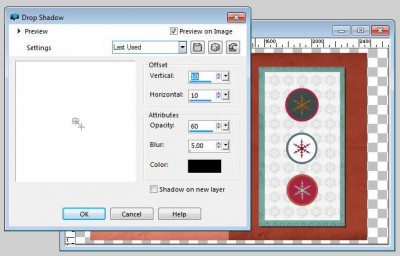
Add shadows
Although your card might be close to be finished, you can still add a few shadows to give it more of a paper look, as if you actually had layered all those pieces of paper. You do not have to shadow the base shapes as they will be printed and cut anyways, but everything else can be shadowed. For a card of that size, the shadow settings that you can use are the following.
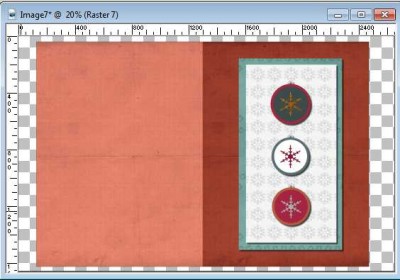
Notice that it gives a thicker look to the teal color paper than it did initially. Apply the same shadows to all the paper elements. If you have decorations that are thicker, like buttons, you can increase the offset a bit.
Print and cut
Once you are ready and have completed your card, it is time to print it. Use cardstock instead of paper so it will hold better. Finally, cut and fold the card you just created.
Envelopes
You can follow the exact same steps for the envelope if you want to create one. The design of the envelope is meant to match the card so it will make sense to use similar papers and decorative elements to have a truly coordinated set. If you print your envelope, you might consider printing it on paper as it will be easier to fold and glue, especially since it won't have to stand up alone.
Do you want to get the template used in this tutorial? Simply click HERE to download it. And once you have created your one-of-a-kind card and envelope set, take a picture and link it in the comments below, or post it on our Facebook page, or our Pinterest board. We are anxious to see your masterpiece.
If you want 12 more sets of cards and envelope templates to create your own holiday greeting cards, you can purchase the whole set and have also 12 additional tutorials from various designers using different software or traditional supplies. Check out the 12 Cards of Christmas.


34 thoughts on “Creating a card with a layered template”
I need to start learning how to make digital cards…I still make my the “old school” way…these are so beautiful.
Traditional cards can also be just as nice. Digital is just a different way. Why not try both?
As always, you create the easiest tutorials that any beginner in (digital) scrapbooking can follow! That’s why I love the Scrapbook Campus! 🙂
Cool card 🙂 Great tutorial too 🙂
Thank you for the tutorial. Now comes working with it and master it.
Thank you! I plan on using this template soon!
Glad to hear. Remember to show us what you do with this template!
Wow. I might need to try this. Thanks
I will help you all the way if you need it.
would love to try this; thanks for the instructions!
thanks for a great tutorial
Glad you like it.
Thank you so much for the card instructions and the template. The card is so cute!
Thanks for the compliment on the card. You can surely do something just as cute, i am sure!
Glad you like them. Remember that you can download the instructions by clicking the pdf icon on the top.
Love your card!
Thanks Ruth.
Thank you for sharing this lesson and being a part of the Christmas blog hop.
Thank you for participating. There is so much in it!
Thank you for this good tutorial!
Glad you like it, Valerie. Remember that you can download the instructions with the pdf icon on top.
Thank you for the great tutorial and the template. I can’t wait to try it!
Thanks. I hope you will show us how you interpret that tutorial.
Thank you for the tutorial. I want to try making digital cards. Thank you for the template too.
Great tutorial. I used a card from this group last year – my first attempts at doing a digi card.
Glad that you used them. Did you take a picture? It would be fun to share if you could.
Thank you for the tutorial!
Thanks for sharing!!
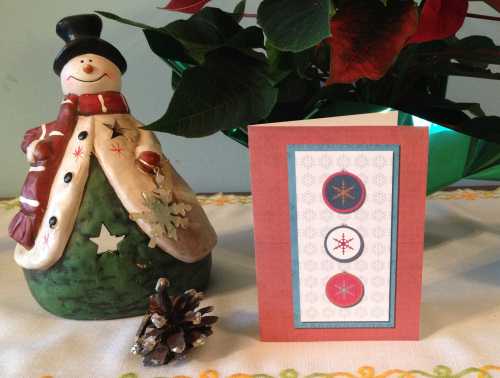
Your card looks great, and I love the sweet little snowman beside it too!
Thanks very much for the lesson!
Love this! Thanks for sharing!
Thank you for the great tutorial on making cards!
I just get a “fatal error” when I try to download the PDF of these instructions. 🙁
Thanks for pointing this out. I’ll check to fix it ASAP.
Thank you!