Forum Replies Created
-
AuthorPosts
-
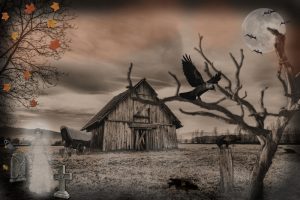
Marlene’s page reminded me of a Corel’s X5 tutorial for Halloween from 2012… It is called the Haunted House Collage and here is the link: https://www.youtube.com/watch?v=Q-d5j1JtabY
So I decided to watch it again and try with this photo. All the techniques I used were taken from the tutorial. Only for the tombstone, I used the Platinum Effect (Time Machine)
Techniques: Time Machine Effect – Use of Picture Tubes – Change the Brightness and Saturation of an image – Adjustment of the transparency – Airbrush (myst).
All additional photos are from the internet
Thank you, Dawn! <3 🙂
Marlene, very nice layout… I like the title font and the story too, even if it is fake news! Great idea!
Wanda (Sue), nobody is laughing! … I also think this is so cute! Marlene, yours came out also very good.
I have no idea how to do this… I have to read the tutorial carefully and give it a try.
Dawn, this is really a very nice layout! The photo is stunning and I like this way of showing a single photo divided into several parts… I have to try this one day… I also like the background paper and the way you included the map of Australia to complete the sentence. Great work!
What I like in the Forum is how we learn and inspire each other. We see one’s layout and think “what a nice way of using/doing this or that….” I loved how you mixed the Beads Tube with the Corner Punches Brush in the Crimson Rose Card… Next time I use the Brush I will think of it 😉
I didn’t take as if you were teasing me with the membership but trying to help me and advising which class have all the information about this theme. 🙂
The Diamond membership is something that is in my mind since I joined the Campus, but I have to wait a bit… Meanwhile, I am very happy to be a Lab member… I am always curious to know which will be the new tutorials
Thanks, Cassel 🙂 I didn’t know this Master Class and from what I read is another wonderful class.
You have tons of great classes and if one wants to learn PSP, here is the perfect place. I will, whenever possible, become a Diamond Member, right now I am tempted to get the Time Masterclass Bundle. 🙂
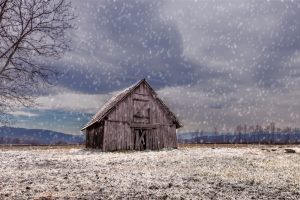
This is what I made for this challenge.
1_ I added frost and snow on the ground and roof following a YouTube tutorial from IrishActs – https://www.youtube.com/watch?v=uwpWMNkJA6w
It is very easy… Color Changer Tool (Tolerance=2 Edge Softness=20) Material Palette Foreground=White… Flood fill over the parts of the image you want.
2_ I wanted to darken the sky but didn’t know how to do it. So, first I selected the sky, promoted it to a new layer and then tried different tools… I finally got something I liked… Adjust > Brightness and Contrast > Highlight-Midtone-Shadow… Here I had to play with the numbers.
3_ Finally I added snow… This technique I learned from Cassel’s Winter Wonderland Masterclass. Great class.
Thanks to Cassel and the challenges I learn a lot.
Dawn and Michele, thank you so much for commenting on my page. I do appreciate. <3 🙂
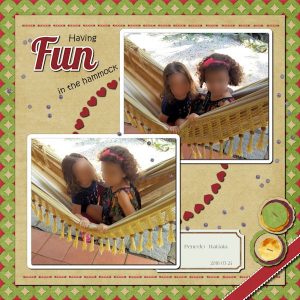
Michele, these two young ladies are indeed lovely and very sweet… It was a joy to be together with them and the rest of the family in March… they grow so fast!
The page below I created to practice some of the tutorials from the LAB 8 Modules 3 (March) and 4 (April).
I would not have that many scrapbook layouts if it were not for Cassel’s challenges and tutorials. It is always fun to be able to create something following them… and if they demand too many steps and time, we always have the scripts, picture tubes etc.
I made the tag (Cassel’s tutorials) and from the LAB 8…
Module 3: Threaded Stitch, Circle of Shapes and Outlined Text.
Module 4: Star Pattern and Pinked Edge
I also used Seed Beads 2 Opaque and Layered Flowers Cassel’s Scripts. The staple on top of the layered flowers was also made following Cassel’s tutorial!
Dawn, your cards are just lovely. The hand-painted flowers, the fancy topper, the creative way you used the corner brushes with the chain bead tube and many other details… just beautiful.
Michele, it came out very good the way you blend Earth with the hands, the technique and also the meaning. Nice work.
Hi, Michele, your layout is very nice, colorful and I like very much the kaleidoscope effect for the background. The whole page with different techniques came out great
The Lab tutorials, not mentioning the webinars, are really great. They always bring something new and creative… I learn a lot with them and also with the tips shared here in the Forum.
I guess all of us have days that we struggle to come up with something… and like Dawn said, other days the ideas come from nowhere. 🙂
Rae, great layouts, and memories!
I still didn’t make anything… I wanted to practice the techniques from the LAB but I was finishing other layouts and didn’t have the time… hopefully this week. 🙂
Anja, this kit is beautiful! I love everything… Cassel’s scripts, tubes etc are amazing… we can create wonderful things with it.
Thank you so much for your generosity.
Dawn and Wanda (Sue), great layouts!
Dawn, I love the way you arranged the photo, title and journaling using square mats… it draws attention to each part… Nice also how you added the hay bale picture tube and the horse corner images. Lovely memory.
Wanda (Sue), you drew the funny turkey?! It’s lovely! I also like the crow and how you used the barbed wire line around the fence. Great work.
I have never been to a farm, or know anybody that has, so I will pass this challenge.
Michele, the watercolor flowers background you made back then is beautiful, and the hearts decal and frame are the perfect addition to the new layout… love the font too.
Terri, they are soooo cute!
Michele, the peek-a-boo was another great class from Cassel, and I will give it a try sometime later… For some reason, I cannot see your image bigger when I click on it.
Dawn, the roses you’ve made are beautiful, and you created great cards with them. Lovely work!
I will try to do something with the techniques shown in The Lab 8 modules 3 (March) and 4 (April).
Dawn, thank you for commenting on my layout. 🙂
The cluster is something I need to practice more… I like the effect of having it on a page but I am never sure how to do it, how many elements etc
My goal when I participate in the challenges is to practice techniques that I learn with Cassel… it is fun! Besides that, I also learn with all of you that also post your projects here!
Hi, Dawn! Thank you so much for your kind words… I really appreciate. <3 🙂
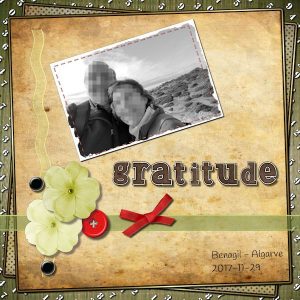
Here is my contribution to this challenge. I used following Cassel’s freebies: Cutout Digits (Cutout Script) to make the background paper; Ribbon Factory and Braid Bows. Other freebies are from Harper Finch (Alpha) and the Granny Enchanted’s Blog (flowers and brads). I made the button with the help of Cassel’s tutorial.
Thank you, Michele! <3
Great work, ladies! Lovely and inspiring layouts
After being away for 4 weeks, I am slowly getting back to the routine 🙂 I haven’t done anything in the meantime and I will try to catch up over the coming weeks.
Dawn, Marlene, Michele, and Sheila, lovely and inspiring work!
Hi, Sue. Your card is lovely, and the photo of the owl is beautiful!
Like I did some time ago with the frame tips you gave, I copied your comment and added to the other one from Feb25th. Next time I make a bokeh effect I will do like you suggested. Thank you for sharing your knowledge. 🙂
This is my Day 7. About the Wire Text… In order to make it easier for me, I create an image of 3000px and wrote the text. From it, I created separate images with one word each. This way each image only had a few promoted selection layers and not dozens like when I tried it for the first time. My text had lots of amendments to be made. 🙂 After it was done, I added all images to just one file. I used the Emily Regular Font.
Like always, it is so much fun to participate in the challenges. I love them! I learn a lot and have a reason to do something with my photos. Thank you, Cassel.
Finally, I have Day 6. Although I had several attempts before this one it was fun to play with this effect, and I thank everyone who gave me suggestions. I do appreciate <3 and will try them later.
Hi Britt, I like your page and don’t think the layout is too busy. I like the colors, the theme and the ricrac you made. Every one of us has a different style and we can only be true to ourselves. Hopefully, we will see more of your layouts. 🙂
Hi Sue, thanks for the tip! This is a very interesting way of creating the bokeh effect using the Brush Variance. Before watching some time ago Cassel’s webinar using this tool I had no idea that it existed. 🙂
I copied your comment and will also try this way. This is the great thing about the Forum, I learn a lot from all you.
Aus, thank you for the tip! I think I am not choosing the right photo for a black bokeh background, besides “struggling” with the technique. 😀 And by the way, I love your layouts.
Teri, I thank you for the tip! I will take both into consideration and see if I can come up with something my Day 6 layout. And you also have great layouts. 🙂
Sheila, first of all, I want to wish you a speedy recovery from your cataract surgery.
About the wedding invitations, I am sure they will be beautiful and your grandsons will be very happy to have something so special done by you. But I have to agree that is a lot for one person. 🙂
Beautiful new layouts!
I am still working on Day 6 but so far I didn’t like how the photo is blending with the black bokeh background… it doesn’t blend naturally like some pages here and Cassel’s example. I have to practice more 🙂
-
AuthorPosts


