Home of the Scrapbook Campus › Forums › Showroom › What are you working on in February 2020?
- This topic has 160 replies, 14 voices, and was last updated 4 years, 6 months ago by
Annie Tobin.
-
AuthorPosts
-
February 12, 2020 at 2:15 pm #38818
Sorry Colleen I dont know about a bevel n emboss adjustment layer, I dont know much about adjustment layers, but the use of them is different in photoshop than it is in PSP. although there are a lot of things you can do in both, they are done differently in psp than photoshop, Photoshop has a lot more things you can do.
Yes the emboss is on the side tool bar .
adjustment layers you can find at the bottom of ther layer pallett and also under layers to the top panel.
Have you looked on this site at the top, Classes/ intermediate/ creative scrap, therer is a whole bunch of things to make and learn in there, there maybe a peppermint of sweet inn there that might answer what you want to do. Hope this helps.February 12, 2020 at 4:38 pm #38821Colleen, the “adjustment layer>Bevel and Emboss” in Photoshop is a bit similar to the Layer Style in PSP where you CAN set a bevel and emboss there:
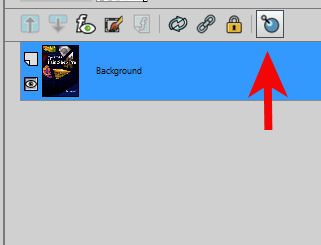
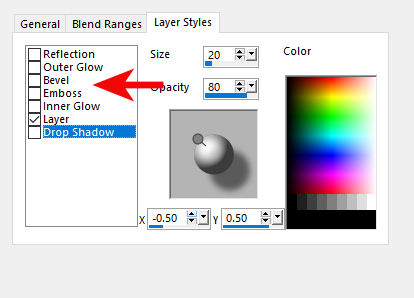
It has the advantage that it is non-destructive, so it is like a shadow on a separate layer that you can just change or discard. The disadvantage of using the Layer Styles is that the settings are completely different than their counterpart available through the menu.
And of course, the settings for Photoshop are totally different than the ones for PSP.
And your candy is great!
February 12, 2020 at 5:18 pm #38822Thank you Ann, yes George is a rag doll, he is nearly 2. 1/2. I have 3 moggys the other have rag doll strain, but George is all rag doll. They are really a placid and laid back breed
February 12, 2020 at 5:42 pm #38823Trish,
Thank you for answering. Yep, the differences between PSP and Photoshop are frustrating to me, since I’m really just beginning to learn, but I thought I could try to figure it out…haha. I laugh because figuring it out is not something I’m really good at with these programs. 🙂 I’m reading the PSP user guide, but I want to keep working on things too.
Oh and yes, I did look through the tutorials that Cassel has, but didn’t find a peppermint candy one, so I googled and the only tutorials I could find were for Photoshop.
February 12, 2020 at 5:49 pm #38824Colleen, the lollipop tutorial is very similar to the peppermint one. The main difference would be in the beveling.
February 12, 2020 at 6:03 pm #38826Cassel,
Thank you so much! I really like how the candies turned out, so I appreciate yours and Trish’s opinion on it too. 🙂 I totally missed that layer styles button, so thank you for pointing it out to me. And yes, the differences between the 2 programs are frustrating to me. I’ve only been using Photoshop when I can’t find the tutorial I want for Paint Shop Pro, but for now, I think it’s best that I just focus on Paint Shop.
I have a few more questions for you, if you don’t mind.
1. When creating elements, like the peppermint candy, what size canvas is best? I remember from your bootcamp videos that it’s better to have something bigger, that can be sized down, instead of sizing up and losing clarity. Those peppermint candies I made were 500×500, but I think that might be too small for a scrapbooking page of 3600×3600. Do you have a suggestion for a good base size for elements?
2. I feel silly asking this next question, but I want to know the answer. 🙂 So, when I start a new 3600×3600 page, the heading shows that it’s being viewed at 20%, as opposed to 100%. (I zoom in when I need to see better, but I personally like working at the 20% or so) What I’m wondering is when it comes to printing out those pages, if I created everything while it’s at 20%, when it’s printed out, will everything be bigger? Does that make sense?
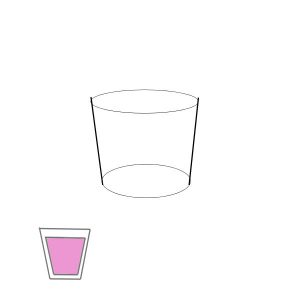
3. Remember when I sent you an email asking about creating drinking glasses? I took your suggestion about looking at that public domain clip art page, but I am still wanting to learn how to make them on my own. This image shows where I tried creating a glass in 2 different ways. The bigger one was making 2 ellipses and then a line on each side to connect the top and bottom. For the space in between the 2 lines and the top & bottom of that glass, is there a way to select just that area to flood fill? (The bottom glass I drew just with lines and was able to flood fill that area, so that may be the way I go with creating the glass, but I’m still wanting to know about flood filling the other way.
Thank you, and I hope you don’t mind me asking here, instead of emailing you. Or is there a better place in the forums for just questions like this?
February 12, 2020 at 6:07 pm #38827Cassel,
Oh ok, thank you! I did see that tutorial, but wasn’t even thinking it would be similar. I will watch it again.
February 12, 2020 at 6:17 pm #38828Trish it is always a delight to hop into the campus and peruse your work … you are tireless, well done Hon!
Colleen, you are well on your way to becoming a PSP enthusiast, love your work and … your enthusiasm!
February 12, 2020 at 6:22 pm #38832Thank you, Annie! 🙂 I’m really really loving it!
February 12, 2020 at 6:51 pm #38833Carole, thank you for that bevel /emboss. can we please learn more about that as I never knew it was there or its function.
It is good asking questions on here, we all get to learn something.
February 12, 2020 at 6:54 pm #38834Colleen, here to answer your questions:
1- since a standard page is 3600×3600 and the resolution should be like 300 pixel/inch when printing, it means that a 300×300 px element will be one inch. That is ok for a button. One trick is to put your element on a full size image and see how it looks.
2- Whatever ratio you view your image or work with will not affect the end result. If you work on something that is 1000 pixels, it will still be 1000 pixels, whether you view it at 20%, 100% or even 400%.
3- Yes, you can use the Magic Wand, using the None match and checking the Contiguous checkbox. Then, it will select inside each section and you can hold the Shift key to select another one. Then, you can enlarge your selection by a couple of pixels just to avoid tiny gaps. Since you will want to work in a separate layer, you can also use the Brush tool to cover any imperfection.
February 12, 2020 at 7:02 pm #38835Trish, I personally tend to avoid the Layer Styles for a few reasons:
– the settings are completely non-intuitive and the Size, Opacity, X and Y values don’t resemble what they are in the “menu commands”. For example, the Size in the Layer Style means the Blur in the Drop Shadow. How would you make sense of that?
– the settings have changed throughout PSP versions, where in older versions, the Size was based on the image size so the same element on a different canvas using the same settings would have different results. So it was too inconsistent to give valid instructions.
– the X and Y are not measured in pixels but in proportion, making it very inconvenient.
I will try to use it if I HAVE to apply an effect to a vector layer, but it am often still not happy with the in-flexibility it gives. Sorry to be a downer, but to me, it is not a feature that is intuitive and convenient enough to use most of the time.
February 12, 2020 at 9:58 pm #38839It just nice to know what something does, I will play around with it, acidental accidents often are nice surprises.
Carole those pots, I have down loaded them 3 times but they havent arrived, perhaps they will tomorrow. x
February 12, 2020 at 10:14 pm #38840Trish, did you receive the Campus update yesterday? I am wondering if you are still “not” receiving our emails? I can see in the backend that you were sent the link at least twice.
February 13, 2020 at 10:06 am #38841Wow, so much going on here! Helen, Trish, Diana, Cindy, Shirley, and Colleen, very nice and creative work!
February 13, 2020 at 12:57 pm #38844Thank you Christina xx
header for my group tomorrow xThank you for the reply carole I found my old copy in 2019, but have now reloaded the new one into 2020 so fingers crossed Thank you x
February 13, 2020 at 6:52 pm #38847Hi Shirley, thanks for answering and George sure is a beautiful rag doll cat. Their gentle laid back nature makes them a very popular cat breed.
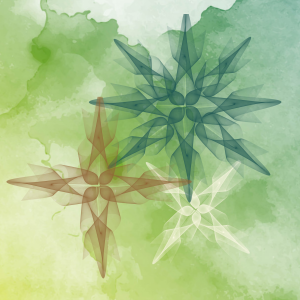
February 13, 2020 at 10:38 pm #38853Been playing around with Sinots and came up with some interesting shapes, then used to make a flower, or could be a star or snow flake, what do you see.
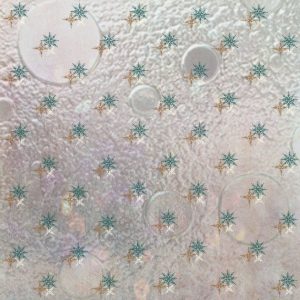
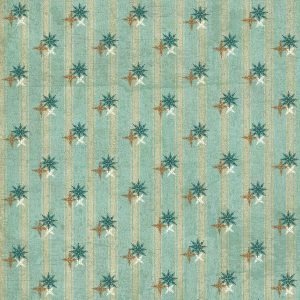
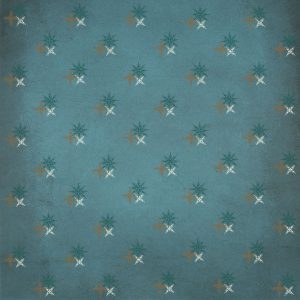
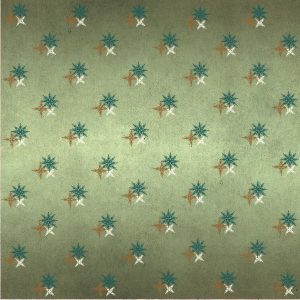
February 13, 2020 at 11:15 pm #38860made an overlay from my pattern and made some papers
February 14, 2020 at 1:56 am #38862Trish, I love the header for your group, your sinedots play was a neat result which I think looks like a snowflake and the papers you have created from the overlay are beautiful. Well done my friend. <3
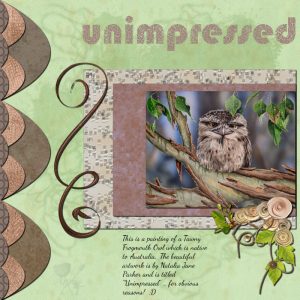
February 14, 2020 at 2:06 am #38864I have been playing around with layouts and watercolor paint stains. The flourish is by Can Designs. The papers are my own from Cassel’s tutorials and the cluster I put together from elements I have. Thanks for takin a peek!
February 14, 2020 at 4:23 am #38866Hi Campus Friends. This is another I played around with today. The photo is off Unsplash and was taken by Luke Stackpoole. I’m having fun with watercolors etcetera and, I think I can safely say this is all my work … I think. Thanks for takin a peek!
February 14, 2020 at 5:24 am #38868Hi Annie, thank you for the lovely comments, much appreciated.
I love your 2 posts, the green one reminds me of easter, they look like easter eggs down the side, yummy, great colours. The pink is my favourite, just love the colours and it sure is tranquil, the lace pattern on the accent patch, is lovely, looks like lace, my favourite, especially today, Happy Valentines day.here is my attempt at the vase, wasn’t sure if you just wanted us to fill the vase, or make it into a post x
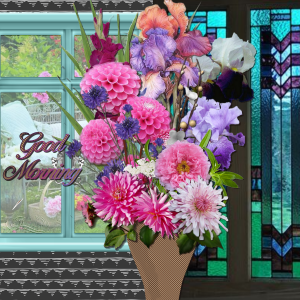
Vase- Cassel, window and stain glass panel from stock, back packer is all my design, photo in window from a gardening magazine, flowers I have extracted all of them apart from one iris, and a couple were extracted from my own photo, font is Birds of Paradise. xx
February 14, 2020 at 10:53 am #38869Trish, very interesting shape you came up playing with Sinots, and for me, it looks like a star. 🙂 Nice work!
Annie, the layouts are lovely, and my favorite is the “unimpressed”, for obvious reason! 😉
Great work, ladies!
February 14, 2020 at 6:55 pm #38875another pot, Carole how do you do long shadows please xx
February 14, 2020 at 7:10 pm #38876Trish, with the shadow on its own layer, you use the Pick tool to stretch it in the direction you want. There is a little bit of an example in the Shadow Challenge class.
February 14, 2020 at 8:11 pm #38883Thanks Trish! I do love what you did with the vase, all in all it is a terrific page and one could almost be fooled into thinking they were looking from the inside out. Well done Hon.
February 14, 2020 at 8:12 pm #38884Thanks Cristina! I always appreciate your comments my friend. <3
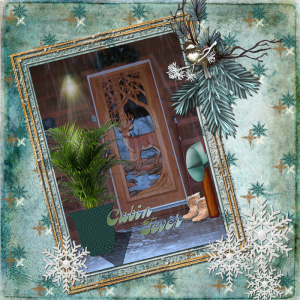
February 14, 2020 at 8:15 pm #38885Nice work Trish. I think I shall join you for a week or two in that cabin, if that is OK by you, ;D
February 14, 2020 at 9:19 pm #38891Thasnk you Carol, that is what I did, I thought with the light shining down on it it would throw he shadow to the front, although now I think the shadow would have been the plant. But it didnt look right whatever I did, and the shape went wrong with the presky perspective tools taking over, oh well perhaps next time. xx
Thank you Annie, the cabin was lovely , I have a thing for doors, my husband just wanted to take this one home, but it wouldnt fit in the suitcase xx
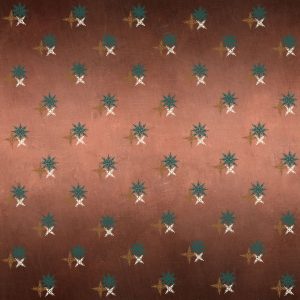
been playing again with another sinot shape and made some more patterns x
-
AuthorPosts
- The forum ‘Showroom’ is closed to new topics and replies.


