Home of the Scrapbook Campus › Forums › Let’s talk › PSP stuff › PSP 2018 Layers
- This topic has 14 replies, 3 voices, and was last updated 6 years, 5 months ago by
Robert Boers.
-
AuthorPosts
-
July 14, 2018 at 8:42 am #20154
Hello,
I’m new on the forum, though I have had many earlier contacts with Cassel. I’m from The Netherlands, and I use PSP X-3 for reasons I’ll explain below. I use this programme mainly as a design tool for composing pictures and studies for paintings for my art class.
Recently I received an invitation from Corel to try the new PSP 2018. Now, I use in the design process many elements of the design for my painting (i.e. tree on foreground in layer 1, tree with lake in layer 2, mountains in layer 3, sky in layer 4, etc etc), and all elements are on their own layer. In the window of the Editor you can see the combined picture, naturally. Now, if I wish to change one layer, f.i. to make it darker, or lighter, or change the size, in X-3 you can see the changed layer together with all the UNcjanged layers, so you can assess its effect in the total. Unfortunately, all subseuent PSP progrmmes, X-4, 6 and so on, have lost this property. When you change one layer, the total picture disappears, to change that one layer, and you cannot judge the change in relation to the other layers, because they are not visible. Changing a layer is in the menu “Enhance Photo/Smart Photo Fix”.
My question is, has anybody tried the PSP 2018 in this respect? And can you change a layer, while still keeping sight of the others?
I look forward to your findings.
Robert
July 14, 2018 at 1:07 pm #20156Hi Robert, welcome to the forum. In order to help out with your question, could you specify one (or two) exact commands you are referring to? And could you post a screenshot of what you have in X3 so we can actually answer more specifically?
July 15, 2018 at 6:04 am #20167To change a layer, I use the menu Enhance Photo/Smart Photo Fix, where you can change light/dark and colour intensityper layer. Also in the same menu, there is Colour Balance, where you can make colours cooler or warmer, or change green/purple levels, also in each layer seperately.
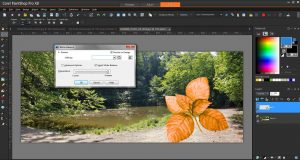
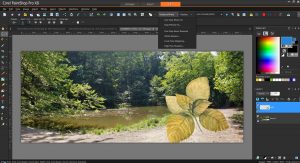
See screen shots. The picture on the right is the original photo and I want to change the tone and colour of the seperate elements (i.e. river, tower, ship etc). So, I have layered the river, the tower, the ship and the trees, and set them on the background, i.e. the original photo. Now, I have first darkened the original pic, of which you only see the sky, the rest is covered by the layers, see left picture in the first screen shot. Next, I can change the the tower to a darker shade and I can compare it to the sky, see the left picture in the second screen shot. I use the sliders in the menu Smart Photo Fix. Note, that the Editor remains visible, so that the picture with the changing layers is fully and complete (layers-wise) visible.
In the later PSP programmes, you cannot do this: if you select a layer to change light or dark etc, the complete picture disappears, and the Editor shows only the layer that you are changing. You see what I mean? You cannot assess the changes in one layer with respect to the others. I discussed this earlier with Cassell, and she said, that Corel said “Too bad” , therefore my question is, did Corel put this property back in PSP 2018??
thanks, Robert
July 15, 2018 at 8:21 am #20168So you want to be able to SEE two (or more) images at the same time on your workspace. It is still possible. It is just that PSP2018 was set to the other way, by default. To change that (and I instruct everyone to do that as soon as they start using PSP2019) go to Window > Tabbed Documents and UNCHECK it. Then, you should be able to see as many images as you want on your workspace, and with duplicates like that, you can easily compare them.
Does that address the issue?
July 16, 2018 at 9:54 am #20195Strange. I responded to your question, but since I pressed the button twice, the response was dispalayed double. Selecting the last one and clicking delete, both responses were deleted, so I’ll try again.
July 16, 2018 at 10:22 am #20200No, it is not the tabbed images question, that is clear, and I never use tabbed documents. And I always use fit window to image.
I have another example which explains my question perhaps better.
In X-3, I have opened document, see pic 1, a face of a woman, and I want to add hands to that picture. So from another source, I found a pair of hands that I want to use, see pic 1-1. I copy the hands and put them in pic 1 as a new layer, see pic 2, and you see that the hands and face do not match in colour. Next to that document, I have opened the palette Layers, and you see the hands as a separate layer. Using Enhance Photo/Colour Balance, while having selected the hands layer, I move the sliders to warmer, and the hands now match the face, I can check that because in X-3 you keep seeing the document with both face and hands and you see the change in colour in the hands as you move the slider, untill the colours of the layers match, see pic 3.
Now the problem with later versions of PSP is, when you have selected a layer you want to adjust, and you then open Enhance Photo, the workspace disappears and the layer appears fully on the screen. Changing the colour of the hands is now difficult, because the face of pic 1 is gone and so you cannot judge the level of colour change of the hands. Therefore my question is, can PSP 2018 do this in the same way as X-3?
Has anybody tried this? Do I make sense here, or did i miss something?
I look forward to your findings
Robert
July 16, 2018 at 1:35 pm #20209Robert, I don’t know much about this subject… Cassel can help you more than me…but I just have one doubt…
You mentioned Enhance Photo > Color Balance in PSP X3, what I think it is now called is Enhance Photo > White Balance in PSP X8… (I don’t have PSP 2018)… Is that correct?
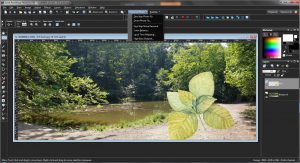
If so, I can see the correction in the whole photo both X3 and X8. See my examples… is that what you mean?
July 16, 2018 at 1:52 pm #20210I don’t have X-8, so I can’t check. The white balance is the default position in Enhance Photo/Colour Balance (in X-3). In Colour Balance, you can also select Advanced Options, and then you get the sliders for purple/green and warmer/cooler etc.
In your example pictures, it seems that the leaves is a separate layer, that you are changing w.r.t. colour and Smart Photo Fix (ie. light/dark and more/less colour0), is that correct?
Ah, I just clicked your pics and saw the large ones. In the X-8 nr 1, I notice, that there is ONLY White Balance under the Enhance Pphoto menu, and not Colour Balance. Does that mean, that you can not change the colour of the leaves in layer 1? More purple, or more green, or more warm etc?
Robert
July 16, 2018 at 2:47 pm #20212Yes, it is possible… you have to click the ADVANCED OPTIONS … top left… Check my example… Is that what you mean?
I don’t know much about it… just trying to help. 🙂
July 16, 2018 at 3:30 pm #20213I think that Cristina has a good answer and her illustration is the same for PSP2018. However, the reason I was asking about the specific commands you were using is that there have been some changes with some of them where you can see two panes (before and after) but only of the layer itself, making it hard to compare with other colors from other layers. And that has been reported as an “annoyance” (since it was by design). But I cannot remember which command it was affecting. Obviously, it was not the one you are listing, at least.
July 17, 2018 at 3:26 am #20222Yes, I overlooked that, so you still can select advance options in X-8. But it is as Cassell said, you cannot see the two panes with the before and after of the change, AND the whole document, so as to compare the before and after and compare the colours of a layer while seeing simultaneously the whole document. So I understand that still hasn’t been addressed by Corel. My feeling is, it is not an annoyance, but an essential. I don’t believe, PSP 2018 will help me, so it is a no-buy.
July 17, 2018 at 5:36 am #20223Robert, which commands are doing that? I can’t find them again (as I don’t typically use them). I could re-report it to Corel.
July 17, 2018 at 2:42 pm #20224The commands I use for matching layers with each other is under Enhance Photo in the main menu strip atop the Editor. Clicking it will show a drop-down menu with a.o. Smart Photo Fix and Colour Balance.
Smart Photo Fix allows you to alter a layer for Brightness (with sliders for Overall, Shadows and Highlights), Saturation (with a slider for Less or More Colourfull) and Focus (with a slider fo Original to Sharper.
Colour Balnce using Advance Options show a first section called Optional Fine Tune with Temperature (with a slider for Cool and Warm) and Tint (with a slider for Purple and Green) and then a section called Enhance Color Balance with Temparature (with a slider Cooler and Warmer) and Tint (with a slider Purple and Green).
Every slider, when opened, show a preview with two panes, showing the original condition and the condition after you have moved a slider. Thes panes are called Before and After. You must check the little Preview on Image box, to be able to see the changes in the whole document.
Note that in the working space I have a document, that consists of a Background and one or more layers. Each layer contains a part of the total picture that I am composing. These layers may come from various other documents, in which I selected the specific part I need, so the layers in the document at hand will typically all have different contrasts, colour saturation and tints. To amalgate my document, all these layers must match each other in tint, colour and contrast, so that when all are merged, it is a coherent picture.
To do that, you need to see the panes of change in the commands together with the main document and all of its layers. In X-3 you can see that combination (Document in workspace, the layers palette with all the layers, and the command that I am using (such as Cooler and Warmer)). In X-6 that I once tried, with one of the commands as described above, such as Cooler and Warmer, you do not see the workspace any more, it is replaced by a full screen showing the pane with Before and After. So, X-6 is useless for this sort of matching to produce a coherent picture, and I think all subsequent PSP programmes are dito. Am I right?
I hope this makes any sense.
Robert
July 17, 2018 at 7:06 pm #20225Yes Robert, you are correct. That way of displaying the before and after was changed in recent versions, and it is still the same in PSP2018. However, although those commands might be annoying to use, you might find other features that you would love PSP2018 for and even if you upgrade to 2018, you can still keep your older version when it is more convenient to work with; you can easily have several versions of PSP on your computer, even running at the same time.
July 18, 2018 at 3:14 am #20228Ok, thanks for the responses on this subject. I’ll stick with X-3 for the time being. Hopefully Corel will add this way of displaying before and after together with the whole workspace in later versions.
Robert
-
AuthorPosts
- The forum ‘PSP stuff’ is closed to new topics and replies.


