Home of the Scrapbook Campus › Forums › Lobby › Chit Chat › Master classes for 2022
Tagged: Needy newbie.
- This topic has 32 replies, 14 voices, and was last updated 2 years, 3 months ago by
Cassel.
-
AuthorPosts
-
December 15, 2021 at 3:50 pm #69014
Planning 2022, I want to get more ideas from you about what topics you would like to see addressed in our monthly masterclasses.
Some topics that were suggested in the past have already been addressed. If we want to add a different angle on a past topic, that is fine, but it would not be fair to just repeat something already done.
I have some ideas. If you suggest something else, I will add it to this post, provided that it is clear and precise enough.
- Would it be a tool/command in PSP that you feel needs more explanation or exploration?
- Would it be a type of manipulation that you would like to learn more about?
- Would it be another way to create scrapbook projects to showcase photos/stories?
I do have some ideas that include:
- using fancy fonts with extra glyphs
- photo manipulations
- fantasy scene creation
- one more class on using Filter Forge effects
- more about Advent Calendars styles and ways to make them
- and surely another PaintShop Christmas
What else?
December 16, 2021 at 9:00 am #69034I would like to know about the various tools. I used the push tool in Lab 6 Mod 8 but it wasn’t great and I really don’t understand it. Also when you click on the push tool, I see that there are a great many tools in that area that I do not understand.
Also, in creating a shape paper clip, I did not understand how to use the pen tool and the knife tool to pull apart the pieces and push them to a new location.
December 16, 2021 at 9:32 am #69035I would like to see ways to enhance a portion of a photo, such as select a single person in a group photo and make that person stand out from the rest.
December 16, 2021 at 3:28 pm #69038Hi,
I wouldn’t mind a Master Class on: –
photo manipulations
fantasy scene creation
one more class on using Filter Forge effectsover the next few months
December 16, 2021 at 4:33 pm #69042Marvin, that is an interesting idea. How to make something stand out. Good idea.
Mary, I think there might be a need for more tutorials on using the Pen tool. This could be a specific element to address.
Colin, glad to see that some of those suggestions resonnate with you.
December 19, 2021 at 1:18 pm #69124I think more classes or tutorials on how to use the various tools available in PSP. For me, it doesn’t do any good to have some of the classes that focus on making something specific if I don’t know how to use the tools needed.
I have used the clone and scratch remover but not sure if I’m using them efficiently. I’ve never tried the object remover. Of all the brushes, the only one I use is the burn brush… I’m not sure about any of the others (like lighten/darken) because if I do use them they don’t seem to do what I think they are supposed to do!
I also struggle with the other brushes like chalk, oil, crayon etc.
December 19, 2021 at 1:46 pm #69125Good points Rene.
For the chalk, oil, crayon, have a look at the Art Media class. It will give you a good start.
For the Clone tool and Scratch remover, we have looked at them, in real examples in the Get Rid of It class.
But I will definitely look into offering more classes on those lesser-known tools.
December 19, 2021 at 3:43 pm #69130I would definitely be very happy with tutorials/classes on the lesser-known tools (the pentool!) and an extra FilterForge. Photo manipulations sounds good too.
January 7, 2022 at 2:32 pm #69649Hi,
I would also like to learn more about the same points as Rene, Corrie and MaryPhoto manipulations and the various tools.
For exemple, I didn’t know you could use the brush tool to color in for example, or to use bruches with the eraser tool.Carole what do you mean by : another way to create scrapbook projects?
January 7, 2022 at 2:47 pm #69650Marie-Claire, I was mostly referring to the idea of different styles of scrapbooking, like I showed pocket scrapbooking, and the one with infographics. If someone sees a different style and would like that explored, it could become a class.
January 13, 2022 at 3:30 pm #69812Carole ok, now I understand, different styles of scrapbooking that would be interesting indeed.
I also thought about the new Frame tool in PSP 2022, what the possibilities are with that, but that might be a bit difficult because probably not everyone has or wants to use PSP 2022 yet?January 13, 2022 at 3:36 pm #69813Marie-Claire, that would likely be a blog post exactly for that reason. 🙂
February 1, 2022 at 11:53 am #70796I have never used the user defined filters. Is it something interesting to know for what and how it can be used? Or is there already a class or blog post about it somewhere?
February 1, 2022 at 12:28 pm #70798Marie-Claire, I have tried to make sense of the User Defined filter, but the only thing I have been able to achieve is to play with the randomized settings. I have tried to analyze each of the settings, but I found that I would end up with effects similar to what the regular effects will give; a little blur here, a little sharpen here, etc. At this point, I don’t have enough information to make any kind of tutorial.
February 1, 2022 at 1:08 pm #70799Carole, ok ?
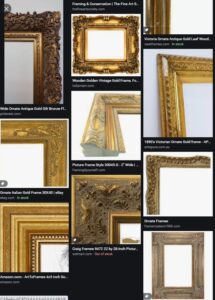
I’ve also tried shifting the settings, but I don’t understand how it works either. I was curiousFebruary 18, 2022 at 11:16 pm #71717I have taken notes of various suggestions for classes, from forum posts, Facebook posts, emails, and private messages. One of my post-it notes indicates “Dynamic frames“. If you saw that title for a class, what would it mean to you? What would you expect during that class?
February 18, 2022 at 11:57 pm #71723As you know I enjoy creating my own frames. I keep them relatively simple, in order to not overpower the photos within them. I’m not a fan of ornate frames, like many of the ones in PSP frames. Here is a screen shot of how I would interpret ‘dynamic frames’ and one of my own simple frames. I suppose my frames could be classed as dynamic, compared to the very plain framing usually used in scrapbooking.
February 28, 2022 at 7:11 am #72861I’m asking someone who speaks German.
I like to try some of the workshop instructions (is it the right word) especially the mask from Day 7 in German (it’s easier for me). But unfortunately I don’t know what command I have to use for (Ctrl-A; select all) oder Ctrl-F; float). New Mask layer or Negative Image is okay, find it in German. Also I don’t know what command I have to use for Deselect (Ctrl.+C)
February 28, 2022 at 10:57 am #72877Christiane, HERE is a great resource you can keep. You just have to start with the correct menu on the left and you should get all the translations you need.
March 1, 2022 at 2:49 pm #73001Thanks, Carole.
June 1, 2022 at 3:56 am #77413Thank you very much Carole for asking us for our ideas
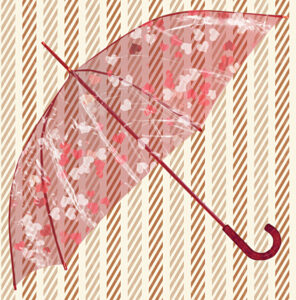
I would very much like to know how to make opaque or transparent plastic textures myself. I have already made a transparent umbrella (not perfect LOL I had forgotten to make the other side that we should have seen, precisely by transparency). But I had used a texture collected on a free site. The problem being that these textures are not always suitable for our project. I really like making titles with the tower like transparent stickers around, but I spend hours on it with lots of tries, and suddenly, I don’t know what I did anymore oops (big head but small brains LOL)
Anything that can be transparent: epoxy, glass, crystal, plastic, sticker with transparent border ………. etc.here is my “not perfect” umbrella LOL
June 1, 2022 at 4:20 am #77416June 1, 2022 at 11:43 am #77427Nadine, for the metal elements, you might need a combination of the Embossing and the Chrome effect. Considering that a real 3D effect plays with perspective, it might be hard. I tried to play with something similar when making a coin, like you would see a 3D head on it, but it is not as simple as black and white.
As for transparency, it if often a matter of playing with the Opacity. This might actually be a cool question for the Q&A so I can demonstrate it.
July 7, 2022 at 11:51 pm #78826Hey, You offer this in the Master Classes — Customizing your PSP 2018 and I was wondering – would it be time to do a Customizing your PSP 2022? Or is the 2018 about the same? I’m still trying to bind my scripts, and by that I mean I’m trying to get serious about doing it, so I am not doing very well. :((
July 8, 2022 at 12:05 am #78828The workspace has not changed THAT much, but after a few years, it might be a good idea to do one… for PSP2023.
If you are having issues with Binding scripts, at what point are you stumped?
July 8, 2022 at 2:05 pm #78831Ive been using PSP X2. On it, I have a bound script, see photo. All it does is add 30 pixels to all 4 sides of anything, .png or jpg.
I have a bound script in PSP x2 I want to put into 2022. The script is NOT where it says it is, (when you hover, the directory and folder pop up) and in fact, I cannot find the script anywhere! Apparently when you bind it, it makes a copy somewhere within paintshop files somewhere, unknown. Can you help me find it? THEN I can look at the directions to bind it to 2022, LOL!
July 12, 2022 at 9:48 am #79031I think I need a refresher course on everything mentioned above! My biggest bugbear is manipulation and trying to remove an object or person from a photo. I’m lazy and inclined to use just the Enhance Photo button, the crop and straighten tools! So please, roll them all out again.
August 3, 2022 at 11:39 am #78827Hey again,
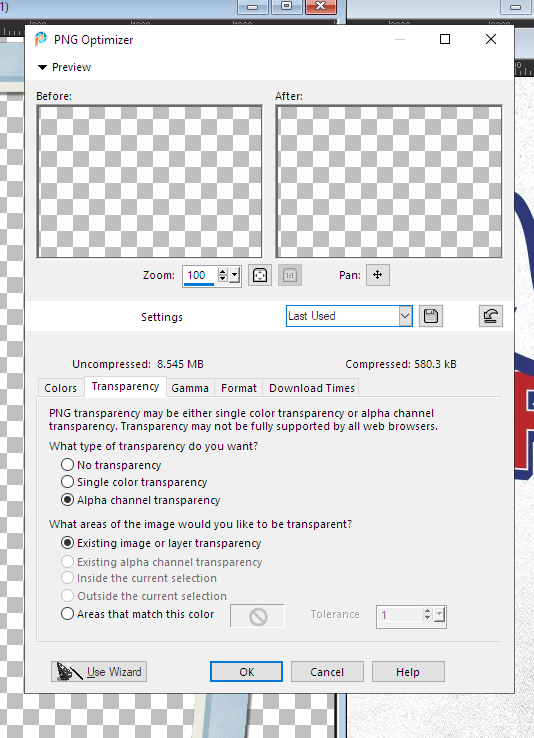
There is something called a .png optimizer…. it’s under File–> export.
At the bottom, there appears to be a way you can make the white background of a photo transparent, just by clicking that last radio button…does this work? Instead of tedious extraction? “areas that match this color”
Here is the popup.
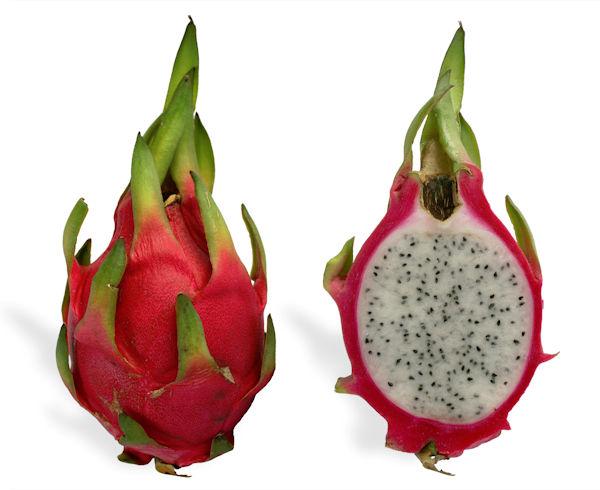
and here is the image I want with a transparent bg. in .png format.
 August 6, 2022 at 5:01 pm #80452
Suzy what you did there is ok.
Go to the wizard png left down.
Tab to the first green balloon. there it is the first one. I do not know what it’s called in English.
Tab again, the second green balloon. chose for the third one.
Tab again to the third green balloon: take a color up to what you want.
The fourth green balloon, chose yes.
The fifth green balloon leaves it on top of its there.
In the sixth green balloon, you see the result of your work.
You can everything file in png.
I hope you succeed this way. Write this down somewhere in a notebook.
Sometimes you have to rectification of everything (PSP) before you lose it.
August 6, 2022 at 5:08 pm #80453Oops, I forgot something. On the first page, you have to choose 16-7 million colors 24-bit.
That’s very important too for png.
Greetz Jannette
-
AuthorPosts
- The forum ‘Chit Chat’ is closed to new topics and replies.


