Home of the Scrapbook Campus › Forums › Showroom › Bootcamp – March 2020
Tagged: Bootcamp Project 4
- This topic has 211 replies, 24 voices, and was last updated 4 years, 6 months ago by
James Durrant.
-
AuthorPosts
-
March 16, 2020 at 11:00 am #40443
I don’t know Mary, looks like you are doing OK to me. Nice tribute to your Mom and Dad.
March 16, 2020 at 11:12 am #40444Cassel, you ask what little tidbit was picked up this time around. This is so easy that I can hardly believe I didn’t figure it out sooner. When using the selection tool, sometimes multiple selections could be made and other times I would have to hold the shift key. I couldn’t understand why. Now I am aware of the Replace, add, and remove mode. Yikes, could that be any easier. 🙂 Thanks for your great tutorials and bootcamps.
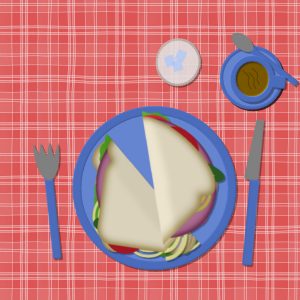
March 16, 2020 at 11:35 am #40446Messing around with the sandwich..added a glass of water with ice and separated the sandwich.
March 16, 2020 at 4:45 pm #40451Replace add and remove are my biggest nightmare, I am so confused with those I need to know more.
March 16, 2020 at 5:45 pm #40452Trish, you have done a great job on Hastings 1066. I love the way you have laid it out and your glitters are great. Well done Hon. <3
March 16, 2020 at 7:01 pm #40464Corrie, your projects are a delight to view. I particularly liked your homework ‘A Rainy Day in the Garden’, very cute. Well done!
March 16, 2020 at 7:09 pm #40465Lynda, clever girl you! I would never have thought to ‘cut’ the sandwich … thinking outside the box, yay! <3
March 16, 2020 at 7:12 pm #40466Mary, this is very lovely. You are doing well my friend. 🙂
March 16, 2020 at 7:29 pm #40467Sharon, wonderful job … and, I love how the photo of Jimi is pointing to the birthday cake, very clever.
March 16, 2020 at 8:33 pm #40469Hi Finally sending this only been on it days, but I am way better than the first bootcamp, used to sweat loose sleep, have some fits lol corel road rage do it better now and I don’t sweat have to walk away and retry but no fits 🙂 getting better still stuck on other feats. or labs ect
I knew I pulled to high but it made me skinnier so I was happy.
March 16, 2020 at 9:30 pm #40476Here’s an extra one I did with a bit more embellishments and papers.
used my own papers, Bohemian sunshine papers and embellishments
I think I remembered to drop shadow everything.
Am in husband imposed quarantine. Running fever and have a small cough. Have a nearly non-existent immune system.
March 16, 2020 at 9:42 pm #40477Shirl, a good time was had by all … such fun my friend, well done. ;D
March 16, 2020 at 9:43 pm #40478Shirley,
When you make a selection if you use the “add” mode it will add to a selection you have already made. You can either add another selection or you can add to the original selection.
If you make a selection and you use the “replace” mode it will replace your previous selection.
If you use the “Remove” mode it will remove part of a previous selection.
For instance if you make a selection and then go to the “Remove” mode and select over part of previous selection you will remove part of that selection. The same with the “add” only you will add to the selection. The “replace” mode will just replace a previous selection.
I don’t know how clear this is but if it is not maybe Carole can help you out.
Hope it helps as I know how confusing it can be.
Lynda
March 16, 2020 at 10:03 pm #40479Thanks Lynda. Nice photos in After the Storm … nature is amazing. <3
March 16, 2020 at 10:30 pm #40480Annie,
I saw the cut sandwich here . I thought it was yours.
March 16, 2020 at 11:27 pm #40481Annie, your project shows how one does not need a ton of embellishments to make a balanced page! Happy to see those tutorials in use!
Trish, what might have happened to your computer? Is someone else using it? I like how you used a photo as a background paper. It matches well without overpowering it.
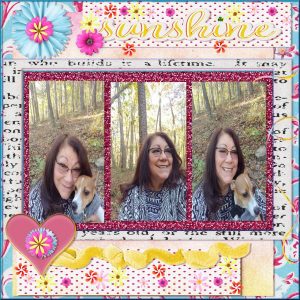
Lynda, that seems like a lot of water! It is amazing how a river can change in a few days! I like those little droplets. They are perfect for that layout! That tip about adding and removing selections can make that tool so versatile too! Glad you learned that. It seems like the sandwich is a favorite exercise of all the tutorials I have in the Campus!
Cindy, I am glad to see that you noticed how the image was slightly distorted. At least knowing it, you chose to play with the end result and that is the fun part! Looking at your layout, it seems like you are really getting more comfortable with PSP.
Jackie, that is a fun layout. I hope you are safe at home. Quarantine is no fun but at least, you have PSP and a whole family here to share work or thoughts.
March 17, 2020 at 3:24 am #40482Thank you Carole, yes it was another photo from the same batch, I wanted to use a photo of the fishing boats, but that would be 4 so I used it as a background and that bought the story together.
Well I am now in isolation,and totally alone, it is worrying me about Food, you have to book deliveries in advance now to get a slot, now there will be many more using the delivery service and people in my position dont have anyone to get the shopping for them.
Lynda , thank you for explaining , I still do not understand, need a video on this one to understand it. has this come up somewhere else begore as I dont recall it. By the way the cut sandwich was mine. LOL. xx
March 17, 2020 at 3:38 am #40483Carol I now turn off my comp and turn or the power supply as well, but I turned on and up came this page and I was already signed in, shouldnt this all have closed down. I did have those upgrade reminders from windows, where they say down switch of we will update , but I had it 3 nights on the trot which has never happened before. I am wondering if they have found a new way in x
Cindy well done, you are coming along nicely, that is a lot of work on that project, and a lot thing to learn and put together, you did well and well done for putting your tag into the showcase competition , xxx
March 17, 2020 at 10:02 am #40491I have customised my workspace byincreasing the size of the Icons,Text,ScrollBar and Nodes (to makethem more visable on a 4k screen) Set my workspace to Dark Gray and Background to Light Gray.
I also followed a tip from Corel’s last upgrade instructions to save my workspace File>Workspace>Save to recover my settings if ever it was changed.
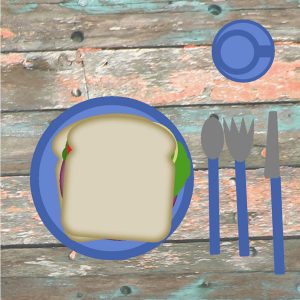
Below is my Layers exercise. I have made my Sandwich and as it is sunny I will eat it outside. I prefer wholemeal bread and a cup of tea so I will try to make these later.
March 17, 2020 at 4:12 pm #40495Wow Carole, what a day! I spent hours trying to make the butterfly with picture tubes. I tried to do it on my own, but ended up with 216 layers! So I then went to your webinar on picture tubes. A big help. I must say I learned a lot today. It would be nice if now I would remember everything I saw.
Problem 1: I tried changing the color on the 2 small horizontal rectangles as they blended too easily with the background. No way could I do it. I guess in hindsight, I should have tried changing the background color instead.
Problem 2: I could not see all of my images or the title of them. I must have clicked on something. I kept having to go to Window – cascade… to find the image I was working on to copy on my project.
Butterfly: I went to Pixel scrapper to get most of the stuff, including an outline of a butterfly. I then inverted the butterfly image and used a picture tube to put glitter on the outside (this time without 216 layers). I then inverted the image again and deleted the butterfly. I was left with only the outline with glitter. Pretty cool. Saw it in your webinar.
Thanks for keeping me so busy on this blustery day!
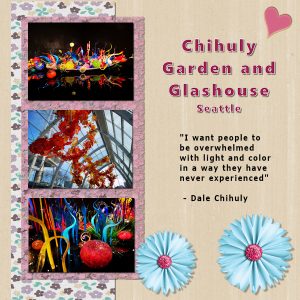
March 17, 2020 at 5:27 pm #40498My project #3. At first I had a lot more elements in it, but as the photos are quit colorfull that was way to much; at least I think so and toned it down a bit. Getting the glittertile right was a chalenge but in the end I got there. Sorry I see now that I misspelled glashouse, it should be glasshouse. But I’m Dutch so……
March 17, 2020 at 6:33 pm #40500Hello.
I know I’m way behind, but here is my Day 3, Project 01 creation. I am using PSP Ultimate 2020.
March 17, 2020 at 7:36 pm #40501You are doing well Corrie and, you are right, the photos do carry enough colour so minimalism is the key. Well done.
March 17, 2020 at 10:46 pm #40503Here is my Project #4 post.
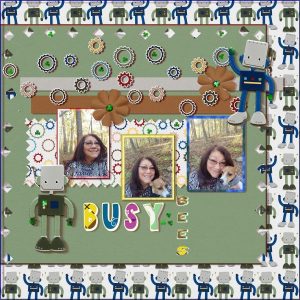
March 17, 2020 at 10:57 pm #40505Hi This is the cutest scrapbook page love these robots.
I learned a lot didn’t sweat had fun all day doing this, I haven’t got a lab done yet I get lost in these but and not following through and its hbo amc, this manafest. I think i did good, did I Carole? hugs allThis one was the most fun so far. 🙂 ty it was truly my calgone today. Carole was I the first one to turn in lesson4?
March 17, 2020 at 11:07 pm #40507here is my 4th project
March 17, 2020 at 11:45 pm #40510Trish, what page are you referring to? A Campus page or a scrapbook page on your PSP?
James, that is a good tip to save your workspace once you have it set up the way you want. This way, if something gets messed up, you can always recover it. One additional tip I would like to offer is to save your workspace with the version number in the name, so that, later, you don’t accidentally try to load it on a different version. And also, to keep your copy safe, save it in a different folder than one that was created upon installation: in case you need to uninstall PSP, those folders MIGHT be removed or overwritten, and then, you would lose that workspace. As for your sandwich, you are eating on the picnic table?
Denise, I bet the tube was placing one image per layer, right? For your problem 1, what did you try to change the color? Did you use the Adjust > Hue and Saturation > Hue/Saturation/lightness ? Although it is not the only way to change a color that is one common tool. If you used that and it didn’t work, it is possible that you had a selection somewhere (even a single pixel) that would have changed color but too small for you to see it. If that happens again, use Ctrl-D (to deselect everything) and try again. Interestingly, it happened to me just yesterday, and it had me puzzled until I figured it out. For the Problem 2, usually, if you check and uncheck the Tabbed Documents, it can work, but on occasion, it is like one (or some) image will go hide under one of the palettes on the side. In that case, yes, checking the Cascade would do the trick. It is a little annoying as they will ALL overlap and you have to move them, but at least, they all show up.
Corrie, what problem did you have with the glitter tiles? Did you use the tiles available for download and had issues installing them or did you try to create them yourself and that was the issue?
Charles, glad you are starting, even if it is late. One thing I notice with your project is that you have your shadows in a different direction than what we typically see. On the other hand, it is all consistent with each other which is the important part. I think you can use a smaller offset for the shadow as it gives the impression that the photos and the letters are somewhat floating off the paper. That is only a small adjustment since those elements are expected to be flat on the support. Is that a building you visited?
Lee, that is a fun layout. I guess the darker background does not show the shadows much, which is ok, as that is the way it would be in real life too. For the little scattered nuts, I think it would look good if some of them were appearing on top of the photos as it would look scattered after the photo is glued. If you end up with some elements in the “wrong” place on a photo, you can always erase them, one by one.
Cindy, you are definitely having fun now! The one detail I would suggest is in the layering of the top flower. It seems like the little nuts would not stick very well on top of a flower. You could arrange the flower on top of the nuts? And no, you were not the first one, as Lee posted one just before you 🙂
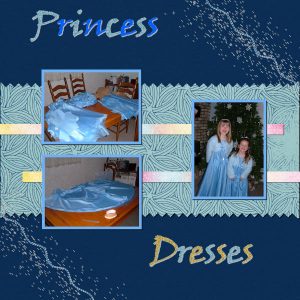
Jackie, did you sew those dresses??
March 18, 2020 at 12:18 am #40513Thanks Lynda for that information. that gives me something to think on. There will be lots more than 3 bases to cover with the selections though. I am hoping Carole will do an update webinar on selections.
March 18, 2020 at 12:31 am #40514Yes, I sewed those dresses. Two hems per dress. That was about 11 years ago.
March 18, 2020 at 5:34 am #40516Hi Campers. Day 6 completed. Boy oh boy is the internet slow or what! Took an age for this page to load but here it is. I used a Pixel Scrapper scrapkit “Bonfire Memories”. Thanks for takin a peek!
-
AuthorPosts
- The topic ‘Bootcamp – March 2020’ is closed to new replies.


