Home of the Scrapbook Campus › Forums › Let’s talk › PSP stuff › Using Scripts in PaintShop Pro
- This topic has 17 replies, 4 voices, and was last updated 2 years, 4 months ago by
Marie-Claire.
-
AuthorPosts
-
August 2, 2020 at 9:16 pm #45820
This class was packed, in more than one way.
It was FULL, meaning we reached the maximum of attendees allowed (100) and some people might have arrived late, to a locked door. I am sorry. I have never reached that level of attendees in one of my classes. It is fantastic. I guess the topic was important and interesting to a lot of people.
It was also FULL of content. I didn’t even have a chance to go through all the scripts and types of scripts I wanted to explain. I didn’t get to answer Valerie’s question about what editor I was using (I am using Notepad++ by the way).
I think there is plenty of content to do another class on the topic, where I can demonstrate more types of scripts (based on what you would suggest). What would you think of that?
August 2, 2020 at 9:30 pm #45823And by the way, there was an error on the link to purchase the class package. I have fixed it so, just click on the link again, in your email.
Sorry for the inconvenience. I could see several people trying to access it but were redirected to the wrong offer.
August 3, 2020 at 10:11 am #45845Thanks a lot, that was another really interesting subject, Carole, may be you could plan the same subject for the next webinar , as you did for the templates.
I was so curious that I tried out the alpha maker-script afterwards, (instead of going to bed ….. LOL, in Germany past midnight). Someone among the other participants asked how to go on with the characters and I answered, I think you moved them.
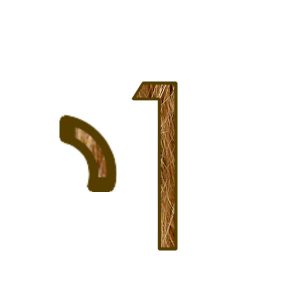
During my experiment I discovered that for example the number 1, trying several fonts, appears often just as a line, (do not know how to explain it exactly) and sometimes other numbers or characters are not shown completely but just a part of it. May be a problem if you choose outlines, thickness or order ?
Test 1 result: numbers 1 and 2, the 2 doesn’t appear completely
Test 2 result: number 1, then L and I, the character I doesn’t appear completelyBoth with PSP 2019. The font is century gothic here.
August 3, 2020 at 10:26 am #45846Libera, what were all the options you used? What thickness of outline? Did you choose it uneven? Did you use 3600×3600 px papers? or smaller?
As for answering during the class, you are welcome to do that. It helps others while I am unable to see the questions.
August 4, 2020 at 3:38 pm #45885With over 100 attendees during the live class and now 60 people have watched the replay (yes, I see that kind of stats but I don’t know who), only 14 have filled out the survey! As we plan on having a follow-up class on Scripts, it is time to add your questions, or tell me what part might not have been explained enough or that you wanted to hear about but didn’t, etc.
Com’on! Fill that survey.
Next time, I plan on demonstrating even more scripts so if there are some that you don’t understand how to use, or some you are considering purchasing but are hesitant, it is the time to mention them.
August 5, 2020 at 7:43 am #45914Sorry Carole,
I would have written about the options before, but I was in a hurry suddenly, I had to go to work …and I was playing around with PSP before going… LOL
First of all I used 1000×1000 px, for another test 2000×2000 px, for the last one 3600×3600 px (upload here). No difference. Most of the time the same effect. Only 1 of 5 tests was successful.
Fonts for ex. Bauhaus 93, 100, Century Gothic, 128, Hobo, 128, thickness of outlines, the first was 4 (test 1) then 2, one time in order, another randomly, never irregular outline.
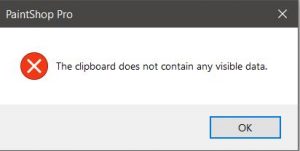
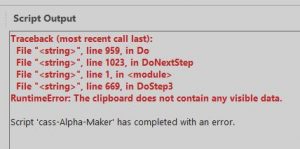
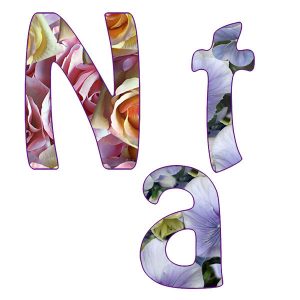
I thought initially the issue is using characters with figures together. But now here the uploaded image proves the contrary, this time created with PSP 2018, it should have been “Nathan” and I only get Nat and these errors.
August 5, 2020 at 8:30 am #45918Libera, would you be able to send me BY EMAIL, a screenshot of your entire workspace when you run the script?
You could also record the whole process using Loom (useloom.com). It is free and it would allow me to see what is going on while the script runs. Sometimes, it can give me a hint about what is happening.
August 6, 2020 at 1:02 pm #45936Yes, Carole, I prepared screenshots of the different steps and will sent them later per mail!
August 8, 2020 at 2:02 pm #45971For those who will read this, I discovered thanks to Carole what was the mistake I did. Instead of clicking directly on the script button, I opened first a new image, then clicked on the cass-Alpha-Maker, went on till the end and wondererd why I didn’t have all the characters I gave in at the beginning. I was so used to open first an image using the other scripts that I misunderstood it although I read the tutorial.
Alpha-Maker is really one of those wonderful scripts you like to go on playing with endlessly 🙂
January 23, 2021 at 1:08 pm #52002Hi everyone, for some reason I downloaded the VectorPaint script in the store , probably I saw something about that in a webinar or here in a class on the scrapbook campus, but I can’t find anything more about it and I’m giving this script a try but it doesn’t work the way I try, where can I find some explanation about this script? thank you in advance
January 23, 2021 at 1:37 pm #52004Marie-Claire, what did you do and what result were you getting? What is different from what you expected?
January 23, 2021 at 2:20 pm #52006I actually don’t know anymore how and what you can use the script for.
I have downloaded it, so I will have seen an explanation by you about it in a tutorial or webinar I suppose. Probably a while ago and have now forgotten how to use the script.-
This reply was modified 3 years, 10 months ago by
Marie-Claire.
January 23, 2021 at 3:07 pm #52015Oh ok. So here are the steps:
- make sure you have a vector object selected, and that it is a PATH (right-click on it with the Pen tool and if Convert to Path is available, click it)
- choose a brush tip with the settings you want (size, step, etc.) and the settings from the Brush Variance (F11) palette too (size jitter, position jitter, color jitter, etc.) and the color
- run the script
What do you get?
January 23, 2021 at 3:54 pm #52020i just did something to test, I know now how to do it. Thank you so much Carole !! I will safe your explantion in a little file and put it with the script 🙂
March 22, 2021 at 11:14 am #55194Oh my, scripts are so addictive! 🙂
Instead of finishing projects for the study group I tested several scripts and loved it! 🙂
July 23, 2022 at 6:35 pm #79879A question about a script: Adjustment Layers Group
How do I add a button group in the menu ? sorry if I ask a stupid question, but I think I misunderstand due to the language difference.PSP Script – Adjustment Layers Group
by CasselThis set of 13 scripts will simply create a group with the active layer to add the adjustment layer selected.
If a particular adjustment layer is not available for your version of PSP, and you try to run it, the script will let you know.For best and quickest results:
– bind the scripts through the View > Customize command
– add a button group below your New Adjustment layer command in the menu
– add each script to that button group.July 23, 2022 at 6:43 pm #79886That is using the Customizing feature (just like the tutorial associated with Lesson 2 of the Basic Scrap Course). However, unfortunately, there has been a bug in recent versions and even if you do add them to the menu, they won’t stick after you close the program. Sorry. I have been reporting this issue for a few versions now.
July 23, 2022 at 6:57 pm #79887Ok, thank you Carole !
-
This reply was modified 3 years, 10 months ago by
-
AuthorPosts
- The forum ‘PSP stuff’ is closed to new topics and replies.


