Home of the Scrapbook Campus › Forums › Basic Scrap Course › ty ty ty ty ty x 100
Tagged: Module 5 Project
- This topic has 34 replies, 5 voices, and was last updated 4 years, 8 months ago by
cindy harris.
-
AuthorPosts
-
January 28, 2020 at 9:04 pm #38285
Mode 1 done I was happy on it thank you for fixing my desktop with your script and thank you for helping me all the time. Thank you 100 times
cassel your the best.
January 28, 2020 at 9:11 pm #38286Definitely looking good!! Is the shadow on the middle paper missing?
January 29, 2020 at 1:01 am #38293thank you
cassel redid it thank you put the shadow in, yes I missed that…… you rock
went 6 hours on mode 2 ill try again tomorrow… 🙁 New day right but found out, 1. that email all in or something
like that you had to resend it to me, I found it in my spam folder 🙁 that’s why I didn’t get it. But you resent it so then
I got it. 2. I see the script would be easier to use I want to get there just having so much trouble, 3 no I don’t know what
sinedot is its greek and scripts are greek. Signed up for march beginners class because i plan on buying my daughter this
program and I signed up to do it and do it with her at her house. 4 good night your awesome
January 29, 2020 at 8:42 pm #38311Cassl that was fun especially when my script worked it was like magic they all popped in the new project I started, thats cool.
I know it took me 3 days to do it but I am going fast for me. I Seen the lab I want to join and pay but today we lost
2 people in our family, well My daughter in law her father isn’t passed but hanging on but it doesn’t look good I heard. IT’s hard
on Joan last year she lost her only sibling her brother. But I couldn’t take on anymore than what I am doing right now. Watching 2 horse and 3 grandkids and 3 dogs, I am over the top in stuff having to do stuff.
I really enjoyed this am getting the hang of a lot but just pretending on selling my daughters crafts lol she only gifts them
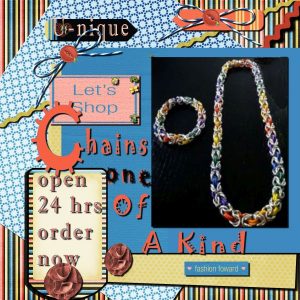
one in a while she will take on a project but she just does it for fun the Chain male shes really made some cool stuff though. I will take the lab i just came commit right now. But I wanna lol hugs ty
January 29, 2020 at 9:13 pm #38317There is no need to rush into another level; it will stay here for you when you have the time! 🙂
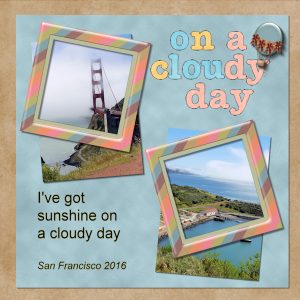
January 30, 2020 at 4:27 pm #38348This project let me revisit a trip to visit a friend in San Francisco. One confession, I converted the journaling to a raster layer then deleted the vector layer only to realize that the date of the trip was 2017. I could hear that little voice in the video describing why you should hide it .
Stylistically, I think the shadow on the balloon may be too heavy and maybe too little on the frames. Your thoughts would be appreciated.
January 30, 2020 at 4:58 pm #38351Gerry, I don’t think the shadow is too heavy on the balloon. At first glance, it simply looks like a thick sticker. It really didn’t hit me as odd at all. You might want to play with the blur if you find it too heavy. Sometimes, it just softens it enough to look more like YOU want. The same goes for the frames; it could be tweaked if YOU want, but I would not have noticed any oddity in the shadows. It is great that you are actually analyzing those shadows. That is reflex to develop instead of blindly add shadows without thinking of it.
For the text, yes, I guess it is also a habit, and often, we start it when something like that happens and we realize it!
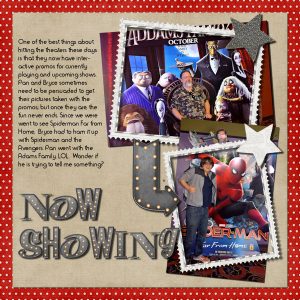
January 31, 2020 at 3:04 pm #38384Finished Mod 1. Had fun with it and used the levels on both the pictures and on the 1st background paper. It was a little to orange for me and I wanted it to match the Adams Family curtains and Spiderman’s costume.
January 31, 2020 at 4:35 pm #38386Since I don’t yet have a library of papers and elements, I spend a lot of time looking (and looking.) I finally remembered that I actually needed to do something.
Thank you for the instructions on softening a busy patterned paper. It opens more opportunities beyond solid colors.
I got errors when running the script. I will forward the information later today.
January 31, 2020 at 4:49 pm #38389Cassel, I got it done but not your way thats what buggs me. I want stuff to be like yours so I can follow you.
I thought I had to busy of papers so made couple from the busy ones thing is I had a hard time because i couldnt find the menu
whre you can flood fill like big 100 or 5 small I cant find it. Question should I turn in like this when I as in the past
didnt get there with your instructions but from hunting a way? i dont like it but I want you to know I am working on it in my
spare time from life. Really needed this though either way right now. Cause of life, its as good as my thearpy. Lol
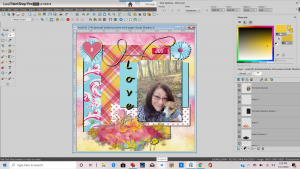
I showed my desktop also my star dont work but if I hit run scrip folder thing it works. I want to do my work your way also
going to try some more but I wanted to see what you say. thanks cindy
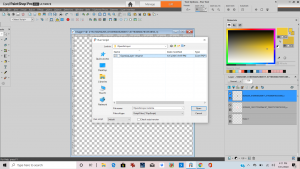
January 31, 2020 at 6:17 pm #38391on my script the star dont work but if I click the folder highlighted then the box opens I click the open as a layer then a box opens to pick a photo then it pastes it in as a layer.
and still can’t find the box that you can change your selection as a square or rectangle option all I can get it what its on
already. And I cant find the dot that you have to magic erase what you have highlighted. I hope i don’t give you a headache
if so sorry. I hope i can learn your way is so forward and easy my cassel workspace seems like its changed I just
need my workspace like yours. It was but??? I can’t find those things above this that I wrote about this is my cassel
workspace
January 31, 2020 at 6:26 pm #38392Cindy, somehow, it looks like you have the Essential workspace, which is strange because if you loaded the one I sent you, it SHOULD have been the Complete. So, click on the little House icon on the very top to go to the Home page. There, you should see the option for Essential, Complete and Photography. Click on the Complete, and then, the Edit tab on top. See if you can now find the settings you are looking for.
Gerry, you can look at the Resource page for places where you can get free supplies. You can gradually build your own library that way. As for the script, yes, send me the information by email, it is fine.
Karon, that looks good. As you can see, PSP opens up so many options as you can tweak the colors to perfectly match your photos. That is one great advantage of DIGITAL scrapbooking, because, in traditional paper scrapbooking, you can’t adjust color if it is a little off!
January 31, 2020 at 6:59 pm #38393thank YOU
February 1, 2020 at 6:01 am #38414Thank you that helped so much, I am learning thank You Cassel. When I did the drop shadow I couldn’t find the shadow paper
I don’t have it in my box so I just reduced the shadow. I had trouble the invert and then delete worked once but then not
next 3 times. I know its just practice So ill be doing it. Tomorrow I am going over how to do that script, and other
things youve taught us. thanks night
February 1, 2020 at 7:41 pm #38428Cindy, I am not sure what settings you used for the shadows, but those are incredibly larger than all the other shadows you used in previous projects. I think you might have accidentally set the horizontal offset too much (like adding a 0 to get 100 instead of 10 or something like that).
February 1, 2020 at 8:13 pm #38430im still trying to get started on module two so far I have been completely unable to find where I actually have thhe scripts and the script does not show in the new folder I added to file locations I have scripts but I may have duplicate folders with the same name because they don’t show anywhere ive looked
February 1, 2020 at 11:38 pm #38436What are the folders listed under the Scripts-Trusted and Scripts-Restricted under File > Preferences > File location?
If you do a search on your system for the scripts, you might find them just in a similar name folder?
February 2, 2020 at 12:18 am #38438It took me a dozen times to make those little donuts lol but I finally got it Really needed this its my fun sat night thanks
Cassel. I think I am finally beginning to follow your lessons. its been so greek to me. thank You hugs cindy going to bed
I hope lol…
February 2, 2020 at 1:15 am #38439Cassel, thank you
I think I am slow to catch on but having a good time really needed this to right now. ITs helped me keep my mind off
things. Cassel, am I don’t with 1? Is there a basic 2? i hope I am not done 🙁 I am still going over things to learn that
you have taught us. I am learning.
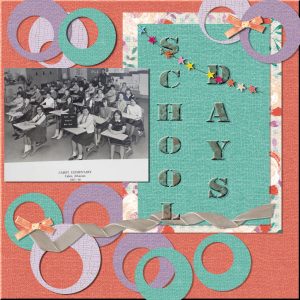
February 2, 2020 at 10:05 am #38445I have to say that you have worked quite fast! On your last layout, one suggestion I would give is to move the ribbon a little further down AND place it on top of the letter L. It seems illogical to put a letter on top of a folded ribbon like that.
To your next question, there is no Basic Course 2. I had plans for it (for years) but I have not done it. 🙁
Now, if you want more tutorials, there is TheLab, which offers 3 tutorials per month ($10/month) or the DIAMOND membership ($25/month) which grants you access to 300+ tutorials to create individual elements/effects (not complete layouts, but the elements themselves) and 100+ full-length classes. You can read all about those here.
Of course, you can also choose individual courses to purchase on this page if you prefer.
February 2, 2020 at 5:59 pm #38450Hi Cassel,
Please I need your basic Next step class You can do it and could I get coupon for it? I’d like to be your first student
Ill try to go to the lab and look I know I did before and it looked hard idk. Still going onver the lessons I faked myself
through trying to get it done but not your way which is the right way. I am just not beginning to get it a pinch i need my
2nd basic class bad. lol I am in a scrapbook hole now. its like a show hoe lol ok trying to do it your way going back
in lessons.
February 2, 2020 at 6:36 pm #38454hi iam so happy I am in the lab now.. but i will still go over these and get them right the way you do.
please rething a basic 2 I need it i dont know what where files go what pga is what scrips are wait yes the copy as a
layer script is awesome love it going to work on setting it up the right way the way you showed today… but joined the
lab i cant stand being in a hole. scrapbook hole. i am in a show hole in real life.
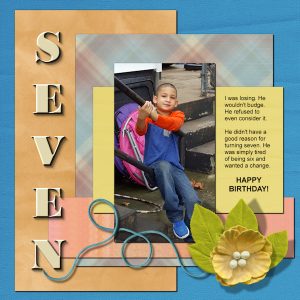
February 5, 2020 at 4:07 pm #38529This exercise was interesting and challenging. The various shadow techniques made a significant difference.
In my original layout, the journaling was longer. As a writer, I get carried away with telling a story. I need to keep the use of the graphic in mind, in a gallery with a smaller size vs. a standalone that can fill the screen.
I had a problem with the journaling disappearing when resizing from the PSPimage to 600X600. I tried several scenarios but couldn’t determine the cause. There was no problem saving as a 3600X3600 JPG. I resized to 600 using the larger JPG.
February 5, 2020 at 4:13 pm #38531Gerry, there is an oddity when you are resizing a .pspimage after using the text wrapping feature: the selection area does not resize with the image so your text might still be around BUT completely out of the frame of the image. In order to resize your image to 600×600 pixels, you have to do it on the jpg version. In other types of projects, it is not a problem, but with text wrapping feature is just… odd in that way.
February 6, 2020 at 8:32 pm #38587I am enjoying these lessons and exercises. Your explanations and demonstrations are informative and easy to follow.
Outside of my usual challenge with choosing a picture, papers, and elements, I didn’t have problems working on this one other than paying more attention to the ever-smaller details.
I look forward to working on Module 5. From there, I will be considering joining The Lab.
UPDATE: In looking over the layout this afternoon, I forgot to add the shadows to the brads. Details.
February 10, 2020 at 4:49 pm #38754I got sidetracked with other stuff so I worked on this project in stages – a good thing. There were several a few tricks you showed that helped me recover from my missteps. One was to change the opacity to determine an area for selection to match what is underneath.
I’m not yet comfortable with the shadowing on the ribbon. That will come with practice. It took several tries but I began to see the difference and understand the importance of the detail.
Thanks for a great course. I’m looking forward to working in The Lab.
February 10, 2020 at 7:46 pm #38760Hi Cassel,
I put the file where you said and I found it easy. I put them in front of a old home and SO now I can put shapes insorry couldn’t figure it out without your help thanks Wished there was plants in them. ty
I had a tube in my 2020 and i put a bike and some flowers in the pots you gave me 🙂
February 25, 2020 at 1:18 am #39695Hi Awesome Teacher 🙂
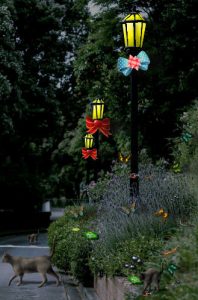
I had so much fun lighting up the path for all the creatures 🙂 lol it was fun did I do okay omg took me a couple hrs itsnever easy like you do, but I am happy with it. Coudlnt turn the lights on forever then moved the layers around and bout
fell out my chair I was so happy lol luv Diamond to ty.
February 26, 2020 at 2:54 pm #39754Cassel
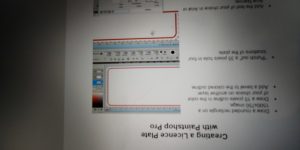
Ima sending this by my phone. But I have free time and trying to do offline creating a licence plate I got a few directions good but what how do I draw a red line it’s not going on like yours mines all wacky 15 pixels. See
February 26, 2020 at 2:55 pm #39755Cassel did you see I turned the lights on?
-
AuthorPosts
- The forum ‘Basic Scrap Course’ is closed to new topics and replies.


