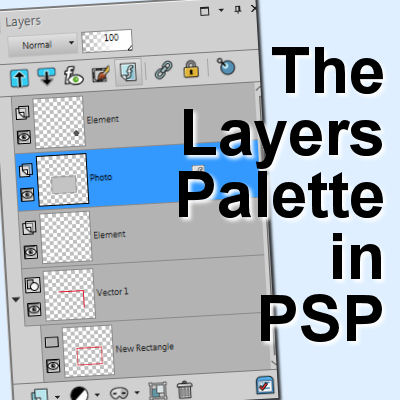

We all know the importance of layers in working on projects in PaintShop Pro. They are very important and can be manipulated in various ways to yield different results and effects. The Layers Palette includes a large number of icons, each of them giving you access to different functions to create a masterpiece. Let's have a look at all those icons and explain their function.
The layers
Obviously, the Layers Palette will display all the layers for your particular project, one on top of each other. The content of the bottom layer displaying "below" the top layers. Your Layers Palette could have a single layer, but can also have as many as dozens, or even a hundred layers, each one displaying separately.
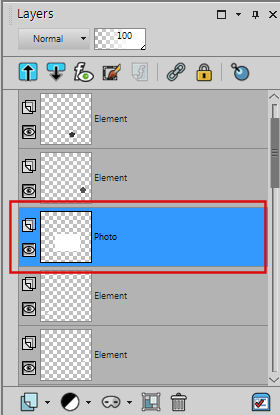
You will also notice that one layer is of a different color (depending on the color scheme you are using on your PaintShop Pro). This means that this layer is ACTIVE, and the active layer is the one that can be modified. It is like determining which sheet of paper you can modify at that point. Typically, you will only have one layer active at the time, but you can also activate more than one, holding the Ctrl key while clicking on several layers.
Layer type
On the left of each layer, you will see an icon to indicate the type of layer you have.
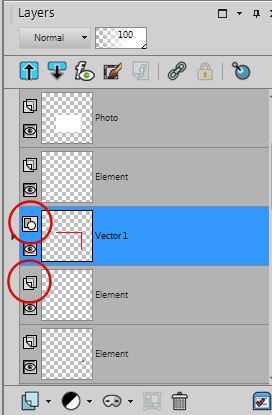
The possible types of layers include Rasters, Vectors, Masks, Background, Adjustment. You can read more about the various types of layers available in PaintShop Pro in this article.
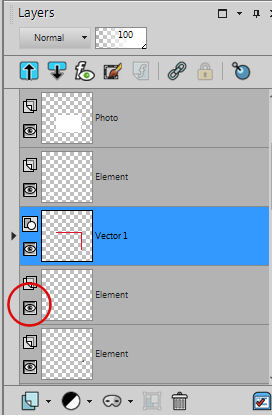
Hiding and unhiding
Another icon available for each layer is the Hide/Unhide (in the shape of an eye). This allows you to choose which content to display on your project. Sometimes, you might want to have a duplicate of a layer to keep "just in case", but you don't want it displayed, or other times, you might hesitate between two or more layers to display so you can alternately hide and unhide the layers to see the result and choose which one you prefer.
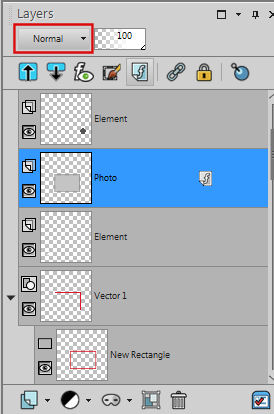
Blend mode
On the very top of the Layers Palette, you will see a drop-down list that displays "Normal" by default. Pulling down this list offers you an array of options to apply a specific effect to the active layer. There is no time to explain the individual effects of each blend mode, but you can now know that is where it is, when a tutorial asks to change the Blend mode to Multiply, or Overlay, or Hard Light, etc.
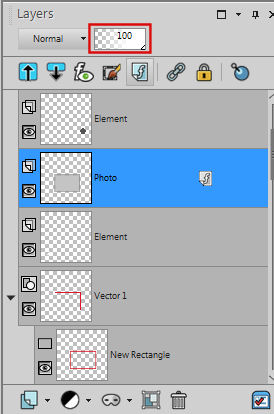
Opacity
Since each layer has content that is independent of the others, you can not only apply effects to them separately but you can adjust the opacity of the layer allowing you to have a faint element or an opaque one. Use the slider from 0 to 100 to adjust that opacity level.
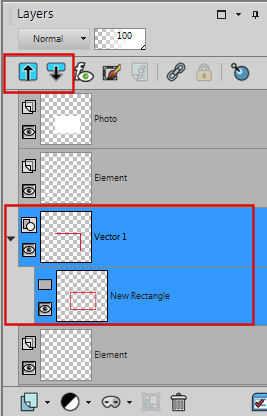
Collapse and Expand
Some layers will be grouped and include multiple sub-layers. Sometimes, the user might want to have them all collapsed so more primary layers will be visible, while at other times, they want to expand them to see all the content without having to click on the tiny arrow beside each group of layers. The two new icons have been recently been added to the Layers Palette, to expand or collapse those groups of layers in a single click.
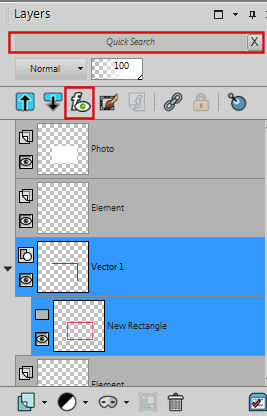
Search function
This is a function that was recently added and lets you search throughout all the layers you have, for one that would have a particular name. If you have renamed your layers and have to browse through dozens of them, using the search function might be a great time-saver. Clicking this icon will toggle the display of that search box.
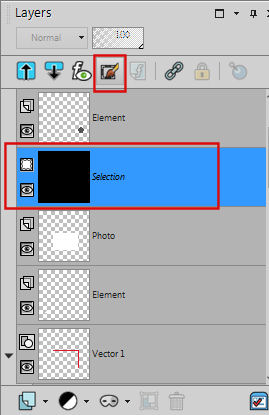
Edit Selection
This icon will convert a selection into a "temporary layer" or create a temporary layer that can be used to add a selection. If there is already a selection on the project, that icon will turn that selection into a reddish area that can be manipulated, distorted, added to, etc. as if it were an element in itself. A great way to use this function is illustrated in this article.
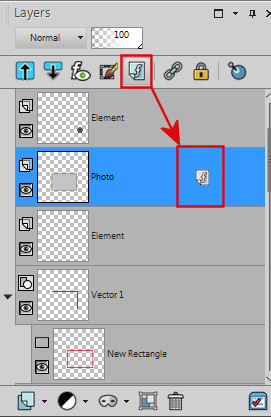
Layer Effects
Some effects can be applied, called Layer Styles, and if one layer has such a feature, that icon will make that effect visible or invisible. It is a bit like the Hide/Unhide function for the whole layer, but it will only apply to the Layer Style of that particular layer. Whether a layer has such effect or not, you will see the same icon ON the layer itself, and if the active layer does not have any effect, the top icon will be greyed out.
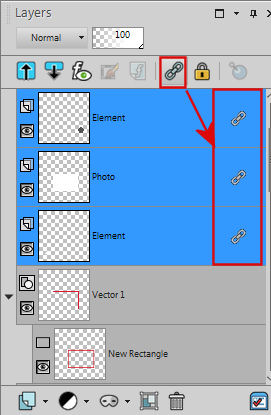
Linking
In order to "attach" layers together, we can use the Link icon. By activating several layers, the user can then click on the Link icon and all those layers (whether it is 2 layers or 20 layers) will be attached. This allows the user to move all those layers together and keep them perfectly aligned.
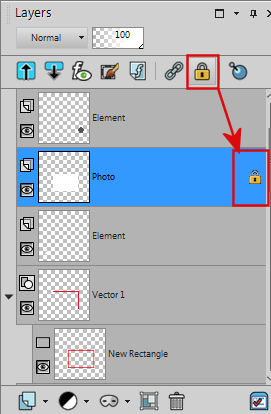
Lock transparency
This next feature allows the user to paint over any non-transparent pixel in the color of your choice while maintaining the level of transparency of the original pixel. Click on the icon to lock the transparency, paint where you want, then make sure you click the icon again to UNlock that transparency.
Layer Styles
One of the effects mentioned earlier is the Layers Styles. By clicking on that icon, you will raise the Layers dialogue window that includes a layer Styles tab you can use to apply that effect. You will then see the icon appear on the layer itself to indicate that an effect has been applied and you can hide it with the Hide/Unhide icon seen before.
New Layer
This icon at the bottom of the Layers Palette allows you to add a new layer of any type (Raster, Vector, Mask, Adjustment, etc.). By clicking on the icon, it will raise the drop-down (which will show up if the Layers palette is at the very bottom of the workspace) where you can choose the type of layer you want to add.
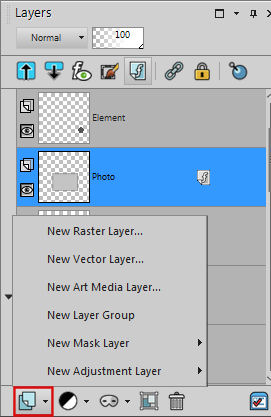
If you want to save one click, you can use one of the next three icons to choose which type of layer you want to add, whether it is an Adjustment layer, a Vector layer or a Group layer.
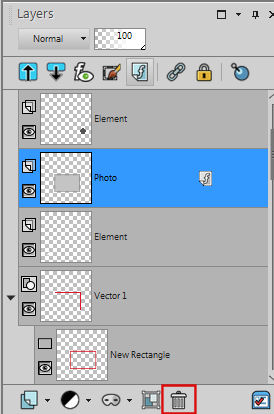
Delete
This might be obvious, but as a way to manage all those layers you created, you might need to remove some because they are no longer useful to your project. Of course, you could hide those layers but sometimes, you know they are not going to be used, and they take up space in the Layers Palette, space you could use more efficiently without extra hidden layers. Click on the icon and it will remove the active layer completely. If you have more than one layer activated, it will delete each of them!
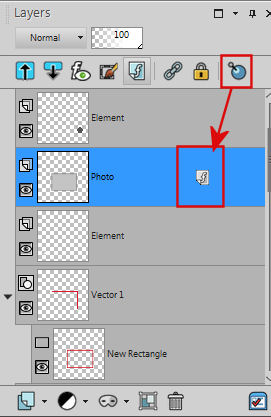
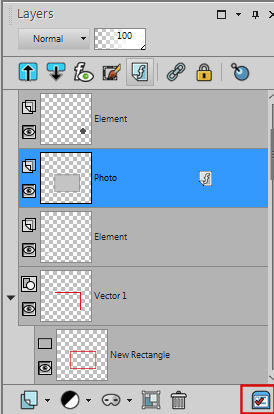
General Preferences
Although this last icon has nothing to do specifically with the layers themselves, it allows you to access the General Program Preferences where you can modify various settings for your Layers Palette. We will have a look at it in a future blog post for you.
With all those functions grouped in a single palette, you have a complete toolbox at your fingertip. The options are endless and there are more details that could be illustrated for each of them, which is way outside the scope of this overview of the anatomy of the Layers Palette. At least, you now know where each common function is located, and what they are called.
Do you want to practice manipulating layers themselves in PaintShop Pro? You can do so with the SANDWICH exercise available HERE.


1 thought on “The Layers Palette in PaintShop Pro”
thank you for the very useful tips, i appreciate it